Showing posts with label Valentine. Show all posts

Friday, February 14, 2014

Red Velvet Valentine


So I sent my daughter off to school today with a backpack stuffed with Valentines and her hands full of a Perry the Platypus Box that she had made herself out of a shoe box and some construction paper.  And I was thinking...why should the kids have all the fun?

I decided that my Mom friends needed to have a little fun on Valentine's day too.  Most moms will agree that lunch time at home with the little kiddos just isn't that great.  You get a little tired of PBJ and mac and cheese.  Know what I mean?  I knew just the thing to bring a little smile this Valentine's Day.  Dessert.  Nothing major.  Something light.  Something just for them that they could hide in the pantry and eat.  All alone.  You know...just something to bring a little pizzazz to their hotdogs and chips. 

A Red Velvet Valentine.

Here's the scoop:

Whip up a batch of red velvet cupcakes.  While those are baking and cooling you need to do a couple more things.  First up...make some frosting.  I wanted mine to be light and fluffy not super sweet.  I mixed a package of cream cheese with a cup and a half of powdered sugar.  Mix well.  Fold in a container of Cool Whip.  Then spoon it into a frosting bag with a large star tip.  Place in the refrigerator until you are ready to use.  Now move onto the strawberries.  Rinse them well and give them a rough chop.  That's it.  You're ready to assemble your little jars of heaven.

Cut your cupcake in half.  Place the bottom half in a small half pint mason jar.  Swirl some frosting on top.  Spoon some strawberries on top of that.  Add another smaller swirl of frosting.  Place the rest of the cupcake into the jar.  Add one more swirl of frosting and you are almost done.  At this point you could dress it up with some sprinkles.  But if you really want to be the hero...add a chocolate covered strawberry.

We mustn't forget the presentation.  Valentine's Day is all about the presentation.  The sky is the limit here.  I didn't necessarily need to put a lid on my jars.  But they would be super cute with a red or white or pink topper of some kind.  I decided to just wrap some red baker's twine around the jar a few times and attach a spoon.  I figured, who wants to mess with a lid when they can just dig right in.  Right?

There you have it.  A little jar full of love.  For your Mommy friends. 
 

Valentine Soldier


If you've spent much time poking around this blog, then you know that I LOVE Valentine's Day!  It's my favorite.  Just click on the "Valentine" label in the right sidebar and you'll start to get an idea.  I couldn't let this week pass by without sharing a few of my latest Valentine creations with you. 

You can easily make a whole army of these traditional English soldiers in no time flat.  You will need some full sized Lifesaver rolls.  Mine measured 3.5 inches long.  You will also need a large black pompom.  Print out the soldier's uniform here.  Cut it out and wrap it around the lifesaver roll.  You will want to secure it with glue or tape.  Then glue the pompom on top for his hat.

And just like that...you have a super cute valentine to give to all of your friends.
I attached mine to this here little card.  If you want it to be really glossy and crisp, you could print it out as a photo like I did.  Or you could print it out on cardstock.  There are just so many options!  I  mounted mine on red cardstock.  Punched a couple of holes and tied my little soldier onto the card with some baker's twine.

Happy Valentine's Day!

Thursday, February 13, 2014

[Valentine] Peas be Mine


The PEAS are back!! Hip Hip Hooray!  If you missed my first pea post, you'll want to click here for sure.  I think these little green sixlets are just about the cutest things ever.  And don't they look just like peas??


This is what my seven year old daughter is handing out to her classmates this year.  There is a bit of irony going on here.  My daughter hates peas.  But when she discovered they were chocolate.  She was totally on board.  And really, nothing says first grade more than a knock knock joke!  It's all about the jokes here people!  I am loving the fact that it's not too much candy.  Just a little taste and that's enough.  Know what I mean?


I had some cute little plastic pillow boxes that were screaming to be used for this project.  You could just as easily put the peas in a tiny little bag.  Just attach the peas to the card with some sticky tape or a ribbon or BOTH.  And send these off to school.  Done.

Want to print some for yourself?  Click here.

*****
 I bought my green sixlets at Hobby Lobby with a coupon and it only came to like three bucks.  AND  we only used about half the bag.  Happy happy.

Thursday, January 16, 2014

[Valentine] A Classic Combination


Isn't about time we did a little doorbell ditchin?  Valentine style?  I thought so too.  I found these aluminum pans with cardboard lids at WalMart.  They weren't much more than a dollar for three pans.  They measure about eight inches by six inches.  These are the perfect vehicle for ditchin' some homemade treats.


I went ahead and designed a fun Valentine lid to put on top of the pans.  The cool thing is...you have so many treat options.  Just think of something that combines classic flavors.

Cookies are at the top of my list.  Chocolate chip.  Sugar cookies with buttercream  frosting and sprinkles.  Homemade Oreos.  Snickerdoodles.  Peanut butter dipped in chocolate.  Mmmm.

Or if cookies aren't your thing, you could go with Sweetheart Popcorn.  Or Valentine Chex Mix.  Or Pink Party Mix.  All solid choices.

Bake up those delicious treats and package them into your pan.  Print out the box lid onto heavy card stock.  Crimp down the foil edges and you are ready for business.

I suppose if you weren't in a ninja doorbell ditchin' kind of mood...you could just hand deliver them with a smile.  That would be fun too.

For an alternate box lid...click here.  Just a friendly warning.  These may be ink intensive.  You might want to print them at your local copy shop.

Thursday, February 14, 2013

[Valentine] Chocolate Dipped Strawberries


It's my neighbor's birthday today.  Happy Birthday!  And it's Valentine's Day.  Happy Valentine's Day!  And her husband just left for boot camp about a week ago.  So I wanted to do something nice for her and a few of my other friends as well.

I love chocolate dipped strawberries.  But I do not love the cost of buying them at the store.  Have you seen how much they are charging???  Really??  Upwards of $2 per berry.  That's just wrong.  Let's make our own shall we?


You will need some berries.  It's still winter in these parts.  The strawberries aren't as perfect as they will be in a couple of months.  But most grocery stores do get a shipment from somewhere for Valentine's day.  I happened to find some on sale at my local grocery store.  You will want to gently wash them.  And then make sure they are dry.  Water and chocolate do not mix well.

Melt some chocolate discs.  I prefer Guittard Milk Chocolate.  But certainly use whatever you like best.  I melt mine in the microwave on 40 percent power for 30 second intervals until the chocolate is smooth and creamy.  Stir between melting intervals.

Dip you strawberries into the chocolate and place them on a parchment or a silpat lined cookie sheet to firm up.  To avoid splotches and stripes, pop your cookie sheet into the freezer for a minute or two after dipping.

Take the strawberries out of the freezer and let them come to room temp. This will prevent the white chocolate stripes from falling off of your berries.


While your strawberries are warming up a bit, melt some white chocolate discs in a small ziploc bag.  Once again, I use 40 percent power for 30 second intervals.  Squish your bag until the chocolate is creamy and there aren't any lumps left.


Now snip the corner off of your bag and drizzle the chocolate over your berries.  Let the chocolate solidify.  I was able to get fourteen chocolate dipped strawberries for about $5.00.  That's around 35 cents per berry.  Now that's more like it!


Now package them up all cute-like and take them to a friend.  They will be so glad that you thought of them today!

Wednesday, February 13, 2013

[Valentine] You Drive Me Crazy


One Valentine.  Multiple applications.


Have a special little boy in your life?  I've got you covered.


Have a lot of little boys in your classroom?  I've got you covered.


Have a grown-up driver in your life?  I've totally got you covered.
Just slip a few car wash vouchers in a bag and you're good to go.  Or a new key chain.  Or anything car related.  Go crazy!

Click on over here for the printable!

Tuesday, February 12, 2013

[Valentine] Round Chunky Post Card


Two days until Valentine's Day?!!  Where did the time go?  I might slam you a little bit in the next day or two with a bunch of posts.  I still have so many valentine ideas that I want to get out to you.

First of all.  Remember these beauties from last year?  Chunky Love Post Cards. 


Well, they were such a hit with the grandparents that I thought we'd do it again.  This year I wanted to try a circular version.  They are just a little bit trickier to cut out.  But we enjoy a bit of a challenge, right?


You will need foam board, photos (I made these a bit bigger, so you will want 5x7 photos), spray adhesive, an exacto knife, a cutting mat, and this printable.

Follow the general directions here.  I found it easiest to cut a rough square around the circular printable.  Then I cut a square piece of foam board about the same size and shape.  Spray the adhesive onto the foam board and attach the printable.  Then make your precision cut around the circular border.  This gives a more professional looking product.  Once you have your foam board/post card cut out, trace around it onto your photo.  Carefully cut out your photo.  Once again spray the adhesive onto the blank side of the foam board.  Attach your photo.  Trim any overhang if necessary with your exacto knife.

Now all you have left to do is personalize your post card.  Write a little note, tell your special someone how much you love them, or have your child draw a simple picture.  I guarantee the recipients of these post cards will love them.

Just a reminder--you will want to have the post master weigh and hand stamp these cards.  Just in case.  I'd hate for them to get lost in the mail.  I've had various rates applied to my post cards depending on the post master that is helping me.  Some will just put a stamp on it.  Others charge a bit more.  Who knows?  It's still very affordable and super adorable!

Tuesday, January 29, 2013

I Believe in Pink

I believe in pink.  I believe that laughing is the best calorie burner.  I believe in kissing, kissing a lot.  I believe in being strong when everything seems to be going wrong.  I believe that happy girls are the prettiest girls.  I believe that tomorrow is another day and I believe in miracles.
Audrey Hepburn 

Today's post is brought to you by the color pink.  Because it's snowing like no tomorrow outside.  What if snow was pink?  That would be fun.  You know.  Just to mix things up a bit.  Maybe just one pink snow day a year.  Right before Valentine's day. 


This party mix is pink and yummy and guaranteed to make you happy.  Which in turn will make you pretty.  Eat some.  You'll like it.


Start with some pretzels.  Heart shaped would be fun.  I had these awesome square waffle-y ones.  Drizzle them with some milk chocolate.


Now pop a bag of microwave popcorn.  Pour it into a bowl.  


While you are at it.  Pour a bag of white chocolate chips into a bowl too.  Not the same bowl.  A different bowl.  A microwave safe bowl.  Microwave it at 40 percent power for thirty second intervals...until it is all melty and wonderful.  Pour it over the popcorn and stir it well.  Dump it out onto a cookie sheet and let the chocolate set.  You can pop it into the freezer for a minute, if you are in a hurry.


Next up...strawberry wafer cookies!  Delish!  I decided to cut mine up into little squares.  Beware--your children and most likely your husband will try to sneak some of the cookies while you aren't looking.  They're little rascals, aren't they?  


Break your popcorn up into little bunches.  Add dump them into a serving bowl or two.  Add your chocolate pretzels.  Sprinkle your wafer squares on top.  Add some nuts.  I chose cashews.  Then I added strawberry malted milk balls and pink and red M&Ms.   Mix it up a bit. 


Now snuggle up under a warm cozy blanket with your honey and watch Breakfast at Tiffany's  just for fun.  She believes in pink.  And so do I.

Saturday, January 26, 2013

[Valentine] Like Cookies and Cream


Valentine's Day is right around the corner!  It's one of my most favorite holidays.  And it's high time that we started getting our craft on.  This is a very simple no nonsense valentine that would be perfect for the classroom.  Easy to make.  Easy to reproduce.  Kid friendly.  Affordable.  Like I said--it's perfect!

Let's start by gathering our supplies.

You will need:
a package or two of Oreo cookies
Small plastic treat bags
Treat bag toppers (see below)
A stapler and staples

1.  Print and assemble your bag toppers.  This should be fairly self-explanatory.  Cut them out.  Fold them.  Have your child address them.**

2.  Put a couple of cookies in the treat bag.  I chose Oreo cookies.  (Double stuffed-duh.  You could go with any sandwich type cookie obviously)

3.  Staple the topper to the top of the bag.


Wha-la!  You are done.

I told you that would be easy.  Now go enjoy a cup of hot cocoa.  Pat yourself on the back.  Because your valentines are all taken care of.

**There is an alternative way to make these toppers.  I know that some of you are averse to all that spendy computer ink.  Don't worry, I've got your back.  The second option that you have is to buy some cute  cardstock at your local craft store.  Cut it into rectangles.  Mine measured about 3.5 inches by 4.5 inches.  Fold those in half.  Your topper should now measure about 1.75 inches by 4.5 inches.  Print out the "white" part of the tag here.  Cut them out and glue them onto your cardstock toppers.  You will have to hand write the greeting on the back.  Sorry.  There are sacrifices that come with saving a few bucks.

I'm linking up with:

Wednesday, January 23, 2013

[Valentine] Love Bug Game


Do you need a little game for a class party?  Or just something fun to do with the kids for family night?  Here is a simple Valentine dice game.  Print out the game cards.  Grab some dice and a pencil.  And channel you inner Picasso.  Ready...set...go!

Friday, January 18, 2013

Valentines Past


Here are a few valentine ideas from past petunia posts.  Just to get your creative juices flowing...

Click on the links below to see the individual posts.

Monday, January 14, 2013

[Valentine] Share the Love Candy Wreath


This is procrastination done right.  That's what this is.  I totally intended to make a candy wreath for Christmas.  I had a bucket of candy waiting in the pantry for me to have a few spare minutes.  But, I got over-run by all of the Christmas madness.  The good news?  Most of my candy was red and/or white.  It totally works for Valentine's day.  Three cheers for procrastination!!

I love this wreath.  It's heart shaped.  It's red.  It's delicious.  It's totally easy to make and is guaranteed to bring a smile to everyone you share it with.

Do you need a valentine for Great Grandma who is in the care center?  This is the perfect wreath to hang on her door.  Visitors can enjoy a little piece of candy while they chat.  Just pluck a piece right off.

Maybe you need a valentine gift for your favorite Kindergarten teacher.  Again, this is the perfect solution.  She can hang it on her classroom door and when she feels the time is right she can share a piece of candy with the children or her co-workers.

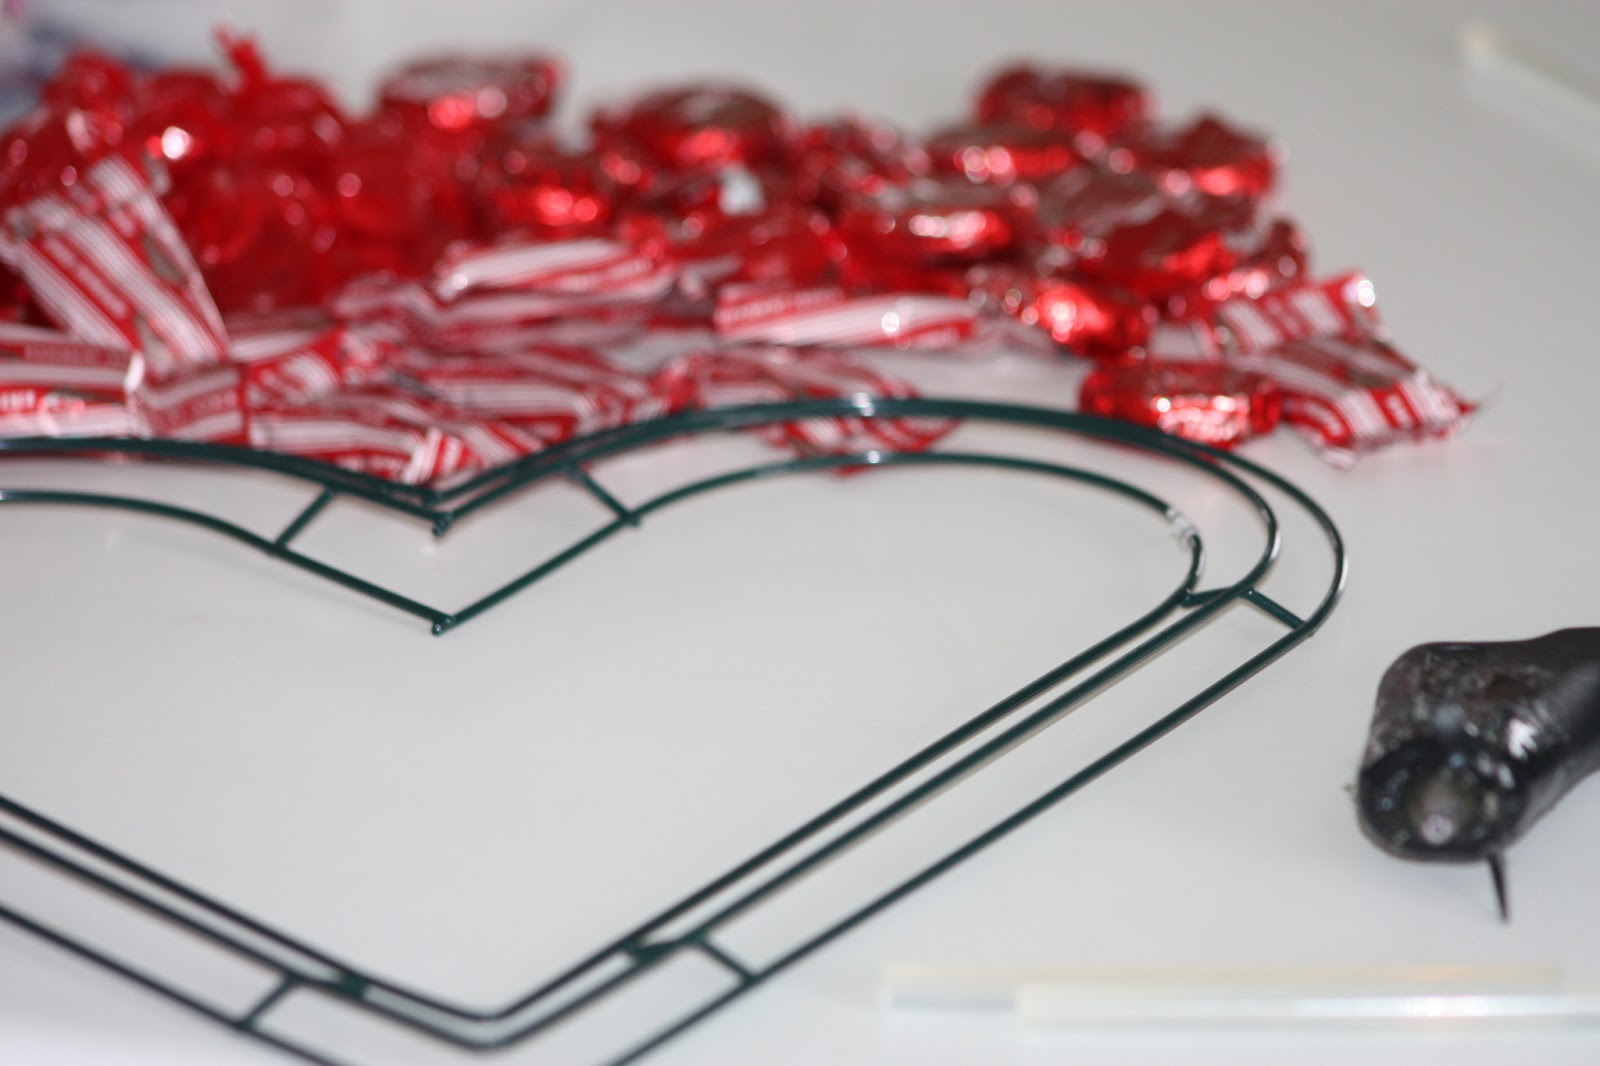
So, let's get busy.  You will need a heart shaped wreath form.  Styrofoam will work.  I happened to have a metal form.  It worked fine too.  You will also need some candy.  And a glue gun.  That's it.


Set out your candy and decide how you would like to arrange it.  Then carefully glue each piece onto the form.  Just keep gluing and layering.


In just a few minutes you will have a beautiful lush candy wreath!

Wrap it up with a bow and hang it in a place of distinction.

There you go.  Now go share the love!

I'm linking up with:

Tuesday, February 14, 2012

[Valentine] Red Velvet Pancakes


I thought I'd share our Valentine's breakfast with you.  Red Velvet Heart Pancakes.  These aren't anything new.  You can find dozens of recipes all over the internet.  But this is my version.  The easiest way to make heart-shaped pancakes is to pour your batter into a squeeze bottle.  Just squeeze out your hearts onto your griddle.  We added whipped cream and sprinkles because it seemed like the right thing to do.  Drizzle with syrup and you're off to a good day!

Happy Valentine's Day!

Monday, February 13, 2012

[Valentine] "Hearty" Chicken Soup


 Get it?  "Hearty".  I crack myself up.

Have you ever made your own pasta?  I remember making it once or twice with my Mom after my brother returned from an extended stay in Italy.  He brought home a pasta maker, and we gave it a go.  Other than that, I don't remember much about it.  I've been wanting to try making my own pasta noodles for some time now.  Today was the day.

The recipe couldn't be easier.  Mix 1 1/2 cups all purpose flour with 2 eggs.  Add a little salt (1/4 tsp) and olive oil (1/2 tsp) if you want to.   My recipe said to mix it in a food processor.  But, I don't have one.  So, I threw the flour and the eggs into my Bosch and pulsed it a few times. 

Then I dumped it out onto my pastry cloth.  (Do you use a pastry cloth?  I LOVE it!)  I kneaded it for a few minutes until it came together nicely in a little ball, like this:


Now cover it and let it rest for about ten minutes.

When you are ready, get out your rolling pin and get to work.  A pasta machine would be nice, but not necessary.  The dough is kind of stiff.  It takes a little muscle.  Just keep working it.  You want it very very thin.  Much thinner than you think.  Cover it with a damp towel and let it rest again if it is giving you too much resistance.

Now let it sit uncovered for about ten minutes to dry.

After you have let it dry, you are ready to cut your noodles.  In honor of the "love" holiday tomorrow, I cut out some cute little hearts.


If you are going to cook them right away, let them dry for about thirty more minutes.  If you are going to store them, let them dry completely.

When you are ready to cook your pasta, bring a large pot of water to boil.  Add salt to the water to increase the boiling point and to flavor your pasta.  Boil your noodles for about 3-5 minutes. Mine were probably thicker than they should have been, so they took a little longer.

*****


I added my cute little heart shaped noodles to homemade chicken soup.  A few days ago we had a roasted chicken for dinner.  There was quite a bit of meat left.  I just cut it into bite-sized chunks and added it to some chicken broth.  I also added carrots, onions, celery, and peas.  You can add whatever vegetables your family likes.  Season it with salt and pepper and whatever else makes you happy.  Don't forget to add your noodles!!  Serve it up with some fresh bread or crackers.


Hearty Chicken Soup--it's delicious!

Friday, February 10, 2012

[Valentine] Chunky Love Post Cards


What exactly should I call these??  Awesome!  That's what I call them.  I had this idea to send some Valentine post cards to Grandma and Grandpa who live far away.  I wanted to make them really "pop" out, if you know what I mean.  Something to truly set them apart from the other letters and bills.  I settled on foam board.  It really worked out well.  The hardest part about this project, is deciding which photos of your little darling you want to use.  You could browse through your files and find an appropriate two or three or ten.  Or you could stage a special Valentine photo shoot just for the occasion.  Either way, it's super fun!  I threw these together in about half an hour. (Not counting photo developing time of course)

This is what you will need to make your own chunky love post cards:

4x6 photos of your little valentine
post card printables (see below)
foam board ( I got mine at Hobby Lobby for a couple of bucks)
spray adhesive
exacto knife
cutting mat
ruler and/or straight edge

 1.  Place your foam board on a cutting mat and cut into "post card" sized boards.


I used an exacto knife.  Just place a ruler or straight edge where you want the cut to be.  Press down firmly on the ruler.  Carefully slide your knife down the ruler edge.  I liked to score mine first and then go back and press harder to make the final cut.


After a bit of trial and error, I decided that it was best to make the foam board just a little larger than the photo.  I cut my foam board 4 1/4 inches by 6 1/4 inches.


2.  Once you have your boards cut, you are ready to adhere the photo.


Paper your spraying surface really well.  I am not kidding--there is a lot of overspray!  (I didn't take a photo of my spraying surface--sorry).  Place your photo picture side down onto your paper.  Spray the adhesive onto the back of your photo according to the directions on the can.  Then carefully place your photo onto one side of the foam board.  You will want to center the photo as best you can.

3.  For the back of the post card, I decided to have the template printed at the photo lab as well.  I thought it would look nice on photo paper.  You could also print it out onto cardstock.  For some reason, my prints came back a little skeewhompus.


The borders around the template weren't even.  This made me slightly crazy.  So, I decided to trim them a bit to make the borders even all the way around.  You may or may not care.  To each his own.  Then repeat the step above to adhere the template to the back of the foam board.

4.  Now, you should be all set!  Write a little love note on the back.  Or draw a cute picture.  And guess what?  Although these are slightly too big to qualify as an actual post card, you can mail them for just the cost of one stamp!  That's awesome all right.  (UPDATE:  Take your cards to the post office and have them hand stamped just to be sure!  We've received some conflicting information on the cost of mailing these cards.)


I have a feeling Grandma and Grandpa are going to LOVE their chunky post cards.  And Grandma, if you are reading this...try to act surprised when you get one in the mail!

*****
If you would like to download the post card template for your chunky love valentines, just click on the appropriate button below.  There is a pink version and a red version.

I'm linking up with: 

Monday, February 6, 2012

Sweetheart Popcorn

Are you a fan of white chocolate popcorn?  My friend Emily gave me all of the ingredients for this super awesome treat for my birthday a little while ago.  We whipped it up for family movie night and everyone loved it!  I thought I would make a valentine version to give away to some friends and neighbors.  It is very fast and easy.

Here is what you will need:


1 bag microwave popcorn
1 bag white chocolate chips
1 cup "heart shaped" pretzels
1 cup valentine jelly beans or candy corn (think pink, white, and red)
1 cup valentine m&ms
1 cup miniature marshmallows (optional)

And this is how you do it:


Pop your popcorn in the microwave according to the package directions.  Remove any unpopped kernels.  Pour into a large bowl.  Add the pretzels, candy, and marshmallows to the bowl.  I didn't have any marshmallows, so I opted out this time.  Pour the white chocolate chips into a microwave safe bowl.  Melt in the microwave on medium power for 30 second increments.  Stir well after each.  Continue until the chocolate is smooth.


 Pour the chocolate over the popcorn mixture and stir well to coat.  Scoop the mixture onto a cookie sheet and allow the chocolate to harden.  You may want to place the cookie sheet in the freezer or the fridge for a few minutes, if you are in a hurry.

Package it up all cute-like and give to your favorite friends and neighbors.  Or sneak off into a corner and eat it all yourself!   We decided to doorbell ditch a few bags just for fun.  Shh.  Don't tell. 

And if you'd like a printable version of this little recipe...just click on the printer icon below!


*****
I'm linking up with: 
Related Posts Plugin for WordPress, Blogger...