Showing posts with label fall. Show all posts

Wednesday, November 14, 2012

[The Gratitude Project] Gatherings

I love getting together with friends and family to celebrate the holidays.  Or just the everyday.  I am so thankful for these times of gathering!


Are you hosting Thanksgiving dinner this year?  Do you plan on having a "kids table"?  I've come up with a fun place mat filled with activities for the kids to do while they wait for the mashed potatoes.  All you need is some crayons.  Color the Thanksgiving characters.  Help the turkey get out of the maze.  Make a list of what you are thankful for.  And spur on some laughter with these Thanksgiving day jokes.


Disclaimer:
These place mats are designed to print out on a legal size paper (14" x 8.5").  The paper used in designing this place mat is from Weeds and Wildflower Designs.  I used some free Thanksgiving Clipart from the web.  To my knowledge there are no copyright or limited use agreements.  I also created the maze at this site.  They have lots of fun puzzles to choose from.  Just plug in your parameters and it spits out a puzzle.  Doesn't get much better than that!

Wednesday, November 7, 2012

[The Gratitude Project] Helping Hands


What started out today as gratitude for the delightful birds in our backyard, turned in to so much more.  I've been wanting to make some bird feed garlands for the trees for a while now.  My daughter was playing with a friend this morning and things started to detereorate.  Her friend had to go home.  My daughter came to me in tears.  So I decided that this morning would be the perfect time to pull out this project.  We had a great time stringing all of these goodies for the birds.  We pulled some string from off the shelf and popped some popcorn.  We also found some dried fruit in the cupboard and some fresh cranberries.  Shell peanuts added that extra bit of bling to our garland. 


I love the birds in our yard.  But I love these little hands more than words can say.


Having a project that we could work on together helped dry the tears and quickly turned them into smiles and laughter.

Wednesday, October 24, 2012

Scarecrow Spree


 Now these are really something to crow about!


Remember this guy?  Let me introduce you to his country cousins...


This could very well be the fastest cutest treat you will ever make.  All you need is four simple supplies.


1.  Scarecrow wrapper (FREE--just click on the link)
2.  Chewy Spree or something similar (I bought mine at our local grocery store for 69 cents)
3.  Glue stick (I consider this to be basically free--just dig a stick out of your craft drawer.)
4.  2" straw or sinamay doll hat (I bought mine at Hobby Lobby.  A package of eight was 99 cents! I was hoping for a natural straw color.  All they had left was red.  But hey, it's a scarecrow--he'll take whatever you got!)

Print and cut out the scarecrow wrappers.  Wrap them around your candy tube and secure in place with the glue stick.  Put a hat on the scarecrow's cute little head and you are done!

I told you.  Fast.  And you get all this cuteness for under a dollar.  These would make great little gifts for friends or teachers.  Need a craft for a Halloween party?  I got you covered!


Now go make a whole corn field of them!

I am linking up with:

(The plaid shirts were made using various papers from Weeds and Wildflowers Design)

Wednesday, October 17, 2012

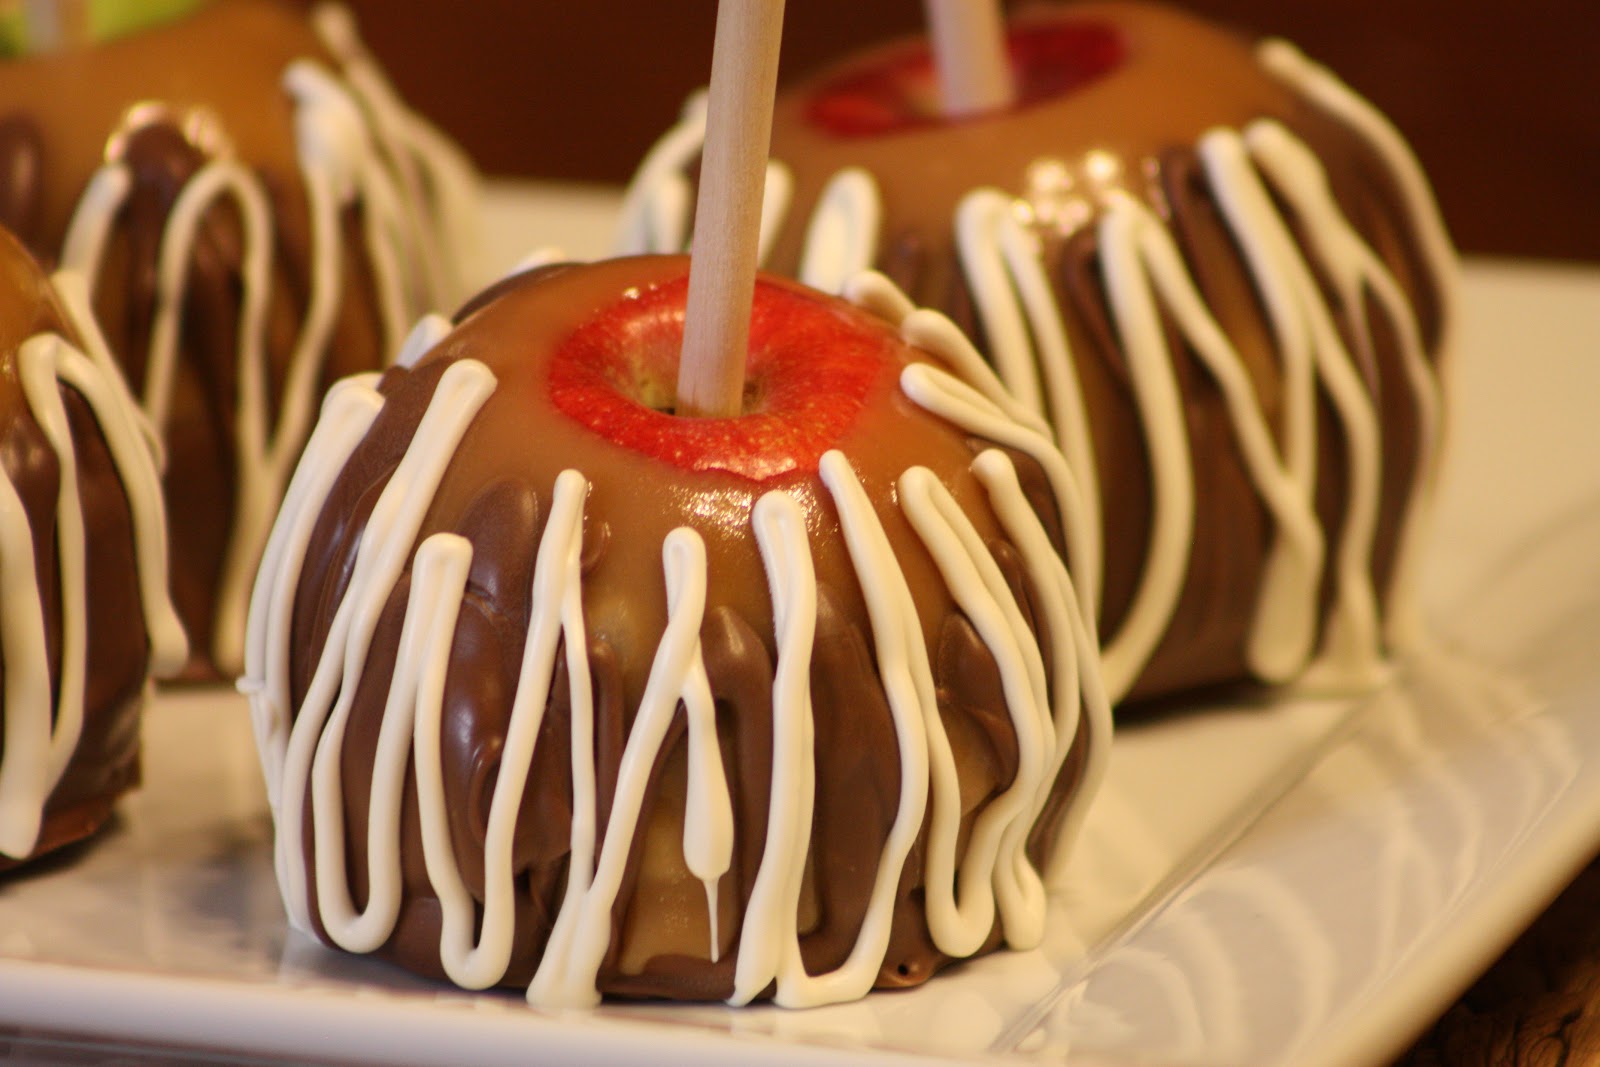
[tips and tricks] Chocolate Caramel Apples


You asked for it...you got it!  Here's a little follow up to this post.


*Choose fresh firm and crisp apples.  Some like to use really large apples.  I don't mind the smaller apples.  There's a greater caramel to apple ratio that way!  I used some Jonathon apples from a local fruit stand that were marked down because of their smaller size.  I also used some golden delicious apples that we had left-over from making cider.

*Wash and dry your apples.  Remove the stems.


*I learned this little trick from somewhere...turn your apples upside down and insert your stick through the bottom.  The bottom of the apple holds the stick more firmly.  Weird, I know.  But it works.

*I like to use homemade caramel.  I could give you the recipe.  But I would have to kill you.  Sorry.  Use your favorite recipe.  It will turn out just fine.  Or, melt down your favorite caramel.  My recipe makes about two cups of melted caramel.

*Pour your melted caramel into bowl.  It needs to be a bit wider and deeper than the size of your apple.  I used a quart size glass bowl that worked pretty well.  Remember that when you push the apple down into the caramel, the level of the caramel will rise, so plan accordingly.


*Submerse your apple on a stick into the delicious caramel.  Let it drip for a minute or two to remove the excess.  I used a knife to scrape the extra caramel off of the bottom (which in this case is actually the top?) of the apple.  Place your caramel apple on a silpat or a greased cookie sheet.  The caramel will still continue to puddle at the bottom.  Delicious!


*Allow your caramel to cool and harden on the apple.


*Once your caramel has firmed up, you are ready to dip your apple into the chocolate.  You have lots of options here.  I melted some milk chocolate discs on 40% power for 40 seconds in microwave.  Repeat until the chocolate is smooth and melted, stirring between each warming interval.  Dip your caramel apple into the chocolate or drizzle it on with a spoon.  Set your chocolate dipped apple onto a piece of parchment and allow the chocolate to harden.  You may want to pop it into the refrigerator or freezer for a few minutes.


*Embellish your delicious apples with white chocolate drizzle or nuts or candies.  I melted some white chocolate discs in the microwave (same procedure as above) in a small sandwich bag.  Once your chocolate is melted, snip the corner off of your bag and drizzle over the apples.  Again, allow your chocolate to set.


*Package your apple pops all cute-like, or just sink your teeth right in!

Thursday, October 11, 2012

Chocolate Caramel Apples--A Photo Documentary

We are on fall break.  And that can only mean one thing...chocolate caramel apples baby! 


Saturday, September 22, 2012

Homecoming Corsages


Tonight is the big Homecoming dance at our local high school.  I attempted to make some corsages for the occasion.  I'm getting a little better.  Practice makes perfect, right?  My son's date is wearing a royal blue gown with gold jewelry.  So we went with white roses and white carnations and gold accents.

 
My son's  friend asked me to make a corsage for him too.  His date is also wearing a blue gown, but with silver accents.  You can barely see the silver ribbon in this picture (on the right side).  I think it looks very elegant.  And the flowers smell divine!

I bought a bouquet of two dozen roses at Costco and the carnations at WalMart.  I made two corsages and a boutonniere.  And I have a gorgeous bouquet of the leftover flowers on my dining room table.  By the time all was said and done, it only cost me ten dollars.  Not too bad.

Wednesday, September 19, 2012

Halloween Treat Boxes


 When we were in China a few years ago, we saw some super tiny individual Skittle and M&M packets just like this.  They couldn't have been more than an inch high.  They were so cute that I just had to buy some!  I've been wanting to recreate a version of them ever since.  Halloween seemed the perfect occasion.  These would make the cutest party favors or inexpensive gifts!  But who needs a party?  Just tuck one into a lunch sack or a pocket and -POOF--instant celebration.

Supplies that you will need:

printable
paper
scissors or paper cutter
double-sided  tape
small candies

Step One:
Purchase and print out the files from my shop.  Just use plain old run of the mill printer paper.  You do not want to use card stock.  It will be too stiff.

Step Two:
Cut out the squares along the black lines.


Step Three:
You will notice that the faces of the characters are slightly off center.  There is a reason for that.  Place a strip of tape along the front left side of the printed square (as shown below).  Fold the strip over about a half inch or the width of the tape strip.


Step Four:
Turn your character square face down, with the folded edge on the right.  Place a strip of tape from the middle of the bottom edge to the lower right corner.


Peel off the protective paper from this bottom strip and stick down the folded flap.  You will also need to put a small strip of tape centered on the top edge.  Do not remove the protective paper on this strip!  You will need to wait to remove this until the very last step.  Your square should look something like this:


Step Five:
Remove the protective tape from the side of the square (the one that is folded over).  Bring the opposite edge of the paper over (this is the edge that doesn't have any tape on it)  and stick it to the tape strip.  This will in essence form a cylinder.  At the same time, seal the bottom of your container with the tape that is already exposed.  You want a flat sealed edge.  It should look something like this:


Step Six:
Fill your favor box with cute little treats.


 M&Ms, mini Reese's pieces, Skittles, and candy corn work best.  Anything small will do.


Once your boxes are filled you are ready to seal the open end.

Step Seven:
Seal the open end by removing the protective paper and pressing the edges of the paper together.  You want this seal to be perpendicular or opposite in direction to the bottom one.  In other words, the faces of your characters should be centered.  When you look at it head-on, the front surface should be triangular.


Step Eight:
If you have a paper crimper you could crimp the sealed ends of the tube.  I have a paper crimper.  Somewhere.  As you can see, this step is optional.  If you can find your crimper--go ahead and crimp away.  If not--all is well. 
Aren't they so much fun?  I think the mummy is my favorite.  Or maybe Frank.  It's so hard to choose.  To open your cute little Halloween favor, just gently tear off the top!  And enjoy!

Tuesday, September 18, 2012

Tricks or treats? Definitely Treats!

Are you getting in the mood for fall yet?  I am loving the cooler nights and the changing leaves.  Over the past week or so, I have been canning peaches, tomatoes, and salsa.  I have also put up some freezer corn and made my first batch of apple cider.  Harvest time is my favorite!  I love the tastes and smells and sights of autumn.  I have been wanting to bake like crazy, but I am trying to show some restraint.  In lieu of baking, I have been working hard on a Halloween printable for you!  It should be ready by tomorrow.  Until then, I thought I would re-post these goodies just in case you missed them last year.  To see the original post, click here.


Tuesday, November 15, 2011

Pumpkin Bread


Do you have a favorite recipe book?

I love a good cookbook.  I've said it before and I will say it again.  One of my most favorite things is to curl up on the couch with a good cookbook.  I love everything about them.  I have more cookbooks than I should, but I could never have enough.   

The first Christmas after I was married (a million years ago), I asked my honey for a cookbook.  To this day, it is probably my favorite and most used.  It long ago lost its cover.  I couldn't bear parting with it, so I took it apart and put each page in a page protector and then put them all in a giant binder.  Now my binder is starting to fall apart.  I have written notes and marked the recipes that I love the most over the years. 

This recipe originated from that book.  I have altered it slightly to accomodate the fresh pumpkin puree. 

Pumpkin bread--it's so delicious.  It just screams fall.  I really like the texture and flavor that the whole wheat flour gives to this recipe.  Give it a try.  Let me know how it goes.

 (adapted from a recipe in The Complete Book of Baking by Pillsbury)

Monday, November 14, 2011

Pumpkin Business


We carved our Halloween jack-o-lanterns quite late this year--like on Halloween day!  I know.  Life was just moving a little bit fast around here and that was the soonest we could get to it.  Anyway, I sent the kids out to the porch to get their pumpkins and they got busy creating all kinds of adorable.  Later that afternoon, as we were setting the finished lanterns out to shine, I noticed one lone pumpkin that they neglected to bring in.  Poor sad pumpkin.

It has been sitting on my counter ever since.  I look at it everyday and wonder what I am going to do with it.  Well today was the day.  I had a date with a pumpkin.  I decided that I would try making my own puree.  This is not a pie pumpkin--it's just your run of the mill carving pumpkin.  But, I figured that I didn't have much to lose.  And I didn't want this little guy to go to waste.

I have tasted pumpkin pies in the past made with real pumpkin and I have NOT liked them.  I am a big fan of Libby's.  But, nothing ventured, nothing gained.

Let's do this.

I cut the top off of my pumpkin and sliced it down the middle.  Then I proceeded to slice it into manageable wedges.  Next I scraped off all of the seeds and stringy parts.  I cut my wedges in half and put them in a big stock pot.  Then I added a couple of inches of water and let them simmer until they were fork-tender.  I drained off the liquid and let them cool.


Once the wedges were cooled  completely,  I removed the skins with a paring knife.  Then I put the pulp into a blender and blended away.  I really went to town on this part.  The fresh pumpkin pies that I have tried in the past have been lumpy and stringy.  I think that is what turned me off.  So, I probably went overboard on the blending.  But, much to my surprise...it turned out beautifully!


I would say that this pumpkin was just a medium sized little guy.  Not small, but definitely not big.  He yielded about twelve cups of puree.  Not too bad.  Much cheaper than buying Libby's.  (worth it if it tastes good).  I have read that puree made from carving pumpkins contains much more water than pie pumpkins.  So, I dumped my puree into a fine mesh sieve and let it drain for quite a while.  I probably got close to four cups of water off of it by the time I was done.

I think the whole process actually worked.  And it really wasn't that labor intensive.  The hardest part was definitely cutting it down to a workable size.  Those pumpkins are pretty tough dudes!

I guess the proof is in the pudding...or pie...or bread.


(The coloring on this picture is a little off. The bread is actually a bit oranger than it shows--delicious!)

Tune in tomorrow for the recipe!

Wednesday, November 2, 2011

Hot Buttered Cider


I spent most of my growing-up years in Michigan.  If you've ever met a Michigander, then you know that they are passionate about Fall in general and apple cider in particular.  It's in our blood.  We can't help it.  I haven't lived in Michigan for almost twenty-five years.  But, when autumn rolls around I get a severe case of homesickness.  Every year when the leaves started to change, my family and friends would head out to the cider mill.  And we would go back.  Again.  And again.  There is nothing like a cup of freshly pressed cider and piping hot donuts.  I had the worst case of cider withdrawal this year.  Seriously, I almost broke out in hives.  It was that bad.  I was bemoaning my lack of cider to my brother one day.  Next thing I know, the UPS man was delivering a huge box to my front door.  Wanna see what was in it?


Not ringing a bell yet?  How about this...


This little beauty is a home-sized apple press.  And it is awesome!  It turns out my brother was having cider withdrawals too.  He is letting me house this baby for a little while.  I have three apple trees in my yard and it was a bumper crop kind of year.  And this little press got here just in the nick of time to make some cider.  It's so delicious.  I love it ice cold (slushy in fact) and I love it piping hot.  Speaking of hot...

Hot buttered cider.  Mmm.  I think today, this would be labeled "butterbeer" of Hogwart's fame.  I found this recipe in an old stapled stack of mimeographed recipes that my mom gave to me.  I'm sure that these recipes could be found thirty years ago circulating around the homes of all the ladies in our church congregation.  With that kind of history--you know it's got to be good!  And it is.


So, in honor of Michigan apples and church ladies everywhere...
let me introduce Hot Buttered Cider!


 Promise me that you will not use apple juice.  Promise!  You absolutely must use apple cider.  Preferably from Michigan.  But in a pinch, you can use your own freshly pressed cider from apples in your backyard.  Or if it's a real emergency, use some cider purchased at your local grocery store.  If it's translucent..it is NOT cider.  Splurge and buy the real deal.  You'll be glad that you did.

I swear it's the nectar of the gods.


Sunday, October 30, 2011

Pumpkin Bundt Cake


 One of my dear friends gave me a recipe and the ingredients for the most delicious chocolate bundt cake a couple of years ago for my birthday.  I think we have made that cake several times a month ever since.  Honestly it's that good.  I decided to try a spin-off pumpkin version today.  It's not chocolate.  But it is good.  Very very good.


I mixed things up a little further, because I needed some little treats to take to a couple of my neighbors.  When I moved out of my parents house (long long ago) and shipped off to college, my Mom gave me her specialty cast iron bundt cake pan (I'm not sure why-I think she just wanted it to go to a good home.).  It looks kind of like a cupcake pan, but instead of cupcakes, it houses six small bundt cakes.  They are bigger than the ones you see today.  This pan is heavy duty.  I'd kind of forgotton about it.  Until I cleaned out my cupboard last week.  So, instead of making one large bundt cake, I made six small bundt cakes.  I still had quite a bit of batter left, so I made 12 mini bundt cakes too.  After all that, I still had batter left, so I scooped the rest of the batter into a regular cupcake pan.  I got 11 more cupcakes.

I dusted the small bundt cakes with powdered sugar.  I decided to fill the mini versions with whipped cream.  Think Hostess cupcake-pumpkin version.  I think it would also be delicious with a drizzle of icing.


Apparently this is a very versatile batter.

Just before I headed out to visit my friends, I carefully lowered three mini cakes in a jar and tied it with a bow.  They are a little hard to see in this picture, but you get the idea.  I hope they liked them!


Related Posts Plugin for WordPress, Blogger...