Showing posts with label desserts. Show all posts

Friday, February 14, 2014

Red Velvet Valentine


So I sent my daughter off to school today with a backpack stuffed with Valentines and her hands full of a Perry the Platypus Box that she had made herself out of a shoe box and some construction paper.  And I was thinking...why should the kids have all the fun?

I decided that my Mom friends needed to have a little fun on Valentine's day too.  Most moms will agree that lunch time at home with the little kiddos just isn't that great.  You get a little tired of PBJ and mac and cheese.  Know what I mean?  I knew just the thing to bring a little smile this Valentine's Day.  Dessert.  Nothing major.  Something light.  Something just for them that they could hide in the pantry and eat.  All alone.  You know...just something to bring a little pizzazz to their hotdogs and chips. 

A Red Velvet Valentine.

Here's the scoop:

Whip up a batch of red velvet cupcakes.  While those are baking and cooling you need to do a couple more things.  First up...make some frosting.  I wanted mine to be light and fluffy not super sweet.  I mixed a package of cream cheese with a cup and a half of powdered sugar.  Mix well.  Fold in a container of Cool Whip.  Then spoon it into a frosting bag with a large star tip.  Place in the refrigerator until you are ready to use.  Now move onto the strawberries.  Rinse them well and give them a rough chop.  That's it.  You're ready to assemble your little jars of heaven.

Cut your cupcake in half.  Place the bottom half in a small half pint mason jar.  Swirl some frosting on top.  Spoon some strawberries on top of that.  Add another smaller swirl of frosting.  Place the rest of the cupcake into the jar.  Add one more swirl of frosting and you are almost done.  At this point you could dress it up with some sprinkles.  But if you really want to be the hero...add a chocolate covered strawberry.

We mustn't forget the presentation.  Valentine's Day is all about the presentation.  The sky is the limit here.  I didn't necessarily need to put a lid on my jars.  But they would be super cute with a red or white or pink topper of some kind.  I decided to just wrap some red baker's twine around the jar a few times and attach a spoon.  I figured, who wants to mess with a lid when they can just dig right in.  Right?

There you have it.  A little jar full of love.  For your Mommy friends. 
 

Thursday, April 25, 2013

[Birthday] Evolution of a Cupcake


I had plans to meet some dear old friends for lunch today.  Friends that I haven't seen for years.  I found out this morning as I was getting caught up on a little FB, that it was my friend Ruth's birthday.  And how awesome that I would get to go to lunch with her on her birthday?  And how sneaky of her not to tell us!  I thought it would be fun to make her a birthday cupcake.  So I set to work.  First I made a batch of chocolate cupcakes. I could swear that I bought a big package of plain white cupcake papers just a couple of weeks ago.  But...apparently not.  So, I had to settle for pink princess liners.  Not ideal--but we'll make it work.  Then I decided that I wanted to do a German chocolate variation on a theme.  I quickly made some traditional caramel coconut frosting and a batch of chocolate butter-cream frosting, while the cupcakes baked and cooled.

So, this is how you turn a plain jane chocolate cupcake in a pink princess paper into a fantastic German Chocolate Cupcake Birthday Surprise!


Step One:
Cut a "cone" of cake out of the center of your cupcake.  Remove the cone.


Step Two:
Fill the void with a tablespoon of German chocolate caramel coconut frosting.


Step Three:
Replace the cake cone.  Don't worry about smashing it flat.  Just set it on top.  It actually helps to give your cupcake some height.


Step Four:
Pipe some chocolate butter-cream frosting around the perimeter of your caramel crater.  Continue piping the chocolate butter-cream in a circular motion working from the outside in.  This will give your cupcake a fun swirl on the top.


Step Five:
Hide your pink princess cupcake liner inside of a white nut cup.  I fancied mine up a bit with some washi tape.

And there you have it!


If you want to take it even a step farther, add a washi tape "flag" and package your cupcake in a cupcake box.  Don't forget the ribbon.  You know how I feel about ribbons!

Happy Birthday Friend!  Thanks for sharing a few minutes of your special day with me!


Thursday, April 18, 2013

[Party] Where in the World?


Yesterday was kind of a big deal for our family.  My 18 year old son turned in his application to serve an LDS mission a few weeks ago.  As a missionary he would be assigned to serve for two years.  Missionaries are sent all over the world and speak almost every language imaginable.  We received word from the post office that his assignment had arrived yesterday morning.  We were so excited and anxious to see where he would be going!  He wanted to wait until evening to open his letter so that many of his friends and family could be there with him.  Twelve hours is a long time to wait.  Truth be told, I've been waiting for this day for over eighteen years!!  I could hardly stand it.  We decided to make a party of the whole thing.  It gave me something to keep me busy all day.

So, I set to work.  We went with a map theme.  It seemed like the logical choice since that was the big question of the evening...where in the world would he be going??


You can't have a party without garland, right?  I love me some garland.  I knew that I wanted to make it out of maps.  But where was I going to find enough maps for cheap to finish the job.  Then it came to me...a stoke of genius really.  We had an old road atlas collecting dust on the shelf.  I set to work removing the pages and cutting them into triangles.  It was quick work.  Before I finished watching an episode of Downton Abbey, I had a huge pile of triangles.  Then I punched them and strung them on some yarn and hung them all over our front room.


I hadn't even begun to exhaust my map source.  So, I made little cupcake flags.  I just cut strips and glued them to a toothpick.  My strips were about three inches long and one inch wide.  Fold them around a toothpick and glue in place.  Cut a notch in the end if you want.  We made these cute little jars of yumminess to serve for dessert.  I did a strawberry shortcake version and a chocolate cake version.  They were fast and I could make them ahead of time.  I didn't want to have to be tied to the kitchen, once our guests started arriving.  They were delicious! 


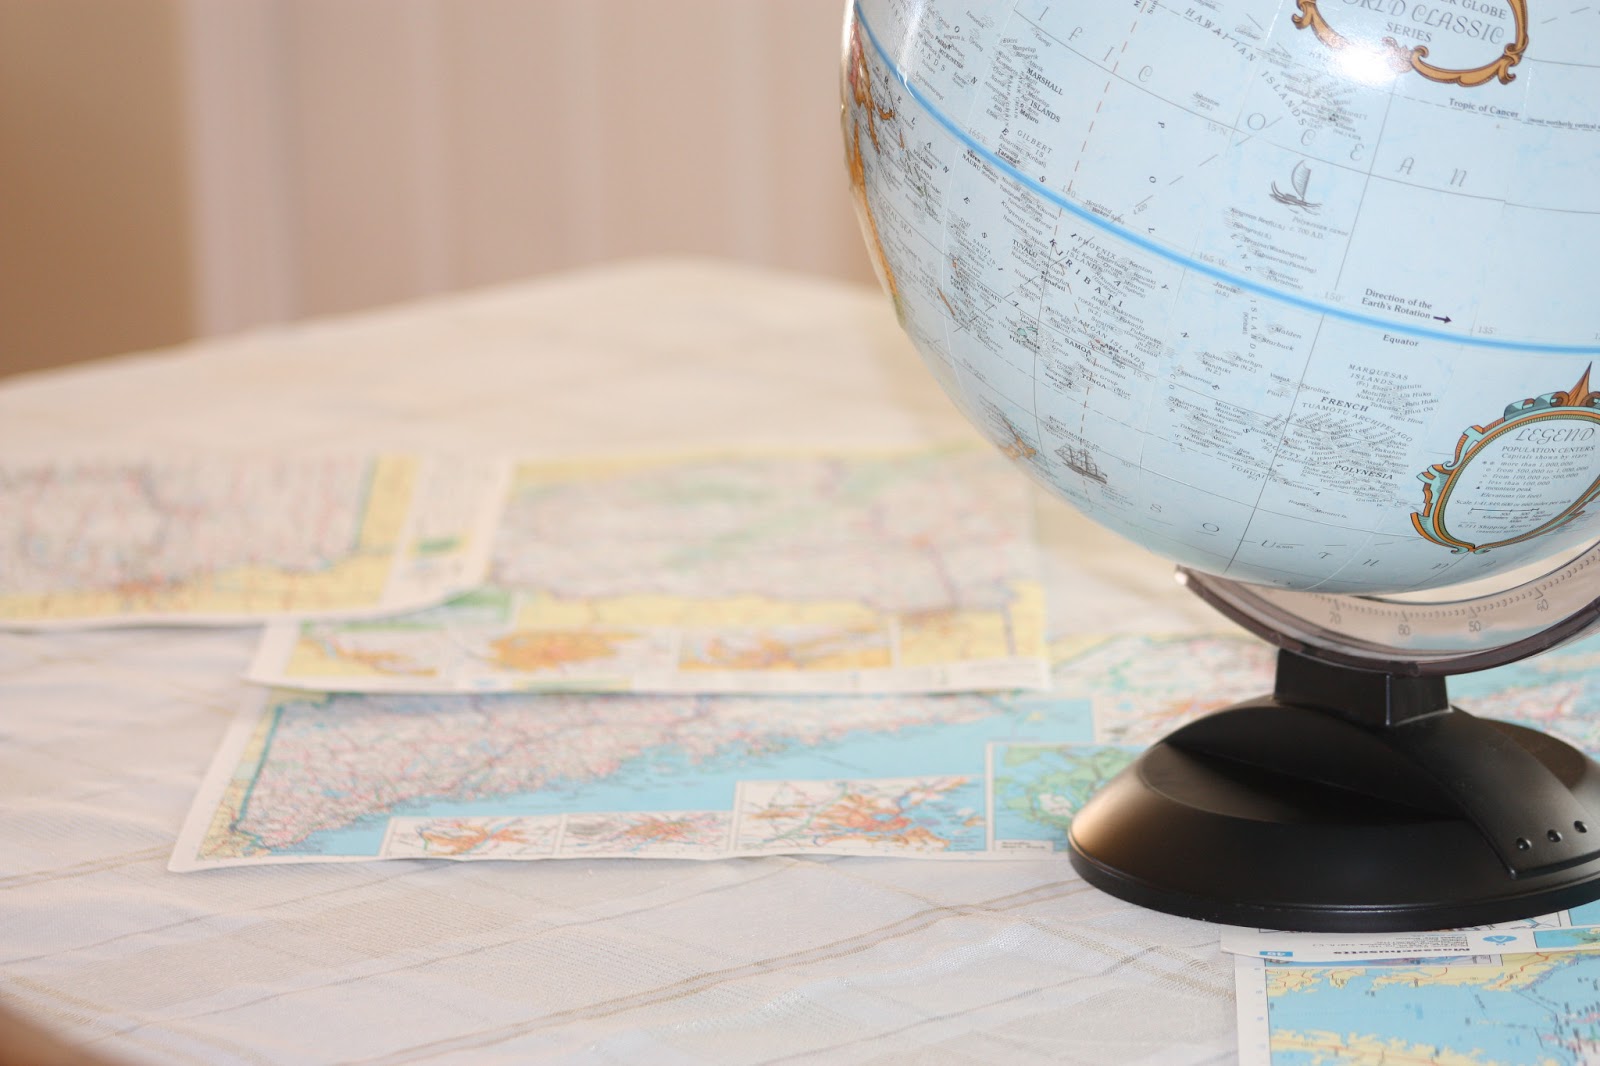
I decided to just use some full pages of the atlas as a table runner and put a globe in the middle for a centerpiece.


Last but not least, we made a guessing jar.


We had each of our guests venture a guess as to where they thought he would be going.  They wrote their name and place on a strip of paper and put it in the jar.  People were guessing Russia, Brazil, Taiwan, China, France, Kansas, Michigan, Africa, Spain, Washington state, Oregon, Paraguay, etc etc.  When it as all said and done, there was only one person who guessed correctly!

It was a super fun evening.  I'm so proud of my boy!  Do you want to know where he will be going?

California!

Have you seen missionaries in your neighborhood?  Be sure to say "Hi"...they are some of the most outstanding young people you will ever meet!

Friday, March 15, 2013

[Happy Birthday] Sweet Sixteen


I have some cute neighbor girls that are turning 16 this month.  I wanted to do something classy and special to honor their birthday.  These were easy to make and I think they turned out so fun.

First, I spent a few minutes perusing the aisles of our local thrift store in search of some lost pieces of china.  I was able to find some tea cups and saucers for about fifty cents each.  They don't technically belong together, but I think that is part of their charm.  Just find some coordinating pieces and have fun with it.

Next I made some cupcakes.  I've been experimenting with cake recipes over the last little while.  The perfect cake is still eluding me.  As soon as I find it, I will share.  This one wasn't bad, but not quite what I was hoping for. 

While the cakes were baking, I scrubbed the china clean.  Make it really sparkle!

Let your cupcakes cool.  Then frost them generously with buttercream.

My tea cups were a little deep.  I didn't want to have my cupcakes sink to the bottom, so I scrunched up some tissue paper and put it in the bottom of the cup. 

Set your cupcake on top of the tissue.

Finally, add some embellishments.  I made a little tag and tied it to the handle with a ribbon.  I also thought it needed a little pendant flag.  I made mine out of washi tape.  Did you know that if you stagger the chevron tape a little, it makes gingham?  How awesome is that?

Happy happy birthday girls!  I hope your day is fabulous!!

Thursday, March 14, 2013

Happy Pi(e) Day!

We have a house full of math nerds.  It's true. 
 But really, if you've got an opportunity to celebrate with pie, why not?

This year's offering...

Boston Cream Pie.

While technically it's probably not a pie.  It has pie in the name.  So...deal.

Friday, March 1, 2013

[St. Patrick's Day] It's Your Lucky Day


What says "lucky" more than an anonymous treat left on your doorstep?  I can't think of a darn thing.  Especially if that treat is packaged up all cute and lucky-like.  And even more especially if it that happy-go-lucky package contains fudge mint brownies.  They're frosted with green buttercream and drizzled with chocolate.  They're delicious!


It just doesn't get any better than this people.

You will need to make some brownies.  Try this recipe.  It's the only one you will ever need.  It will make enough batter for two of these cute little pans.  


I found these handy little aluminum pans at the WalMarts.  They are called "Rectangle Pans with Board Lids."  They come three to a package and cost pennies more than a dollar.    Lucky?  I think yes.

Bake your brownies and allow them to cool.  Then frost them generously with mint buttercream frosting.  Drizzle with melted chocolate to take them right over the edge.  After all...these are lucky brownies!

The thing I loved best about these aluminum pans, is their cardboard tops.  A blank canvas just screaming to be jazzed up a bit.  Don't you think?

Go ahead and put the plain old boring cardboard topper on your pan.  But don't crimp the edges closed just yet.  

Print out one of these little guys and trim it to size.  My treat box measures about 8" x 6". You could trace the original one around your print-out to make sure you get it right.

Place our lucky topper on top of that old boring one and crimp the edges closed.  Now wrap some cute green baker's twine around and around and finish it off with a lucky tag.

We just can't wait to doorbell ditch these lucky treats on some unsuspecting neighbor.  Won't you join us? 

The best thing about this little project?  It makes two!  You can give one away and keep one for yourself.  Now that is lucky!


I'm linking up with:

Thursday, February 14, 2013

[Valentine] Chocolate Dipped Strawberries


It's my neighbor's birthday today.  Happy Birthday!  And it's Valentine's Day.  Happy Valentine's Day!  And her husband just left for boot camp about a week ago.  So I wanted to do something nice for her and a few of my other friends as well.

I love chocolate dipped strawberries.  But I do not love the cost of buying them at the store.  Have you seen how much they are charging???  Really??  Upwards of $2 per berry.  That's just wrong.  Let's make our own shall we?


You will need some berries.  It's still winter in these parts.  The strawberries aren't as perfect as they will be in a couple of months.  But most grocery stores do get a shipment from somewhere for Valentine's day.  I happened to find some on sale at my local grocery store.  You will want to gently wash them.  And then make sure they are dry.  Water and chocolate do not mix well.

Melt some chocolate discs.  I prefer Guittard Milk Chocolate.  But certainly use whatever you like best.  I melt mine in the microwave on 40 percent power for 30 second intervals until the chocolate is smooth and creamy.  Stir between melting intervals.

Dip you strawberries into the chocolate and place them on a parchment or a silpat lined cookie sheet to firm up.  To avoid splotches and stripes, pop your cookie sheet into the freezer for a minute or two after dipping.

Take the strawberries out of the freezer and let them come to room temp. This will prevent the white chocolate stripes from falling off of your berries.


While your strawberries are warming up a bit, melt some white chocolate discs in a small ziploc bag.  Once again, I use 40 percent power for 30 second intervals.  Squish your bag until the chocolate is creamy and there aren't any lumps left.


Now snip the corner off of your bag and drizzle the chocolate over your berries.  Let the chocolate solidify.  I was able to get fourteen chocolate dipped strawberries for about $5.00.  That's around 35 cents per berry.  Now that's more like it!


Now package them up all cute-like and take them to a friend.  They will be so glad that you thought of them today!

Tuesday, January 29, 2013

I Believe in Pink

I believe in pink.  I believe that laughing is the best calorie burner.  I believe in kissing, kissing a lot.  I believe in being strong when everything seems to be going wrong.  I believe that happy girls are the prettiest girls.  I believe that tomorrow is another day and I believe in miracles.
Audrey Hepburn 

Today's post is brought to you by the color pink.  Because it's snowing like no tomorrow outside.  What if snow was pink?  That would be fun.  You know.  Just to mix things up a bit.  Maybe just one pink snow day a year.  Right before Valentine's day. 


This party mix is pink and yummy and guaranteed to make you happy.  Which in turn will make you pretty.  Eat some.  You'll like it.


Start with some pretzels.  Heart shaped would be fun.  I had these awesome square waffle-y ones.  Drizzle them with some milk chocolate.


Now pop a bag of microwave popcorn.  Pour it into a bowl.  


While you are at it.  Pour a bag of white chocolate chips into a bowl too.  Not the same bowl.  A different bowl.  A microwave safe bowl.  Microwave it at 40 percent power for thirty second intervals...until it is all melty and wonderful.  Pour it over the popcorn and stir it well.  Dump it out onto a cookie sheet and let the chocolate set.  You can pop it into the freezer for a minute, if you are in a hurry.


Next up...strawberry wafer cookies!  Delish!  I decided to cut mine up into little squares.  Beware--your children and most likely your husband will try to sneak some of the cookies while you aren't looking.  They're little rascals, aren't they?  


Break your popcorn up into little bunches.  Add dump them into a serving bowl or two.  Add your chocolate pretzels.  Sprinkle your wafer squares on top.  Add some nuts.  I chose cashews.  Then I added strawberry malted milk balls and pink and red M&Ms.   Mix it up a bit. 


Now snuggle up under a warm cozy blanket with your honey and watch Breakfast at Tiffany's  just for fun.  She believes in pink.  And so do I.

Monday, December 3, 2012

[Christmas Treats] Of Christmas Past

Here are some holiday treat ideas that I posted last year.  You know, just in case you need an excuse to make something yummy today!


Wednesday, October 17, 2012

[tips and tricks] Chocolate Caramel Apples


You asked for it...you got it!  Here's a little follow up to this post.


*Choose fresh firm and crisp apples.  Some like to use really large apples.  I don't mind the smaller apples.  There's a greater caramel to apple ratio that way!  I used some Jonathon apples from a local fruit stand that were marked down because of their smaller size.  I also used some golden delicious apples that we had left-over from making cider.

*Wash and dry your apples.  Remove the stems.


*I learned this little trick from somewhere...turn your apples upside down and insert your stick through the bottom.  The bottom of the apple holds the stick more firmly.  Weird, I know.  But it works.

*I like to use homemade caramel.  I could give you the recipe.  But I would have to kill you.  Sorry.  Use your favorite recipe.  It will turn out just fine.  Or, melt down your favorite caramel.  My recipe makes about two cups of melted caramel.

*Pour your melted caramel into bowl.  It needs to be a bit wider and deeper than the size of your apple.  I used a quart size glass bowl that worked pretty well.  Remember that when you push the apple down into the caramel, the level of the caramel will rise, so plan accordingly.


*Submerse your apple on a stick into the delicious caramel.  Let it drip for a minute or two to remove the excess.  I used a knife to scrape the extra caramel off of the bottom (which in this case is actually the top?) of the apple.  Place your caramel apple on a silpat or a greased cookie sheet.  The caramel will still continue to puddle at the bottom.  Delicious!


*Allow your caramel to cool and harden on the apple.


*Once your caramel has firmed up, you are ready to dip your apple into the chocolate.  You have lots of options here.  I melted some milk chocolate discs on 40% power for 40 seconds in microwave.  Repeat until the chocolate is smooth and melted, stirring between each warming interval.  Dip your caramel apple into the chocolate or drizzle it on with a spoon.  Set your chocolate dipped apple onto a piece of parchment and allow the chocolate to harden.  You may want to pop it into the refrigerator or freezer for a few minutes.


*Embellish your delicious apples with white chocolate drizzle or nuts or candies.  I melted some white chocolate discs in the microwave (same procedure as above) in a small sandwich bag.  Once your chocolate is melted, snip the corner off of your bag and drizzle over the apples.  Again, allow your chocolate to set.


*Package your apple pops all cute-like, or just sink your teeth right in!

Tuesday, September 11, 2012

Birthday Craft Party Extravaganza

The craft party was a huge success!  The girls had a great time sculpting, beading, painting, and drawing.  I pulled out almost all of my various craft supplies and let them go to town.  Crayons, markers, paints, glue, paper, fabric, craft sticks, foam stickers--does it get any better than that?


I made each guest a small container of playdough and pulled out all of the playdough toys.  We shaped and sculpted while we waited for everyone to arrive.  Truth be told, they could have played with the dough for the entire party.  Classics.  They never grow old.


Next up was stringing beads.  I saw these beads on Pinterest and had to try them.  It was a great way to use up all of those old colored pencils from school years gone by.  I won't lie to you though...it was quite a lot of work to make enough beads for ten bracelets.  The tips of my fingers are still numb from sawing, sanding, and drilling.  I was not very good at the drilling.  Hubby to the rescue!  He spent a large part of two evenings drilling.  Luckily he could drill and watch a favorite movie at the same time.  Totally worth it though.  They sure turned out cute, don't you think?


What's a craft party without a little painting?  I had envisioned something like this...

But true crafters tend to get their own ideas.  The girls painted their dragonfly/butterfly bodies.


And then things got a little crazy and very mixed media.  It involved leaves for wings and acorns and lots and lots of paint.  Unfortunately, I neglected to get a picture of their finished products.  But they were fabulous.  We threw in some painted rocks for good measure.  Lots of fun.

For dessert each girl painted their own sugar cookie with edible ink markers.  This was probably my favorite activity.  They turned out so cute.  I wish that I had taken a picture of all of the cookies lined up in a row.  But they just wanted to chomp right into them and I was too slow.  Here's one of the masterpieces:


We also had rainbow jello...


and caramel apple popcorn.  Delicious!


All in all I would say it was a huge success.  Happy birthday little one!
Related Posts Plugin for WordPress, Blogger...