Showing posts with label gifts. Show all posts
Thursday, July 10, 2014
S'more Grateful
So, we've been out of town enjoying our summer together as a family. And my wonderful neighbor volunteered to take care of our yard for us while we were gone. This is no task for the faint of heart. I have a lot of flowers that need to be tended to and watered manually. It's kind of a pain. Not to mention the vegetable gardens and the grass. I wanted to do something nice for her. Something fun. Something summery.
What says summer more than...s'mores?
Nothing. That's what. So I ran to the store. All you need is a package of fudge graham crackers and a package of marshmallows. I love making s'mores this way. The chocolate is already built in! Delicious!
Just wrap it up with a tag and a bow and you are good to go!
Thanks neighbor! You're the best!
Monday, March 17, 2014
[St Patrick's Day] Lucky No. 7
Is there a number luckier than seven?
How about when you add it to eleven? I'm not talking eighteen. I'm talking 7-eleven! Nothing is luckier than that. Especially when it involves Slurpees!
And a gift card.
My boy is in California. He is a missionary for The Church of Jesus Christ of Latter-day Saints. He is riding his bike in the California heat. All day long. This just might be the perfect way for him to stay cool this summer. I'm thinking every high school and college student I know could put this to good use. Cut two pieces of white card stock to measure 5 3/4 inches square. Measure in 1 1/4 inches from one of the sides and fold. Repeat with the other piece. This little flap will eventually make the pocket for the gift card. Click here for the "Lucky no. 7" printable. Cut out the card front and glue it to one of the card stock pieces. Line up the card stock so the flaps meet in the middle. Glue carefully around the sides and the back of the flap. Leave the front open. That's where the gift card slides in! I used some green patterned paper to embellish the pocket and the back of the card. I wanted to leave the inside of my card white so I could write a little letter. But whatever tickles your fancy. Go crazy if you want. Have fun.
Write a sentiment or two. Send your love. Then slip the gift card into the pocket. Slide the card into an envelope and send that fun-mail on it's way!
Happy St Patrick's Day!
Tuesday, March 11, 2014
Root Beer Float Gift Tags
It's the month to be lucky!
I was lucky enough to find this idea on Pinterest yesterday by Making Life Whimsical.
Unfortunately the link on Pinterest led to nowhere productive. That's unlucky.
(If you know where to find the true source, please leave me a comment.)
Luckily I had some time today to alter this very clever idea.
I needed a quick and inexpensive birthday gift for some friends that are lucky to be born in March.
Now you are lucky too!
Just click on the link and you can print your own Root Beer Float Birthday Tags. Attach the tags and a straw with some ribbon to a bottle of IBC Root Beer.
So Lucky!
Friday, November 22, 2013
Bundle-Up Buttercup!
Today I am thankful for warmth!
It's freezing outside. I am so grateful for a warm home to live in. For hot food right out of the oven. And for warm blankets to snuggle up in.
I came up with this little gem...to encourage warm hearts and warm hands.
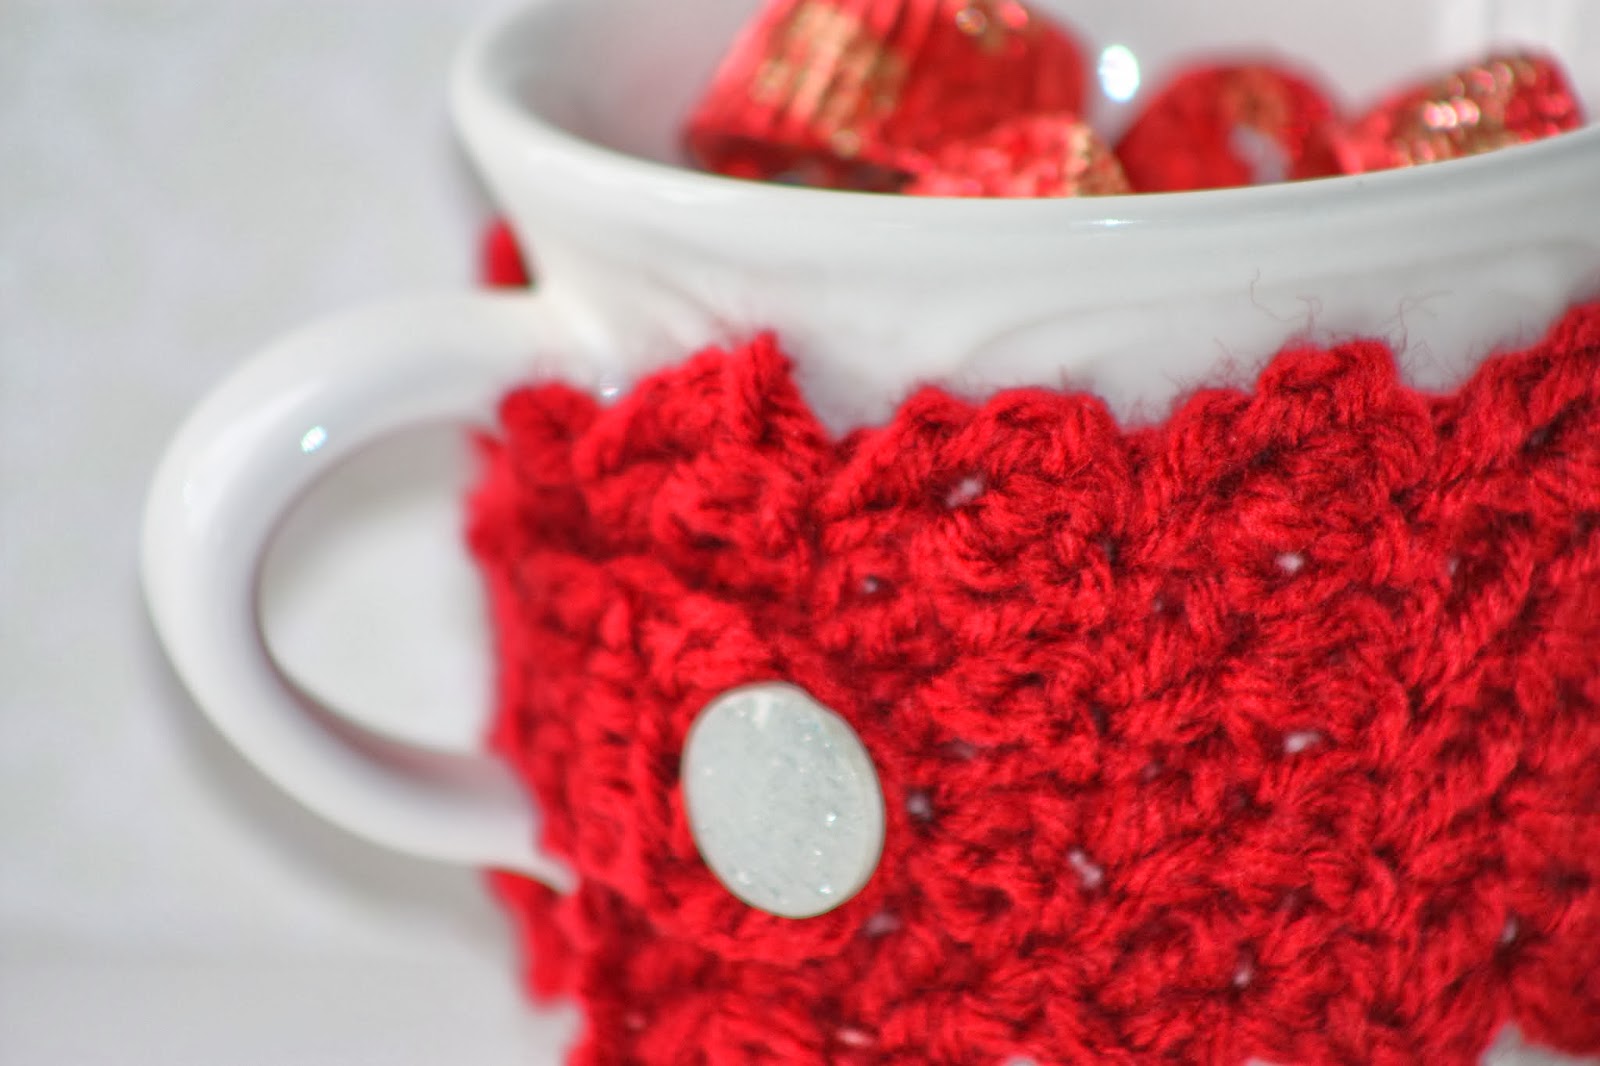
I picked up a mug for pennies at the good will. For fun, I added a mug cozy. I'm not super skilled or proficient at crocheting, but in no time at all, I had finished this cutie. I modified this pattern just a little. I liked the look of the scalloped edges, so I didn't edge the cozy with a single crochet stitch. Give it a try...if I can do it, you can too! And it was so fun, that I made quite a few. Just sew on a random button from your stash and wrap it snugly around your mug.
Fill your mug with some (peanut) buttercups! Add this cute little tag and you're all set for warming up somebody's day.
It's freezing outside. I am so grateful for a warm home to live in. For hot food right out of the oven. And for warm blankets to snuggle up in.
I came up with this little gem...to encourage warm hearts and warm hands.
I picked up a mug for pennies at the good will. For fun, I added a mug cozy. I'm not super skilled or proficient at crocheting, but in no time at all, I had finished this cutie. I modified this pattern just a little. I liked the look of the scalloped edges, so I didn't edge the cozy with a single crochet stitch. Give it a try...if I can do it, you can too! And it was so fun, that I made quite a few. Just sew on a random button from your stash and wrap it snugly around your mug.
Fill your mug with some (peanut) buttercups! Add this cute little tag and you're all set for warming up somebody's day.
*****
I'm linking up with:
Monday, October 28, 2013
Mummy Conversations
"What did one mummy say to the other mummy?"
This must be the year of the mummies here at Pretty Petunia. I was sending a Halloween package to my favorite missionary and all of this mummy goodness just kind of rolled out of my brain.
So let's talk about Mummy Pretzels. I LOVE chocolate covered pretzels. But not just any chocolate covered pretzels...they must first be dipped in caramel. Caramel makes everything better. Most people like to use the long pretzel rods. But not me. I much prefer the Rold Gold Wheat and Honey Twists. They are delicious. And they provide a much better chocolate caramel to pretzel ratio! Let's be honest. The pretzel is merely the vehicle for all that other goodness. Don't worry--there will still be plenty of pretzel at the bottom for a little "handle".
So go buy a bag of wheat and honey twists. I'll wait.
Now you will need some caramel. Obviously. I've said it before and I'll say it again. I prefer the homemade caramel route. But I do not discriminate. Whatever is easiest for you. Make some. Buy some. You will find no judgment here. When your caramel is all warm and melty, dip the pretzel twist. I like to pour my caramel into a glass cup measure with a handle. Just hold the pretzel rod by one end and dip the other. Easy. Let it firm up on a Silpat mat (or a greased cookie sheet).
After your caramel has cooled onto your pretzel, you are going to dip it into milk chocolate. I like to use the Guittard milk chocolate discs. Melt them in a glass cup in the microwave at 30-40 percent power for 30-40 second intervals. Stir frequently until the chocolate is melted and smooth. Dip your caramel pretzels into the chocolate and tap off the excess. Place them on the Silpat mat again or on a piece of parchment paper. Let them solidify. You may want to pop them into the freezer for a minute or two.
Now melt some white chocolate discs in a plastic bag or in a squeeze bottle. Use the white chocolate to stripe your pretzels. Just snip the corner off of the plastic bag. It will work fine! We are going for a bandaged look here...so stripe away!
After the white chocolate has solidified, you will want to add some eyes. Use the same technique that we followed here.
Package three or four to a bag. Otherwise, how will they chat amongst themselves?
Top it all off with this bag topper!
And give them to all your favorite goblins and ghosts...of corpse!
Friday, June 21, 2013
[New Neighbors] The S'more the Merrier!
Wow, I think it's high time that I came out of retirement, don't you? We have had week after week of really awesome family stuff that has unfortunately taken me away from this here blog. But, things are simmering down now, and I'm ready to bring you some fun new ideas.
The economy must be picking up a bit, because after years of stagnation, the homes in our neighborhood are starting to sell. And lots and lots of people are moving in and out. It's always sad to say good-bye to long time friends and neighbors. But the prospect of making new friends is something to look forward to.
I have been wanting to take a little treat around to all of the new folks to officially welcome them into the neighborhood. This is what I came up with! There's nothing quite like s'mores in the summertime!
I grabbed some supplies from my local grocery store. I love to use Keebler chocolate grahams. Less mess and less fuss. Peanut Butter grahams and Grasshopper grahams are also delicious. You will also want to buy a bag of marshmallows. Wrap them up with some burlap and twine and attach this free printable. You have two options for printing. I sent this file to Costco and had it printed on photo paper. Or you can print this page right from your own printer onto card stock and trim as necessary. I also opted to cut around the edges with a pair of scalloped scissors. And there you have it...Presto! A fun neighbor gift for just a couple of bucks.
Now all you have to do is walk next door and say hello!
Thursday, April 25, 2013
[Birthday] Evolution of a Cupcake
I had plans to meet some dear old friends for lunch today. Friends that I haven't seen for years. I found out this morning as I was getting caught up on a little FB, that it was my friend Ruth's birthday. And how awesome that I would get to go to lunch with her on her birthday? And how sneaky of her not to tell us! I thought it would be fun to make her a birthday cupcake. So I set to work. First I made a batch of chocolate cupcakes. I could swear that I bought a big package of plain white cupcake papers just a couple of weeks ago. But...apparently not. So, I had to settle for pink princess liners. Not ideal--but we'll make it work. Then I decided that I wanted to do a German chocolate variation on a theme. I quickly made some traditional caramel coconut frosting and a batch of chocolate butter-cream frosting, while the cupcakes baked and cooled.
So, this is how you turn a plain jane chocolate cupcake in a pink princess paper into a fantastic German Chocolate Cupcake Birthday Surprise!
Step One:
Cut a "cone" of cake out of the center of your cupcake. Remove the cone.
Step Two:
Fill the void with a tablespoon of German chocolate caramel coconut frosting.
Step Three:
Replace the cake cone. Don't worry about smashing it flat. Just set it on top. It actually helps to give your cupcake some height.
Step Four:
Pipe some chocolate butter-cream frosting around the perimeter of your caramel crater. Continue piping the chocolate butter-cream in a circular motion working from the outside in. This will give your cupcake a fun swirl on the top.
Step Five:
Hide your pink princess cupcake liner inside of a white nut cup. I fancied mine up a bit with some washi tape.
And there you have it!
If you want to take it even a step farther, add a washi tape "flag" and package your cupcake in a cupcake box. Don't forget the ribbon. You know how I feel about ribbons!
Happy Birthday Friend! Thanks for sharing a few minutes of your special day with me!
Friday, April 12, 2013
[Teacher Appreciation] Alphabet Gifts
I thought this was such a fun idea for a preschool or kindergarten teacher. I received a letter from my daughter's room mother. She sent a white lunch sack home with each student with a letter of the alphabet on it. Our assignment was to put some small gifts for the teacher in the bag. The gifts needed to be items that start with that letter of the alphabet. They could be homemade, store bought, or whatever. And they needed to be able to fit inside of the bag. We've been out of town, so I only had one afternoon to put mine together. I probably could have been a little more creative if I had known earlier. Oh well.
We were actually one of the lucky ones. We were given two bags to fill. We were assigned the letters N and Y. "N" was fairly easy. We decided to get some nail care products (nail polish, nail files, etc), a notepad, and some Hershey Nuggets. Some other ideas we were considering...a necklace, Nutter Butters, Newtons, and Nerds. The letter "Y" was a little harder. We went with YooHoo drink packets, yogurt covered pretzels, York peppermint patties, and a gift card for frozen yogurt. Some other ideas we thought of were Yahtzee, a yo-yo, and anything yellow.
My daughter loves her kindergarten teacher--and so do I! She does such a fantastic job. I'm sure that you feel the same way about the teachers in your life. Take a minute to do something nice to thank them for all they do.
I've got a few other "appreciation" tricks up my sleeve...so be sure to stick around!
Friday, March 29, 2013
[Easter] Hunt Surprise
So, I've been thinking. Lots of families around here have long standing Easter traditions. They gather with friends and family to celebrate the season. But maybe you know of one or two that just aren't up to the task this year. Or maybe just someone that needs a little extra TLC. Why not provide a little Easter fun for someone else? It's not that hard and it could just become a family tradition of your own.
Gather some supplies for a good old fashioned egg hunt. I used plastic eggs. You will need twenty-four of them if you are going to use the printable that I am providing. Fill them with jelly beans and other goodies. They don't have to be sweets. You could use small toys or money or whatever tickles your fancy. You could number them if you want to or seal them with washi tape.
Now put them in a festive container. This cute Easter bag comes to mind. Or you could use a fun bucket or a spare basket. Or some bunny britches! You could even add a cute stuffed bunny for good measure if you'd like. You can never have too many bunnies!
Now comes the fun part. You have to be all ninja-like. Gather the kids and explain the procedure. You are going to sneak up on the family you would like to surprise. Quietly hide the eggs in their yard. You might want to go when you know they aren't home or when their blinds/curtains are closed. I would stick to the front yard to avoid dogs and such. When you are done hiding all of the eggs...leave your empty Easter bag (or bucket or basket) on their porch. Be sure to attach a fun tag to explain the fine points of the Easter Hunt Surprise! Click here for an orange version or here for a pink version.
Then ring the door bell and run like the wind!
Door bell ditching Easter style! Gotta love it!
Happy Hunting!
Linking up with:
Wednesday, March 27, 2013
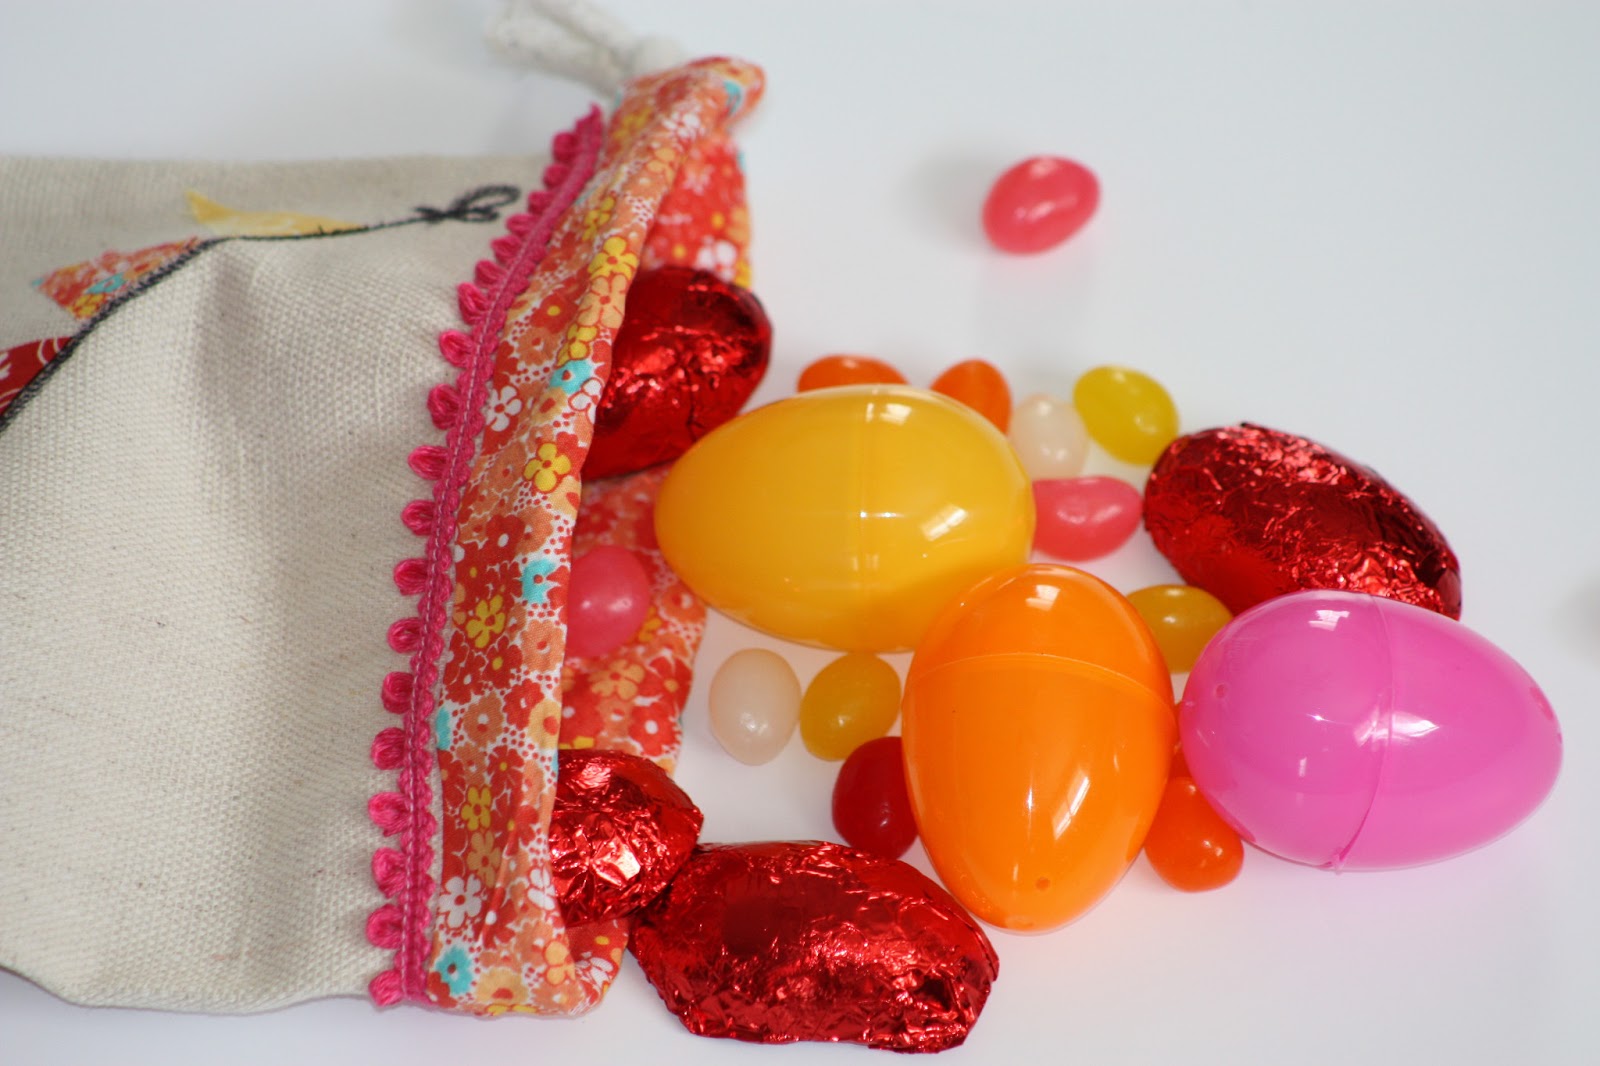
[Easter] Bunny Goodie Bag
I had some time.
I had some scraps.
I made a bag.
I stuffed it full of candy.
Tuesday, March 26, 2013
[Easter] Spring Bouquet
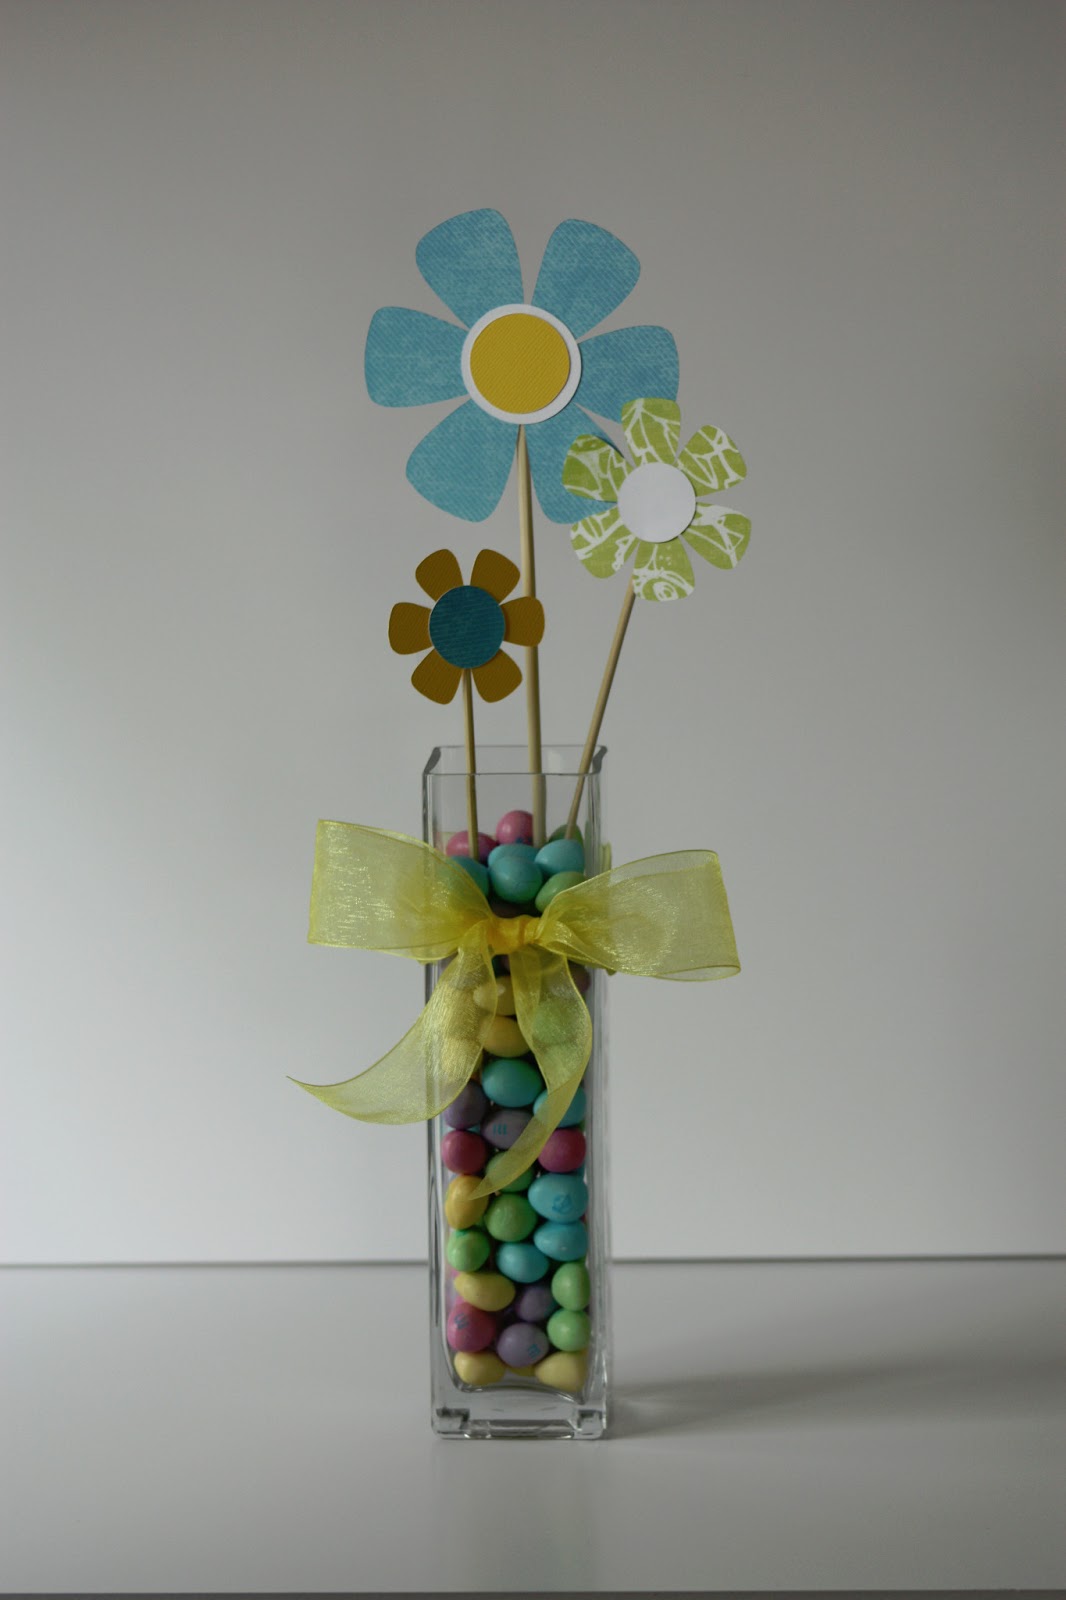
I just had to share this with you. Is this not the cutest thing you have ever seen? My friend Kelley gave this to me last week and I absolutely love it. Love.
I'm sure you could figure this out on your own just from the picture. But, I'll run through it anyway. Why not? She basically took a rectangular bud vase and filled it with peanut m&m's. I'm sure any small pastel candy would work. Pick a favorite. Then she attached three paper flowers--that I am sure she crafted all on her own. Because that's the kind of awesome that is Kelley. And paper flowers are kind of her signature. She does amazing things with paper flowers. Anyway, attach the paper flowers to some long wooden skewers. Stick the flowers into the vase and arrange them all pretty-like. Then tie an organza bow around the vase!
And there you have it! These would make super cute centerpieces for your Easter table. Or how about a teacher appreciation gift? Or just because. Give one to a friend. It will make them happy.
Friday, March 15, 2013
[Happy Birthday] Sweet Sixteen
I have some cute neighbor girls that are turning 16 this month. I wanted to do something classy and special to honor their birthday. These were easy to make and I think they turned out so fun.
First, I spent a few minutes perusing the aisles of our local thrift store in search of some lost pieces of china. I was able to find some tea cups and saucers for about fifty cents each. They don't technically belong together, but I think that is part of their charm. Just find some coordinating pieces and have fun with it.
Next I made some cupcakes. I've been experimenting with cake recipes over the last little while. The perfect cake is still eluding me. As soon as I find it, I will share. This one wasn't bad, but not quite what I was hoping for.
While the cakes were baking, I scrubbed the china clean. Make it really sparkle!
Let your cupcakes cool. Then frost them generously with buttercream.
My tea cups were a little deep. I didn't want to have my cupcakes sink to the bottom, so I scrunched up some tissue paper and put it in the bottom of the cup.
Set your cupcake on top of the tissue.
Finally, add some embellishments. I made a little tag and tied it to the handle with a ribbon. I also thought it needed a little pendant flag. I made mine out of washi tape. Did you know that if you stagger the chevron tape a little, it makes gingham? How awesome is that?
Happy happy birthday girls! I hope your day is fabulous!!
Thursday, February 14, 2013
[Valentine] Chocolate Dipped Strawberries
It's my neighbor's birthday today. Happy Birthday! And it's Valentine's Day. Happy Valentine's Day! And her husband just left for boot camp about a week ago. So I wanted to do something nice for her and a few of my other friends as well.
I love chocolate dipped strawberries. But I do not love the cost of buying them at the store. Have you seen how much they are charging??? Really?? Upwards of $2 per berry. That's just wrong. Let's make our own shall we?
You will need some berries. It's still winter in these parts. The strawberries aren't as perfect as they will be in a couple of months. But most grocery stores do get a shipment from somewhere for Valentine's day. I happened to find some on sale at my local grocery store. You will want to gently wash them. And then make sure they are dry. Water and chocolate do not mix well.
Melt some chocolate discs. I prefer Guittard Milk Chocolate. But certainly use whatever you like best. I melt mine in the microwave on 40 percent power for 30 second intervals until the chocolate is smooth and creamy. Stir between melting intervals.
Dip you strawberries into the chocolate and place them on a parchment or a silpat lined cookie sheet to firm up. To avoid splotches and stripes, pop your cookie sheet into the freezer for a minute or two after dipping.
Take the strawberries out of the freezer and let them come to room temp. This will prevent the white chocolate stripes from falling off of your berries.
While your strawberries are warming up a bit, melt some white chocolate discs in a small ziploc bag. Once again, I use 40 percent power for 30 second intervals. Squish your bag until the chocolate is creamy and there aren't any lumps left.
Now snip the corner off of your bag and drizzle the chocolate over your berries. Let the chocolate solidify. I was able to get fourteen chocolate dipped strawberries for about $5.00. That's around 35 cents per berry. Now that's more like it!
Now package them up all cute-like and take them to a friend. They will be so glad that you thought of them today!
Monday, January 14, 2013
[Valentine] Share the Love Candy Wreath
This is procrastination done right. That's what this is. I totally intended to make a candy wreath for Christmas. I had a bucket of candy waiting in the pantry for me to have a few spare minutes. But, I got over-run by all of the Christmas madness. The good news? Most of my candy was red and/or white. It totally works for Valentine's day. Three cheers for procrastination!!
I love this wreath. It's heart shaped. It's red. It's delicious. It's totally easy to make and is guaranteed to bring a smile to everyone you share it with.
Do you need a valentine for Great Grandma who is in the care center? This is the perfect wreath to hang on her door. Visitors can enjoy a little piece of candy while they chat. Just pluck a piece right off.
Maybe you need a valentine gift for your favorite Kindergarten teacher. Again, this is the perfect solution. She can hang it on her classroom door and when she feels the time is right she can share a piece of candy with the children or her co-workers.
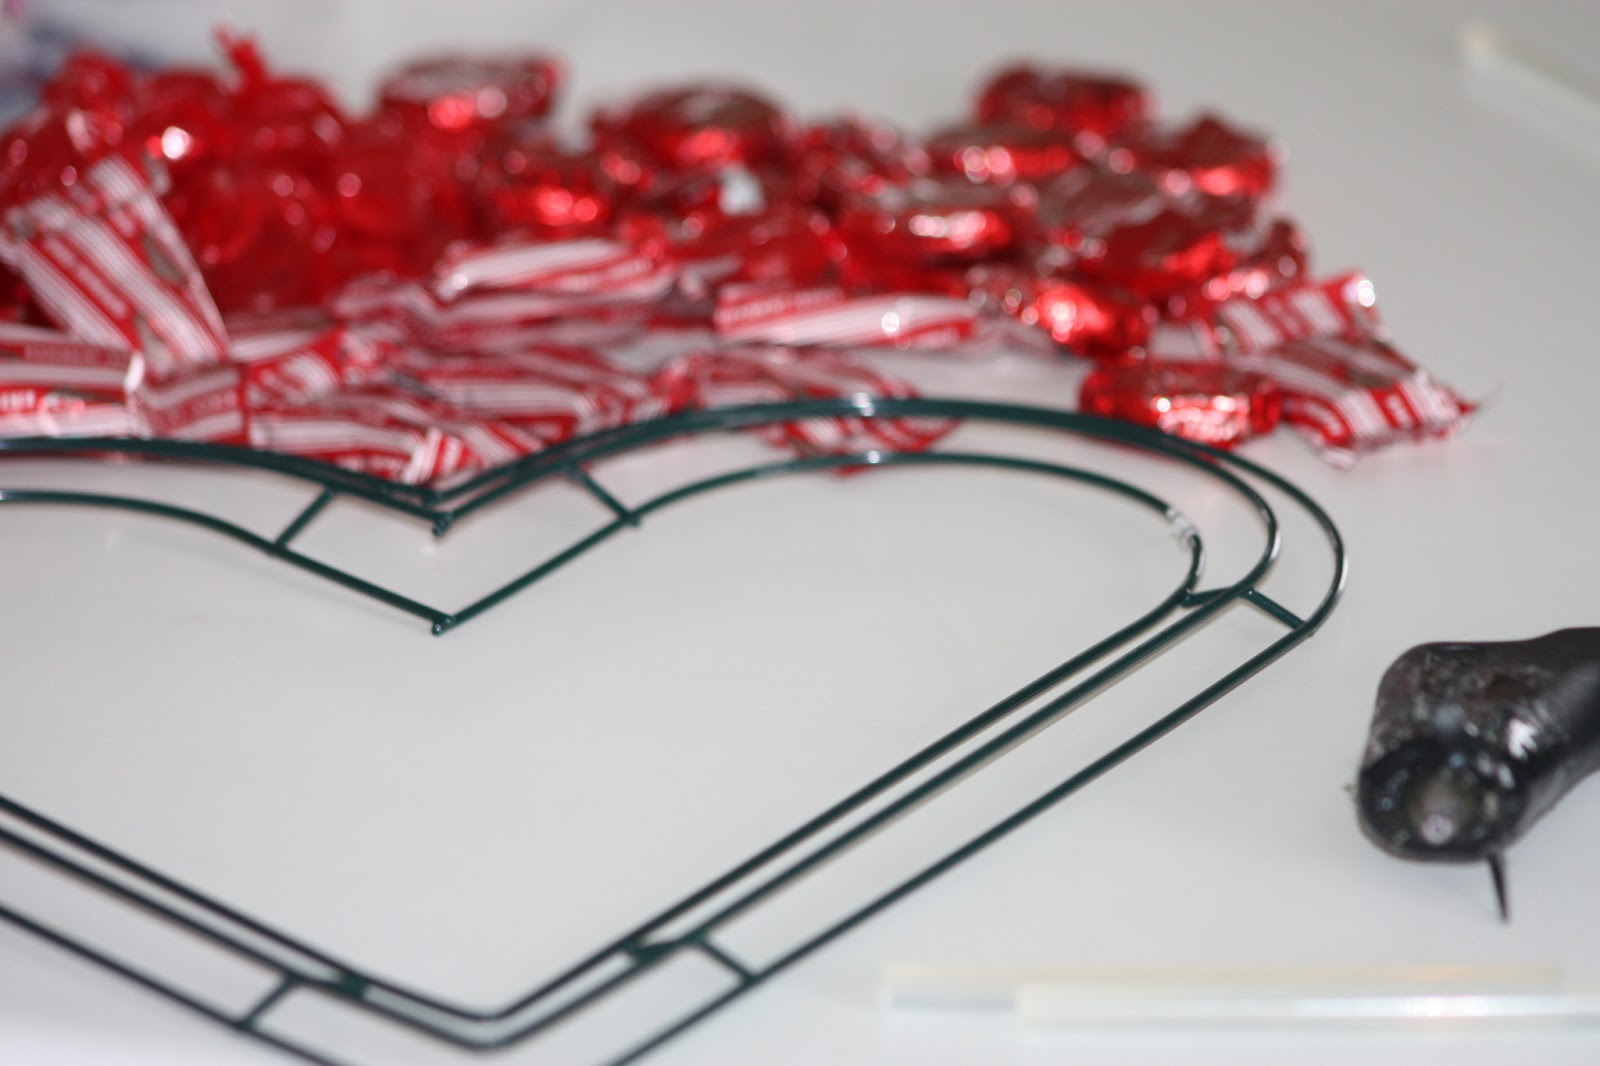
So, let's get busy. You will need a heart shaped wreath form. Styrofoam will work. I happened to have a metal form. It worked fine too. You will also need some candy. And a glue gun. That's it.
Set out your candy and decide how you would like to arrange it. Then carefully glue each piece onto the form. Just keep gluing and layering.
In just a few minutes you will have a beautiful lush candy wreath!
Wrap it up with a bow and hang it in a place of distinction.
There you go. Now go share the love!
I'm linking up with:
Friday, January 11, 2013
Peas...and thank you!
I have found myself lately on the receiving end of some incredible acts of kindness. I've been racking my brain trying to think of a clever way to show how much I appreciate the thoughtfulness. Guess what I came up with? PEAS. Well, of course.
Don't you just love peas? They are one of my favorite veggies. There are those in the world that are averse to peas. No worries. These are not real peas. They are really green sixlets in disguise. I'm pretty sure that everyone in the whole wide world loves sixlets. So these are the perfect thank you accompaniment.
I found a large bag of green sixlets at Hobby Lobby in the wedding department. You could probably find them at other party and wedding supply stores. There are enough sixlets in the bag to make four or five thank you gifts, like the one I made above. Use a coupon. Coupons are the best! I put my peas in a clear plastic pillow box. But a small bag or box would work just fine. Tie it with a ribbon. Ribbons are not optional. Then just print out a tag and you're gold!
Peas--they're the new chocolate!
Linking up with:
Wednesday, January 9, 2013
Birthday Party in a Can
Today is Grandpa's birthday. Happy Birthday Grandpa!!
Now--Grandpa if you are reading this, you need to divert your eyes. Close your browser right now and don't come back until you get a package from us in the mail. Sadly, I was about a day too slow in putting this little package together, so it is not going to get to you on your birthday. But we love you. And we miss you. We'll call you in a bit and sing to you. Now off with you. Go on.
Grandpa lives far away. Grandpa is turning 70 today. It's a big deal.
We decided to put together a little birthday party for him. We made some confetti balloons and some toothpick poppers. We gathered a few noisemakers. We made a birthday banner. We even made a mini birthday cake of sorts--complete with candles. And we found a cute little gift that is perfect for Grandpa. Grandpa is a handyman. He spends his days fixing things. We happened upon a key chain tape measure. Get this--it measures exactly 70 inches! How perfect is that? We wrote him a 70 inch birthday note on the back of the tape measure with an extra fine sharpie. It turned out really cool.
To top it all off, we carefully tucked everything into a quart sized paint can from Home Depot. And we mailed it off. Is there anything better than getting fun mail from the postal carrier?
Happy birthday Grandpa! We hope that you have a super fantastic 25,568th day of life!
Now--Grandpa if you are reading this, you need to divert your eyes. Close your browser right now and don't come back until you get a package from us in the mail. Sadly, I was about a day too slow in putting this little package together, so it is not going to get to you on your birthday. But we love you. And we miss you. We'll call you in a bit and sing to you. Now off with you. Go on.
Grandpa lives far away. Grandpa is turning 70 today. It's a big deal.
We decided to put together a little birthday party for him. We made some confetti balloons and some toothpick poppers. We gathered a few noisemakers. We made a birthday banner. We even made a mini birthday cake of sorts--complete with candles. And we found a cute little gift that is perfect for Grandpa. Grandpa is a handyman. He spends his days fixing things. We happened upon a key chain tape measure. Get this--it measures exactly 70 inches! How perfect is that? We wrote him a 70 inch birthday note on the back of the tape measure with an extra fine sharpie. It turned out really cool.
To top it all off, we carefully tucked everything into a quart sized paint can from Home Depot. And we mailed it off. Is there anything better than getting fun mail from the postal carrier?
Happy birthday Grandpa! We hope that you have a super fantastic 25,568th day of life!
Subscribe to:
Posts (Atom)