Showing posts with label service. Show all posts
Thursday, January 16, 2014
[Valentine] A Classic Combination
Isn't about time we did a little doorbell ditchin? Valentine style? I thought so too. I found these aluminum pans with cardboard lids at WalMart. They weren't much more than a dollar for three pans. They measure about eight inches by six inches. These are the perfect vehicle for ditchin' some homemade treats.
I went ahead and designed a fun Valentine lid to put on top of the pans. The cool thing is...you have so many treat options. Just think of something that combines classic flavors.
Cookies are at the top of my list. Chocolate chip. Sugar cookies with buttercream frosting and sprinkles. Homemade Oreos. Snickerdoodles. Peanut butter dipped in chocolate. Mmmm.
Or if cookies aren't your thing, you could go with Sweetheart Popcorn. Or Valentine Chex Mix. Or Pink Party Mix. All solid choices.
Bake up those delicious treats and package them into your pan. Print out the box lid onto heavy card stock. Crimp down the foil edges and you are ready for business.
I suppose if you weren't in a ninja doorbell ditchin' kind of mood...you could just hand deliver them with a smile. That would be fun too.
For an alternate box lid...click here. Just a friendly warning. These may be ink intensive. You might want to print them at your local copy shop.
Thursday, April 18, 2013
[Party] Where in the World?
Yesterday was kind of a big deal for our family. My 18 year old son turned in his application to serve an LDS mission a few weeks ago. As a missionary he would be assigned to serve for two years. Missionaries are sent all over the world and speak almost every language imaginable. We received word from the post office that his assignment had arrived yesterday morning. We were so excited and anxious to see where he would be going! He wanted to wait until evening to open his letter so that many of his friends and family could be there with him. Twelve hours is a long time to wait. Truth be told, I've been waiting for this day for over eighteen years!! I could hardly stand it. We decided to make a party of the whole thing. It gave me something to keep me busy all day.
So, I set to work. We went with a map theme. It seemed like the logical choice since that was the big question of the evening...where in the world would he be going??
You can't have a party without garland, right? I love me some garland. I knew that I wanted to make it out of maps. But where was I going to find enough maps for cheap to finish the job. Then it came to me...a stoke of genius really. We had an old road atlas collecting dust on the shelf. I set to work removing the pages and cutting them into triangles. It was quick work. Before I finished watching an episode of Downton Abbey, I had a huge pile of triangles. Then I punched them and strung them on some yarn and hung them all over our front room.
I hadn't even begun to exhaust my map source. So, I made little cupcake flags. I just cut strips and glued them to a toothpick. My strips were about three inches long and one inch wide. Fold them around a toothpick and glue in place. Cut a notch in the end if you want. We made these cute little jars of yumminess to serve for dessert. I did a strawberry shortcake version and a chocolate cake version. They were fast and I could make them ahead of time. I didn't want to have to be tied to the kitchen, once our guests started arriving. They were delicious!
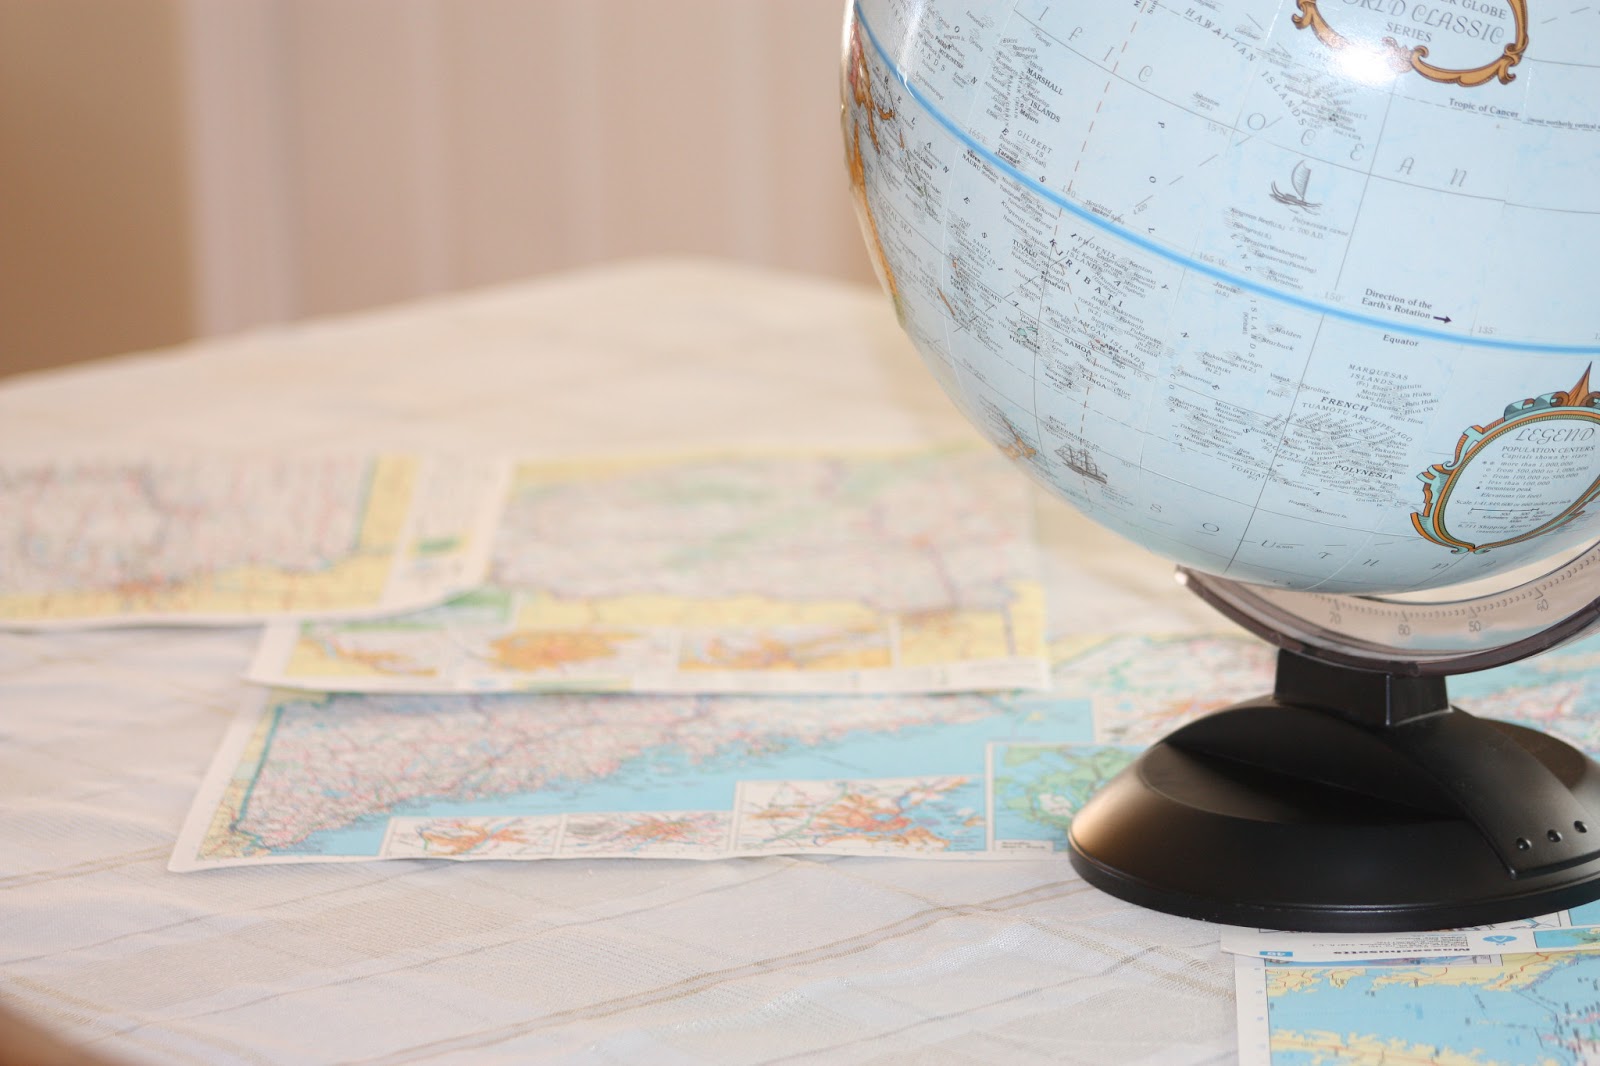
I decided to just use some full pages of the atlas as a table runner and put a globe in the middle for a centerpiece.
Last but not least, we made a guessing jar.
We had each of our guests venture a guess as to where they thought he would be going. They wrote their name and place on a strip of paper and put it in the jar. People were guessing Russia, Brazil, Taiwan, China, France, Kansas, Michigan, Africa, Spain, Washington state, Oregon, Paraguay, etc etc. When it as all said and done, there was only one person who guessed correctly!
It was a super fun evening. I'm so proud of my boy! Do you want to know where he will be going?
California!
Have you seen missionaries in your neighborhood? Be sure to say "Hi"...they are some of the most outstanding young people you will ever meet!
Labels:
craft,
decor,
desserts,
family time,
party ideas,
service
Friday, April 12, 2013
[Teacher Appreciation] Alphabet Gifts
I thought this was such a fun idea for a preschool or kindergarten teacher. I received a letter from my daughter's room mother. She sent a white lunch sack home with each student with a letter of the alphabet on it. Our assignment was to put some small gifts for the teacher in the bag. The gifts needed to be items that start with that letter of the alphabet. They could be homemade, store bought, or whatever. And they needed to be able to fit inside of the bag. We've been out of town, so I only had one afternoon to put mine together. I probably could have been a little more creative if I had known earlier. Oh well.
We were actually one of the lucky ones. We were given two bags to fill. We were assigned the letters N and Y. "N" was fairly easy. We decided to get some nail care products (nail polish, nail files, etc), a notepad, and some Hershey Nuggets. Some other ideas we were considering...a necklace, Nutter Butters, Newtons, and Nerds. The letter "Y" was a little harder. We went with YooHoo drink packets, yogurt covered pretzels, York peppermint patties, and a gift card for frozen yogurt. Some other ideas we thought of were Yahtzee, a yo-yo, and anything yellow.
My daughter loves her kindergarten teacher--and so do I! She does such a fantastic job. I'm sure that you feel the same way about the teachers in your life. Take a minute to do something nice to thank them for all they do.
I've got a few other "appreciation" tricks up my sleeve...so be sure to stick around!
Friday, March 29, 2013
[Easter] Hunt Surprise
So, I've been thinking. Lots of families around here have long standing Easter traditions. They gather with friends and family to celebrate the season. But maybe you know of one or two that just aren't up to the task this year. Or maybe just someone that needs a little extra TLC. Why not provide a little Easter fun for someone else? It's not that hard and it could just become a family tradition of your own.
Gather some supplies for a good old fashioned egg hunt. I used plastic eggs. You will need twenty-four of them if you are going to use the printable that I am providing. Fill them with jelly beans and other goodies. They don't have to be sweets. You could use small toys or money or whatever tickles your fancy. You could number them if you want to or seal them with washi tape.
Now put them in a festive container. This cute Easter bag comes to mind. Or you could use a fun bucket or a spare basket. Or some bunny britches! You could even add a cute stuffed bunny for good measure if you'd like. You can never have too many bunnies!
Now comes the fun part. You have to be all ninja-like. Gather the kids and explain the procedure. You are going to sneak up on the family you would like to surprise. Quietly hide the eggs in their yard. You might want to go when you know they aren't home or when their blinds/curtains are closed. I would stick to the front yard to avoid dogs and such. When you are done hiding all of the eggs...leave your empty Easter bag (or bucket or basket) on their porch. Be sure to attach a fun tag to explain the fine points of the Easter Hunt Surprise! Click here for an orange version or here for a pink version.
Then ring the door bell and run like the wind!
Door bell ditching Easter style! Gotta love it!
Happy Hunting!
Linking up with:
Thursday, March 7, 2013
Soda Pop Walk
Our local elementary school is having a fund raiser tonight. Part of that involves a soda pop walk. Have you ever heard of that before? Me either. Apparently it is akin to a cake walk. Cake was sort of out of the question--because our school has a strict policy about homemade treats. So they opted for soda pop. The kids were asked to decorate a 2-liter bottle of pop to have as prizes for the "walk". And really that was all the instruction we were given.
OK. So now that you are all up to speed. Want to see what we came up with? In honor of the two up-coming holidays...
This little guy has a heart of pink lemonade! You may recognize his britches from here. The soda pop bottle fit perfectly! We wrapped the bottle in brown craft paper, added a face and some ears. My daughter thought he needed a bowtie. And I wholeheartedly agreed!
This bottle of Fanta orange shouted "spring" to my kindergartner. She thought a spring scene was definitely the way to go. She created this almost entirely on her own. I punched out the flowers and helped her glue her scene onto the bottle. I thought it turned out so cute. I love the flowers and the little bunnies. Those must be baby bunnies. Not all of them have caught on to the art of hopping yet. I guess we all must fall sometimes.
Who knew that a bottle of pop could be such a fun canvas for creating!
OK. So now that you are all up to speed. Want to see what we came up with? In honor of the two up-coming holidays...
This lucky leprechaun started out life as a bottle of Sprite.
We added a few embellishments, made a few snips with our
scissors, applied glue generously, and...lo and behold his true identity was discovered!
This little guy has a heart of pink lemonade! You may recognize his britches from here. The soda pop bottle fit perfectly! We wrapped the bottle in brown craft paper, added a face and some ears. My daughter thought he needed a bowtie. And I wholeheartedly agreed!
This bottle of Fanta orange shouted "spring" to my kindergartner. She thought a spring scene was definitely the way to go. She created this almost entirely on her own. I punched out the flowers and helped her glue her scene onto the bottle. I thought it turned out so cute. I love the flowers and the little bunnies. Those must be baby bunnies. Not all of them have caught on to the art of hopping yet. I guess we all must fall sometimes.
Who knew that a bottle of pop could be such a fun canvas for creating!
Friday, March 1, 2013
[St. Patrick's Day] It's Your Lucky Day
What says "lucky" more than an anonymous treat left on your doorstep? I can't think of a darn thing. Especially if that treat is packaged up all cute and lucky-like. And even more especially if it that happy-go-lucky package contains fudge mint brownies. They're frosted with green buttercream and drizzled with chocolate. They're delicious!
It just doesn't get any better than this people.
You will need to make some brownies. Try this recipe. It's the only one you will ever need. It will make enough batter for two of these cute little pans.
I found these handy little aluminum pans at the WalMarts. They are called "Rectangle Pans with Board Lids." They come three to a package and cost pennies more than a dollar. Lucky? I think yes.
Bake your brownies and allow them to cool. Then frost them generously with mint buttercream frosting. Drizzle with melted chocolate to take them right over the edge. After all...these are lucky brownies!
The thing I loved best about these aluminum pans, is their cardboard tops. A blank canvas just screaming to be jazzed up a bit. Don't you think?
Go ahead and put the plain old boring cardboard topper on your pan. But don't crimp the edges closed just yet.
Print out one of these little guys and trim it to size. My treat box measures about 8" x 6". You could trace the original one around your print-out to make sure you get it right.
Place our lucky topper on top of that old boring one and crimp the edges closed. Now wrap some cute green baker's twine around and around and finish it off with a lucky tag.
We just can't wait to doorbell ditch these lucky treats on some unsuspecting neighbor. Won't you join us?
The best thing about this little project? It makes two! You can give one away and keep one for yourself. Now that is lucky!
I'm linking up with:
Thursday, November 8, 2012
[The Gratitude Project] Warmth
Share the love--share the warmth!
We've had the most beautifully warm week. Unprecedented really. Just a gorgeous fall. But the winds of change are blowing. There is a BIG storm approaching and I find myself grateful today for warmth. I feel so blessed to have a warm house to sleep in and warm coats and blankets. There are so many who can't afford those luxuries. So many men, women, and children that are going to be cold tonight.
I bet that we could make a difference today. We could donate some gently used coats and blankets to our local care coalition. That would be amazing! Or make some simple scarves out of inexpensive fleece. Have you done this before? In the past we have made piles of scarves as a family project. I've taken stacks of fleece to the elementary school and taught the children how to cut the scarves and fringe the ends. We've done this as a children's project at church and even as a neighborhood. When the scarves are complete, just pile them in your car and drop them off at your local United Way. If you are looking for a simple service project that can really make a difference, this just might be it!
The nuts and bolts:
Buy some fleece fabric at your local WalMart or fabric store (JoAnn's, Hobby Lobby, etc). There are so many fun colors and patterns. You want to find some that is sixty inches wide. One yard will make three scarves. Fold your fabric in half matching the selvage ends. You may need to square up the ends if they weren't cut straight at the store. Now just cut every twelve inches. I've found that the easiest way is to use a rotary cutter and a self-healing cutting mat. Your finished scarves should be about 12 inches wide and 60 inches long. You can fringe the ends by cutting strips that are six inches long and one inch wide. Sharp scissors work great for the fringe. That's it! Easy peasy.
You can easily make three scarves for five or six dollars. If you watch for sales, you can do it for even less!
Now let's go share the warmth!
And don't forget the hot cocoa.
Thursday, February 16, 2012
Random Act of Kindness Day
Did you know that tomorrow is the official "Random Act of Kindness" day? Well, I didn't either until just a few minutes ago. But I think we should totally get on board with this. What a great way to start the weekend. Do you need a few ideas? I found over 200 ideas on this site. That should get the creative juices flowing! You could plan to do something BIG or just do something very simple. You could serve someone you know well, like a family member or a friend. Or you could surprise a stranger with something to brighten their day. Take a look at your day and see what fits. The point is to get outside of yourself. I was thinking yesterday about some of the people I know and love. Many of them are facing some pretty big challenges. I bet they could use a little sunshine in their lives. How about you? Do you know someone that you could bless with some kindness?
I made a little card to get you started. Two actually. Print them out. Trim them a bit. Fold. Write a little note. Sign your name or not. It's up to you.
Three cheers for kindness!!
Leave me a note in the comments...I'd love to hear what kind of random you've been up to!
*****
I'm linking up with:
Monday, December 12, 2011
Christmas Buddies
Many years ago we started a tradition in our family of choosing Christmas buddies. We secretly choose a family member's name out of a hat (or a cup or a bowl) at the beginning of December. All through the month we do secret acts of love for that person. On Christmas Eve we reveal the true identity of our secret Christmas buddies to each other. It is one of our favorite things to do during the holidays. And it's pretty funny. We don't have a very large family, so it's not usually too hard to figure out who has chosen your name. But that doesn't spoil the fun at all. We try to throw people off the track using all kinds of stealthy tactics. Really, it's just plain fun to see the kids sneaking around being nice to each other. And we have gotten pretty creative over the years. Here's a list of some of the favorites:
*laundry folding (this is a big hit with Mom)
*dish doing (also one of Mom's favs)
*car washing and vacuuming
*bed making and room cleaning
*random treats (candy, yogurt smoothies, pop-tarts, donuts, chocolate milk, peanuts, sugar cereal, etc, etc)
*love notes (lipstick notes on the mirror, hand-written notes on your pillow, computer generated notes posted all over the house, notes in the lunch box...)
*special breakfasts and dinners
*getting checked out of school and taken out to lunch (this is a big hit with the kids!)
I have had my computer desktop hi-jacked and replaced with an original kid designed Christmas greeting.
My daughter (with the help of Dad) recorded herself saying all kinds of wonderful things (that a Mom never tires of hearing) and mixed it in with the Christmas playlist. Her "I love you's" would come on at random times all day long.
My favorite thing so far this year, has been watching my five year old write simple love notes to her brother. She can now write "I love you" all by herself. And her favorite part is putting a "from ?" at the end.
Secret Christmas Buddies. To quote Martha, "it's a good thing!"
Want to get in on the action? Choose a buddy. Do something nice for him/her and leave one of these little cards in your wake. Guaranteed smiles and Christmas cheer!
Thursday, November 17, 2011
Christmas Candy Calendar
Many many years ago (more than ten?), we received a darling candy advent calendar as a neighbor gift from my good friend Kelley. She had taken a paper calendar and hot glued a wrapped Christmas candy on each day leading up to Christmas. My kids loved it! They loved it so much, that we have made them several times since. I even made over a hundred of them for all of the kids at church one year. (I told you I have a thing for advent calendars!!)
I thought I would share a slightly different version with you here today.
Since we have been on a bit of a service kick lately, why not incorporate the service with the candy? A hybrid if you will. Besides, everything is better with candy!
So, this is what you do. Everyday you take a candy off of the calendar. Quickly gobble up the delicious chocolate. But, don't throw away your wrapper just yet. Because written on the back of the wrapper is an act of service that you could perform some time during that day. It's like a fortune cookie--but better! It's chocolate!!
Want to make one?
You will need to print out a calendar onto heavy cardstock. I made one just for you!
Then you need to print out this sheet of service strips. Grab a piece of complimentary card stock and print these ideas on the back. I used the "older children" ideas from yesterday's post. I left some blank strips in case you want to create some service suggestions of your own.
Cut out your strips. You will need a bag of small individually wrapped candy bars. I used Hershey Nuggets. The above strips will be sized perfectly for them. If you use a different kind of candy, the strip size may need to be adjusted. You will also need some glue dots. I used the glue dots to secure the new wrappers to the candy bars. Then you will want to hot glue each candy bar into a square on the calendar.
Finally, back your paper calendar with a piece of poster board cut to size. (I actually cut down a file folder, because I didn't have any poster board on hand.) Don't skip this step if you are planning on hanging your calendar. The weight of the candy will cause your ribbon to rip through the paper if you don't! Which brings us to the last step--punch a couple of holes in the top and thread some ribbon through them. Hang in a place of prominence--and count down the days until Christmas!
Now that I have completed my candy calendar, I have a few suggestions:
1. It occurred to me (a little too late) that I should have turned the candy bars sideways...to avoid the candy slipping right out of the wrappers. Don't do what I did.
2. I think it would be super cute with some black sticker numbers on the candy bars themselves. I would have added this, but I didn't have enough sticker numbers. I suppose you could stamp some numbers onto the wrappers before you wrap the candy bars. Again--I thought of this a little too late.
3. You could make a calendar for each of your kids to avoid fighting over the candy. Or, you could just take turns each day. We have three kids. We just let them each take a turn, and luckily 24 is divisible by three. Mom and Dad could jump in and take a turn to even things out if they need to.
Enjoy! Serving others is sweet!
UPDATE: I have posted a 2012 calendar here!
I thought I would share a slightly different version with you here today.
Since we have been on a bit of a service kick lately, why not incorporate the service with the candy? A hybrid if you will. Besides, everything is better with candy!
So, this is what you do. Everyday you take a candy off of the calendar. Quickly gobble up the delicious chocolate. But, don't throw away your wrapper just yet. Because written on the back of the wrapper is an act of service that you could perform some time during that day. It's like a fortune cookie--but better! It's chocolate!!
Want to make one?
You will need to print out a calendar onto heavy cardstock. I made one just for you!
(This calendar was designed using products from Weeds & Wildflowers Designs)
Cut out your strips. You will need a bag of small individually wrapped candy bars. I used Hershey Nuggets. The above strips will be sized perfectly for them. If you use a different kind of candy, the strip size may need to be adjusted. You will also need some glue dots. I used the glue dots to secure the new wrappers to the candy bars. Then you will want to hot glue each candy bar into a square on the calendar.
Finally, back your paper calendar with a piece of poster board cut to size. (I actually cut down a file folder, because I didn't have any poster board on hand.) Don't skip this step if you are planning on hanging your calendar. The weight of the candy will cause your ribbon to rip through the paper if you don't! Which brings us to the last step--punch a couple of holes in the top and thread some ribbon through them. Hang in a place of prominence--and count down the days until Christmas!
Now that I have completed my candy calendar, I have a few suggestions:
1. It occurred to me (a little too late) that I should have turned the candy bars sideways...to avoid the candy slipping right out of the wrappers. Don't do what I did.
2. I think it would be super cute with some black sticker numbers on the candy bars themselves. I would have added this, but I didn't have enough sticker numbers. I suppose you could stamp some numbers onto the wrappers before you wrap the candy bars. Again--I thought of this a little too late.
3. You could make a calendar for each of your kids to avoid fighting over the candy. Or, you could just take turns each day. We have three kids. We just let them each take a turn, and luckily 24 is divisible by three. Mom and Dad could jump in and take a turn to even things out if they need to.
Enjoy! Serving others is sweet!
UPDATE: I have posted a 2012 calendar here!
Wednesday, November 16, 2011
Christmas Countdown-UPDATED
There are two things that you need to know:
Number one: I love love love advent calendars!
Number two: I teach a co-op preschool.
I teach with another mother in my neighborhood. We use this curriculum and I love everything about it. I have done this with both of my daughters. It's one of the best decisions that I have ever made. It is so much fun to spend a couple of hours a week teaching these cute little people. I highly recommend it. (And no, that is not a paid advertisement--just my heartfelt endorsement of a really great program!)
Anyway. Yesterday we started a new unit on sharing and service. It coordinates beautifully with the holiday season. To get things started, we made an advent calendar--a Christmas Service Countdown, if you will. I wanted to do something a little different than what was suggested in the manual. So, I came up with this:
Basically, there is a blank frame to showcase your child or their artwork. At the bottom of the page, there are 24 little acts of service written on strips. Each day (starting on December 1st) you rip a strip off the bottom and perform the service. These are really simple acts that any preschooler could complete. The idea is to help these little people focus on the true meaning of Christmas. When the strips are gone--it's Christmas day!
Want to make one for the kids in your life?
Print out the page with the blank frame above, by clicking here. Have your child draw a Christmas picture to insert in the frame. I used an X-acto knife to cut around the points of the star that overlap the frame. Then I had the kids color a picture of the nativity. (They thought the night sky needed a few more stars. Love it!)
You could also print out a 5x7 photo and glue it into the frame.
Then you just take a pair of scissors and cut between each service strip. Be sure to leave the top of each strip intact!
I've got plans to make a version that could accommodate a little older child. Watch for it soon!
UPDATE:
Here you go! I replaced the preschool service acts with some that are more appropriate for older children. To print this version, click here.
(This calendar was designed using products from weeds & wildflowers)
Sunday, November 13, 2011
blessing bags--take two!
Have you ever seen Disney's Mary Poppins? I love that show. My favorite part is when Mary is telling the children about the little old bird woman that sits on the steps of the cathedral. You know, the part when Mary sings "feed the birds". I think that is the most beautiful and moving song of the whole movie.
We had a cold storm blow through the past couple of days. Lots of wind and lots of rain (we were supposed to get snow-but no such luck!) Anyway, I've been thinking about those cold little birds. I decided to bless the birds today, since my sack lunch project is on hold.
Bird seed bags. They are all the rage (didn't you know?)
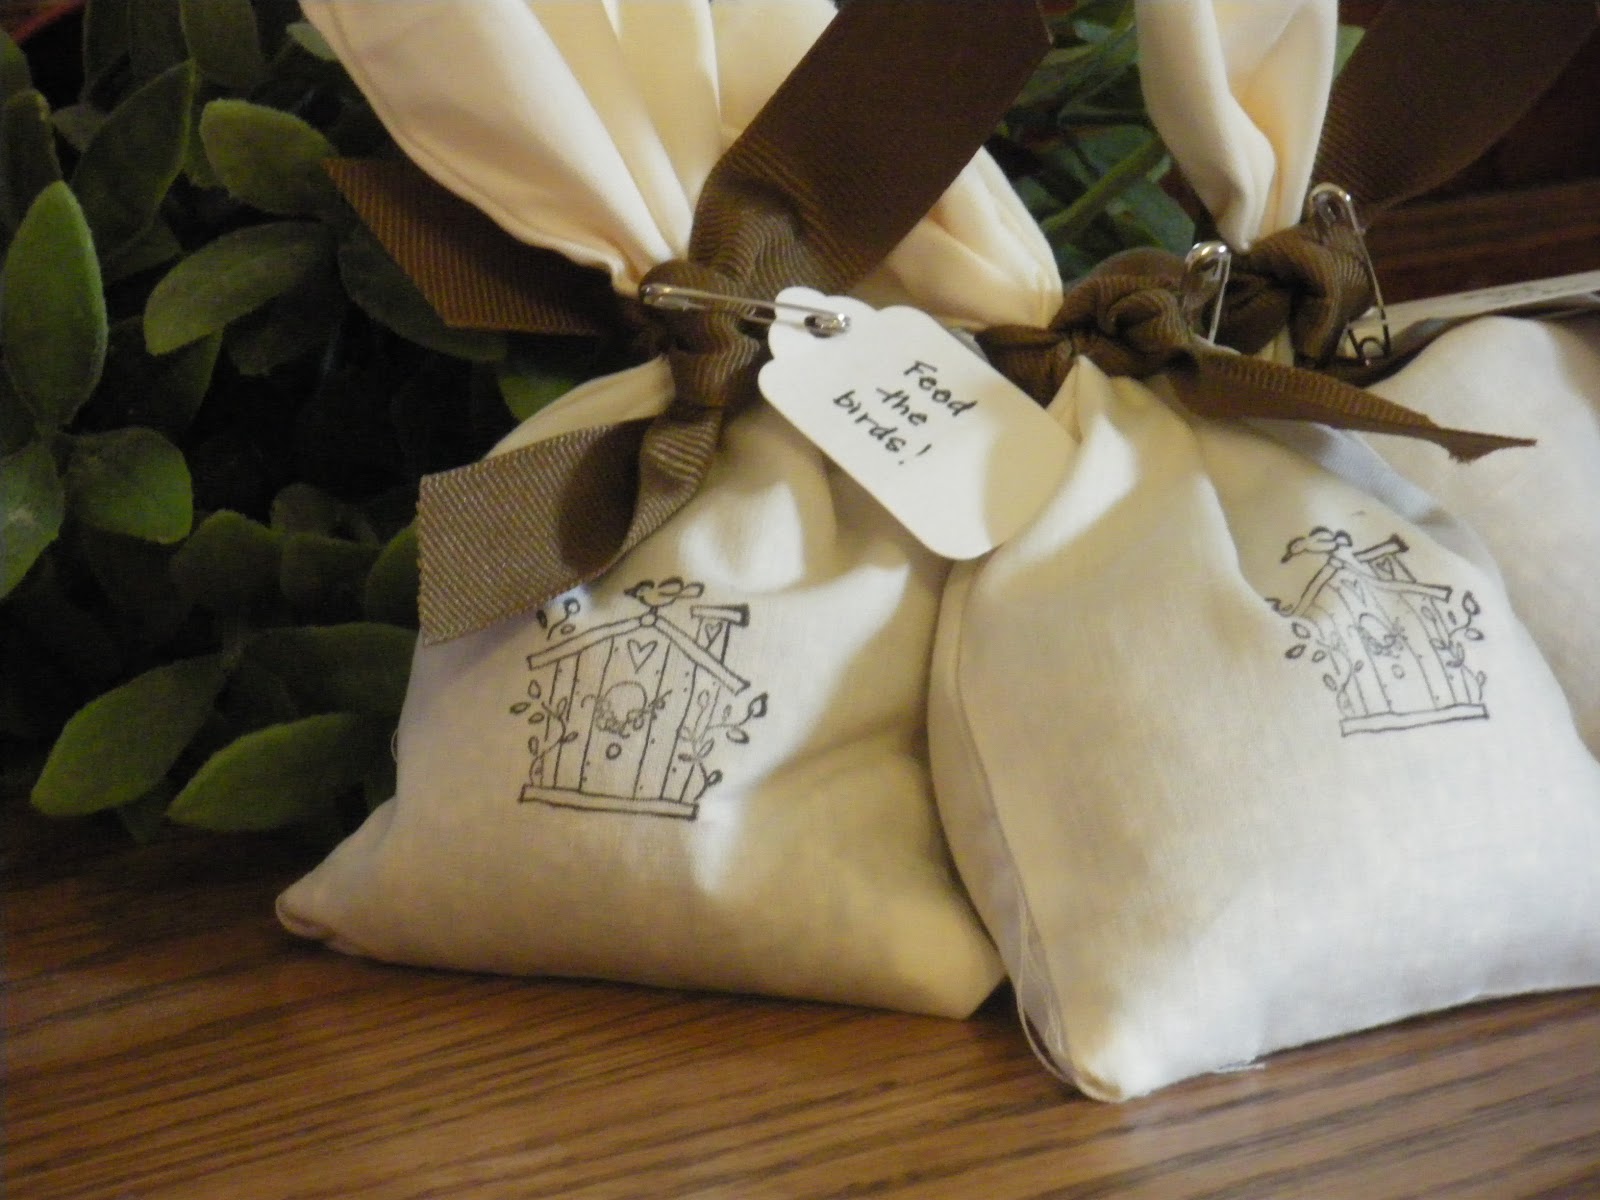
I just happened to have a half bag of birdseed leftover from another project. I cut some muslin into little squares and serged up the sides and across the bottom. Then I stamped this little graphic on the outside. Do you remember stamps? The rubber kind? Yeah. I had to dig pretty deep to find them, but I came out victorious.
Once your little bags are made, pour in some birdseed. Tie a ribbon to the top and add a little tag if you want. Then give them away to everyone you know.
Feed the birds. Tuppence a bag!
Blessing Bags
Bags brimming with blessings. I love that concept.
Julie from Joy's Hope promotes making blessing bags for the homeless. You can read about them here. This is a fabulous idea! What a great way to count your own blessings as you help others in need. Gather your family for the holidays, make some assignments, and bless the homeless!
There are all kinds of ways to package blessings.
Earlier this year some friends of mine got together to bag up all kinds of blessings for the children impacted by the devastating tornado in Joplin, Missouri. We gathered toys and supplies and packaged them up for distribution. Each person signed up to bring something (coloring books and crayons, jump ropes, toy cars, playdough, etc. etc) Wedumped organized everything on a big table and set about making our kits. Then we crammed carefully placed all of the bags in big suitcases to be taken to Joplin.
It was great fun. And it felt good to be helping in some way. We wanted to bless the children, but we were the ones that felt blessed. Isn't that just the way it works?
As I thought of other ways that I could package up blessings in a bag, I remembered that our local food and care coalition needs sack lunches to distribute to the homeless and hungry. We've done this many times before and it's a great way to get the family involved in helping others. Basically, you make sandwiches and compliment them with drinks, chips, fruit, and a cookie or treat. Bag them up and drop them off. It's easy. I called the coalition and I am waiting to be assigned a day. I was hoping to be able to do it this week as part of the Happy Day Project. Apparently, they have a lot of help this time of year. (Note to self--make sack lunches for the homeless during the off months. Like January-October!) So, as soon as I hear back and get the go-ahead, I will blog about our sacks of blessings.
But, what to do today?
I need something that I can throw together with supplies that I have on hand. I have an idea. I'll be right back!
Julie from Joy's Hope promotes making blessing bags for the homeless. You can read about them here. This is a fabulous idea! What a great way to count your own blessings as you help others in need. Gather your family for the holidays, make some assignments, and bless the homeless!
There are all kinds of ways to package blessings.
Earlier this year some friends of mine got together to bag up all kinds of blessings for the children impacted by the devastating tornado in Joplin, Missouri. We gathered toys and supplies and packaged them up for distribution. Each person signed up to bring something (coloring books and crayons, jump ropes, toy cars, playdough, etc. etc) We
It was great fun. And it felt good to be helping in some way. We wanted to bless the children, but we were the ones that felt blessed. Isn't that just the way it works?
As I thought of other ways that I could package up blessings in a bag, I remembered that our local food and care coalition needs sack lunches to distribute to the homeless and hungry. We've done this many times before and it's a great way to get the family involved in helping others. Basically, you make sandwiches and compliment them with drinks, chips, fruit, and a cookie or treat. Bag them up and drop them off. It's easy. I called the coalition and I am waiting to be assigned a day. I was hoping to be able to do it this week as part of the Happy Day Project. Apparently, they have a lot of help this time of year. (Note to self--make sack lunches for the homeless during the off months. Like January-October!) So, as soon as I hear back and get the go-ahead, I will blog about our sacks of blessings.
But, what to do today?
I need something that I can throw together with supplies that I have on hand. I have an idea. I'll be right back!
Saturday, November 12, 2011
Operation Gratitude
Happy Day Project: Day Six.
Assignment: Appreciate those in service.
As I looked around the web, I found a site called operation gratitude. This organization sends hundreds of thousands of care packages to the troops. There are lots of ways to get involved. It was exactly what I was looking for. What a great way to honor our service men and women and celebrate Veteran's Day! My family decided to write some letters of appreciation to send to the troops. I might also sew up some quick neck gators with some extra fleece I have tucked away in my stash. We'll see. I found some patriotic coloring pages online for my daughter to color, and I made some simple cards to write a little note on. Got too much going on today? This would be a great project for Sunday afternoon or family night on Monday! So grab a pen or pencil and let's get to work!
Print this page and cut in half to make two thank you cards. (This card was designed using papers from weeds & wildflowers)
If you live close by, I'd be more than happy to ship your letters and pictures with ours. Just drop them by before the end of next week.
Friday, November 11, 2011
Refreshing
Happy Day Project: Day Five.
Assignment: Refresh someone.
???
Refresh. Re. Fresh. Refreshing.
What do you think of when you think of refresh?
I think of walking on beaches and dipping in the pool, and lemonades, and crisp salads and naps. I think of spring and summer and new life.
This could be interesting, since it's fall and all. Bitter cold winds. Falling leaves. Shortened days and frosty windshields.
So, what to do? I had a plan. The plan was revised. We'll save that idea for another time. We are going for simple today. Simple and fast. It involves Sonic and a cute printable.
I have a memory of a few years back. It was the dead of winter. I had been sick for days. But, Moms can't be sick, right? There were still jobs that needed to be done. Children. Laundry. Dishes. Carpool. No rest for the weary, and sniff-ly, and miserable.
Enter my sweet friend. And a cherry limeade from Sonic. It was heaven. It was refreshing. It was revitalizing. It makes me feel better just thinking about it.
Grab a cherry limeade from Sonic. Go during happy hour (2-4pm) and get it for half-price! Slide this cute little tag on the straw and bring a little reminder of summer to a dear friend!
I actually made two sheets of printables. (the second one was made with papers designed by weeds & wildflowers) Don't you just love circle tags? Pick whichever one you like. Print. Cut-out. Punch two holes (one at the top and one directly beneath it at the bottom) and thread it on the straw.
Did you see the post on Joy's Hope today? Great minds think alike.
P.S. Can you believe we've gone over a week without a recipe?? That just won't do.
Thursday, November 10, 2011
gratitude journals
Happy Day Project: Day Four
Assignment: Give a book to a friend
I thought I would mesh my gratitude theme with the book assignment. And just like that we have...
The Gratitude Journal.
I'm sure that you are all familiar with the concept of a gratitude journal. Basically, every day you write down five things that you are grateful for. I picked up some very inexpensive pocket size notebooks from WalMart (less than a dollar). I liked the small size of these books. You could put it in your bedside table or toss it in your purse or backpack. I'm all for expressing gratitude while I wait for the carpool kids. Huh? Whatever.
To make them look a bit nicer, I picked out a piece of scrap cotton from my box and made a quick book cover. I figure that way, you can just replace the journal when it is full. Easy peasy.
I found some neat gratitude quotes and wrote them in some of the margins. Then I wrapped it all up with a bow.
Be grateful--it will help you be happy!
Assignment: Give a book to a friend
I thought I would mesh my gratitude theme with the book assignment. And just like that we have...
The Gratitude Journal.
I'm sure that you are all familiar with the concept of a gratitude journal. Basically, every day you write down five things that you are grateful for. I picked up some very inexpensive pocket size notebooks from WalMart (less than a dollar). I liked the small size of these books. You could put it in your bedside table or toss it in your purse or backpack. I'm all for expressing gratitude while I wait for the carpool kids. Huh? Whatever.
To make them look a bit nicer, I picked out a piece of scrap cotton from my box and made a quick book cover. I figure that way, you can just replace the journal when it is full. Easy peasy.
I found some neat gratitude quotes and wrote them in some of the margins. Then I wrapped it all up with a bow.
Be grateful--it will help you be happy!
As the months pass and you fill your journal with blessings, an inner shift in your reality will occur. Soon you will be delighted to discover how content and hopeful you are feeling. As you focus on the abundance rather than on the lack in your life, you will be designing a wonderful new blueprint for the future. This sense of fulfillment is gratitude at work, transforming your dreams into reality. (Simple Abundance)
Wednesday, November 9, 2011
We are all about the Happy!
Happy Day Project: Day Three
Assignment: gift card to the homeless
This assignment was a bit harder for me. We don't have a large contingent of homeless people in my little town. At least not in the traditional sense (stand on the corner and hold up a sign--brother can you spare a dime?)
We do have a lot of people that have lost their homes and are now living with relatives or friends.
We do have a lot of people that have lost their jobs and come up against hard times. So, I decided that I would rather focus on that. I made a little gift card holder and bought a card to a local grocery store. I am going to gift it to someone that I know that could use a little extra somethin-somethin. It was hard to choose just one person to help. I sure wish I could do more.
This card is made in two parts. It's really quick to put together. The first is the outer envelope. The second is a "sliding" tag that has a little pocket for the gift card. Awesome.
Do you want to make one too?
Assignment: gift card to the homeless
This assignment was a bit harder for me. We don't have a large contingent of homeless people in my little town. At least not in the traditional sense (stand on the corner and hold up a sign--brother can you spare a dime?)
We do have a lot of people that have lost their homes and are now living with relatives or friends.
We do have a lot of people that have lost their jobs and come up against hard times. So, I decided that I would rather focus on that. I made a little gift card holder and bought a card to a local grocery store. I am going to gift it to someone that I know that could use a little extra somethin-somethin. It was hard to choose just one person to help. I sure wish I could do more.
This card is made in two parts. It's really quick to put together. The first is the outer envelope. The second is a "sliding" tag that has a little pocket for the gift card. Awesome.
Do you want to make one too?
Subscribe to:
Posts (Atom)