Showing posts with label printable. Show all posts

Thursday, July 10, 2014

S'more Grateful


So, we've been out of town enjoying our summer together as a family.  And my wonderful neighbor volunteered to take care of our yard for us while we were gone.  This is no task for the faint of heart.  I have a lot of flowers that need to be tended to and watered manually.  It's kind of a pain.  Not to mention the vegetable gardens and the grass.  I wanted to do something nice for her.  Something fun.  Something summery.

What says summer more than...s'mores?


Nothing.  That's what.  So I ran to the store.  All you need is a package of fudge graham crackers and a package of marshmallows.  I love making s'mores this way.  The chocolate is already built in!  Delicious!
Just wrap it up with a tag and a bow and you are good to go!

Thanks neighbor!  You're the best!

Monday, March 17, 2014

[St Patrick's Day] Lucky No. 7


Is there a number luckier than seven?

How about when you add it to eleven?  I'm not talking eighteen.  I'm talking 7-eleven!  Nothing is luckier than that.  Especially when it involves Slurpees!

And a gift card.

My boy is in California.  He is a missionary for The Church of Jesus Christ of Latter-day Saints.  He is riding his bike in the California heat.  All day long.  This just might be the perfect way for him to stay cool this summer.   I'm thinking every high school and college student I know could put this to good use.  Cut two pieces of white card stock to measure 5 3/4 inches square.  Measure in 1 1/4 inches from one of the sides and fold.  Repeat with the other piece.  This little flap will eventually make the pocket for the gift card.  Click here for the "Lucky no. 7" printable.  Cut out the card front and glue it to one of the card stock pieces.  Line up the card stock so the flaps meet in the middle.  Glue carefully around the sides and the back of the flap.  Leave the front open.  That's where the gift card slides in!  I used some green patterned paper to embellish the pocket and the back of the card.  I wanted to leave the inside of my card white so I could write a little letter.  But whatever tickles your fancy.  Go crazy if you want.  Have fun.

Write a sentiment or two.  Send your love.  Then slip the gift card into the pocket.  Slide the card into an envelope and send that fun-mail on it's way!

Happy St Patrick's Day!

Tuesday, March 11, 2014

Root Beer Float Gift Tags

 
It's the month to be lucky!

I was lucky enough to find this idea on Pinterest yesterday by Making Life Whimsical.


Unfortunately the link on Pinterest led to nowhere productive.  That's unlucky.
(If you know where to find the true source, please leave me a comment.)

Luckily I had some time today to alter this very clever idea.

I needed a quick and inexpensive birthday gift for some friends that are lucky to be born in March.


Now you are lucky too!


Just click on the link and you can print your own Root Beer Float Birthday Tags.  Attach the tags and a straw with some ribbon to a bottle of IBC Root Beer.

So Lucky!


Friday, February 14, 2014

Valentine Soldier


If you've spent much time poking around this blog, then you know that I LOVE Valentine's Day!  It's my favorite.  Just click on the "Valentine" label in the right sidebar and you'll start to get an idea.  I couldn't let this week pass by without sharing a few of my latest Valentine creations with you. 

You can easily make a whole army of these traditional English soldiers in no time flat.  You will need some full sized Lifesaver rolls.  Mine measured 3.5 inches long.  You will also need a large black pompom.  Print out the soldier's uniform here.  Cut it out and wrap it around the lifesaver roll.  You will want to secure it with glue or tape.  Then glue the pompom on top for his hat.

And just like that...you have a super cute valentine to give to all of your friends.

I attached mine to this here little card.  If you want it to be really glossy and crisp, you could print it out as a photo like I did.  Or you could print it out on cardstock.  There are just so many options!  I  mounted mine on red cardstock.  Punched a couple of holes and tied my little soldier onto the card with some baker's twine.

Happy Valentine's Day!

Thursday, February 13, 2014

[Valentine] Peas be Mine


The PEAS are back!! Hip Hip Hooray!  If you missed my first pea post, you'll want to click here for sure.  I think these little green sixlets are just about the cutest things ever.  And don't they look just like peas??


This is what my seven year old daughter is handing out to her classmates this year.  There is a bit of irony going on here.  My daughter hates peas.  But when she discovered they were chocolate.  She was totally on board.  And really, nothing says first grade more than a knock knock joke!  It's all about the jokes here people!  I am loving the fact that it's not too much candy.  Just a little taste and that's enough.  Know what I mean?


I had some cute little plastic pillow boxes that were screaming to be used for this project.  You could just as easily put the peas in a tiny little bag.  Just attach the peas to the card with some sticky tape or a ribbon or BOTH.  And send these off to school.  Done.

Want to print some for yourself?  Click here.

*****
 I bought my green sixlets at Hobby Lobby with a coupon and it only came to like three bucks.  AND  we only used about half the bag.  Happy happy.

Tuesday, February 11, 2014

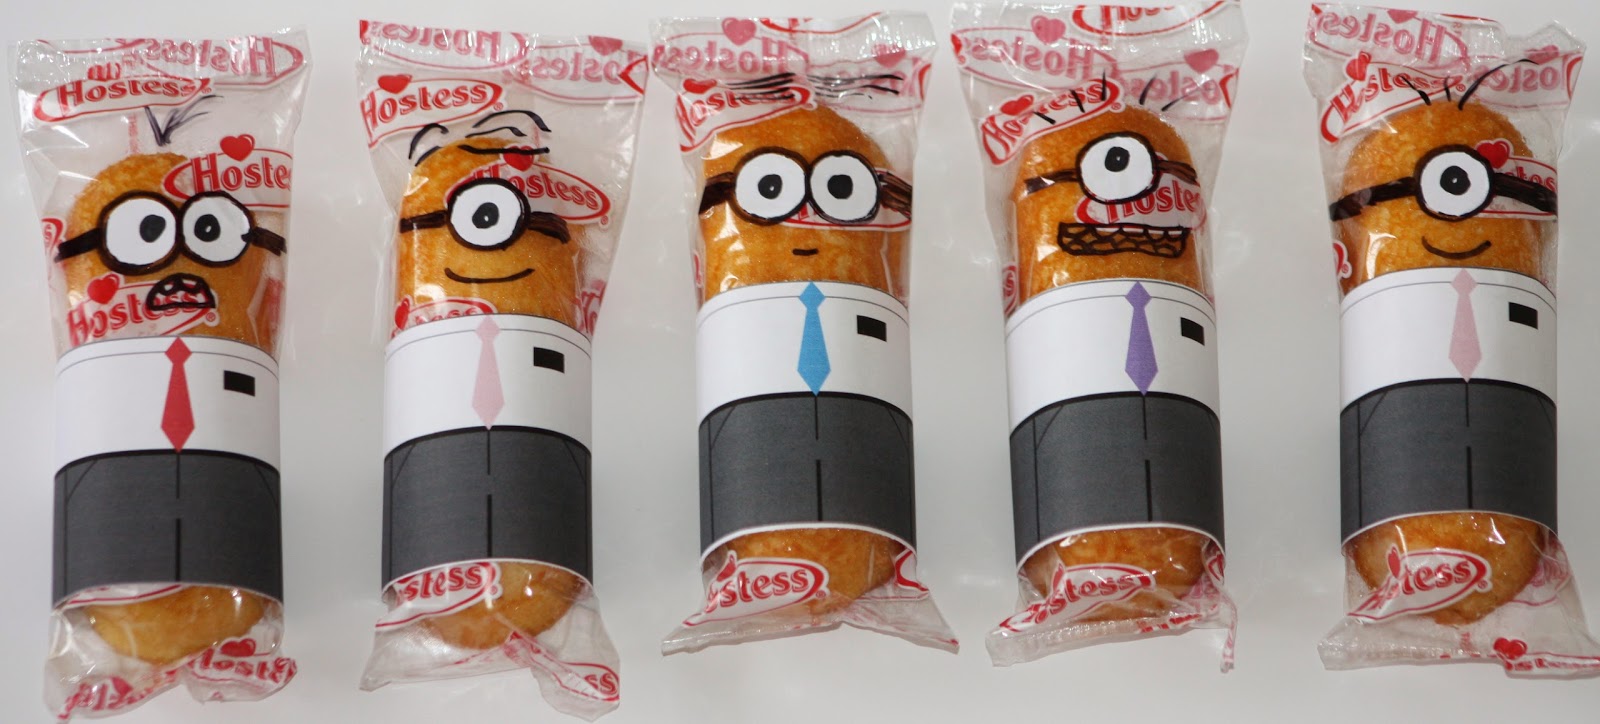
To Our Favorite Minionary!

 
I just couldn't resist.  Minionaries!  These make for a great care package.   We are sending ours for Valentine's Day.  But anytime is a good time.  Bring a smile to your missionary's face in just six easy steps.

1.  Buy a package of Twinkies.  Or Cloud Cakes.  If you can find one without any printing on the cellophane packaging you win a prize!  Be sure to leave me a comment and let me know how you did it!
(**One of my readers found some!!  Buy the WalMart generic "twinkies".  They don't have any printing on the packaging :)

2.  Purchase and print out this handy printable on regular old white printer paper.  And relish in the fact that there is very little usage of colored ink!

3.  Cut out the missionary "clothes" and tape to the Twinkie.  I used glue dots.

4.  Punch some "eyeballs" from a white sticker or address label and adhere to the Twinkie.

5.  Using a black sharpie..embellish to your heart's content.  I warn you that this is quite addicting and sooo much fun!

6.  Package them up and mail them off!

I promise that you will be able to hear the squeals of delight from half-way around the globe.


If you are looking for something fun for your Sister Missionary...you can find Sister Minionaries here!


*****
linking up with:

Thursday, January 16, 2014

[Valentine] A Classic Combination


Isn't about time we did a little doorbell ditchin?  Valentine style?  I thought so too.  I found these aluminum pans with cardboard lids at WalMart.  They weren't much more than a dollar for three pans.  They measure about eight inches by six inches.  These are the perfect vehicle for ditchin' some homemade treats.


I went ahead and designed a fun Valentine lid to put on top of the pans.  The cool thing is...you have so many treat options.  Just think of something that combines classic flavors.

Cookies are at the top of my list.  Chocolate chip.  Sugar cookies with buttercream  frosting and sprinkles.  Homemade Oreos.  Snickerdoodles.  Peanut butter dipped in chocolate.  Mmmm.

Or if cookies aren't your thing, you could go with Sweetheart Popcorn.  Or Valentine Chex Mix.  Or Pink Party Mix.  All solid choices.

Bake up those delicious treats and package them into your pan.  Print out the box lid onto heavy card stock.  Crimp down the foil edges and you are ready for business.

I suppose if you weren't in a ninja doorbell ditchin' kind of mood...you could just hand deliver them with a smile.  That would be fun too.

For an alternate box lid...click here.  Just a friendly warning.  These may be ink intensive.  You might want to print them at your local copy shop.

Friday, December 13, 2013

Tag--you're it!


I've been making confections like nobody's business for the past week.  Eight batches of fudge.  Six batches of caramel.  Peppermint Bark.  And Christmas Pretzels.  Lots and lots of pretzels.  Hundreds.  Now it's time to package all of these goodies up.  Candy boxes.  Cellophane bags.  Red and green ribbons.  Check.  Check.  Double Check.  OH yeah...and tags.  Ummm.


No tags.  Well, that just won't do.  So I tried my hand at the ever popular chalkboard tags.  And this is what I came up with.  My beef is that these take so much black ink to print out.  So, I decided to have them printed at Costco.  I fit two tags on an 4x6 photo.  The cost is 6 1/2 cents per tag.  I don't know if that's cheaper in the long run than an ink cartridge.  But I like to think it is.  I hate buying printer ink.  And it never runs out at a convenient time.  Am I right?


Anyway, here is the file if you would like to make some chalkboard tags of your own.  Make sure you check the matte or flat option when you are ordering your prints.  Chalkboard tags are NOT meant to be glossy.  Just a little helpful tip.

Merry Christmas!

Friday, November 22, 2013

Bundle-Up Buttercup!

Today I am thankful for warmth!

It's freezing outside.  I am so grateful for a warm home to live in.  For hot food right out of the oven.  And for warm blankets to snuggle up in.

I came up with this little gem...to encourage warm hearts and warm hands.


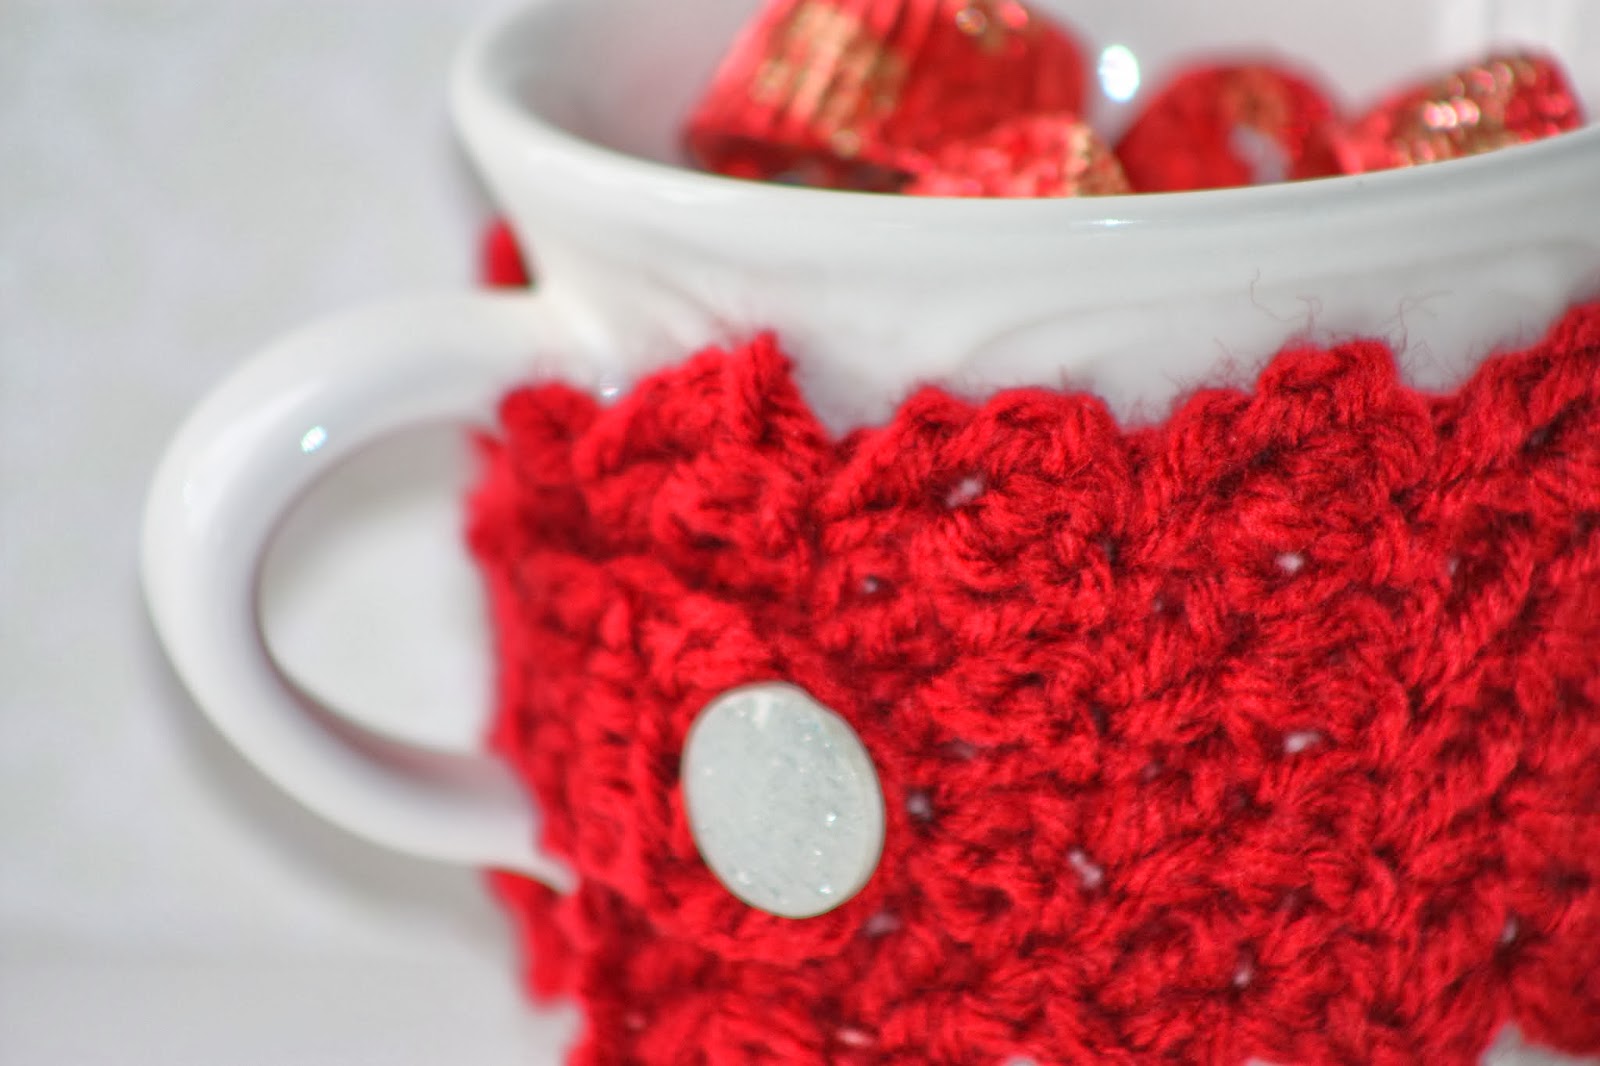
I picked up a mug for pennies at the good will.  For fun, I added a mug cozy.  I'm not super skilled or proficient at crocheting, but in no time at all, I had finished this cutie.  I modified this pattern  just a little.  I liked the look of the scalloped edges, so I didn't edge the cozy with a single crochet stitch.  Give it a try...if I can do it, you can too!  And it was so fun, that I made quite a few.  Just sew on a random button from your stash and wrap it snugly around your mug.


Fill your mug with some (peanut) buttercups!  Add this cute little tag and you're all set for warming up somebody's day.


*****
I'm linking up with:

Sunday, November 3, 2013

[The Gratitude Project] Lifesaver Challenge--Updated


I love November.  I love being reminded to slow down and be grateful.  Life is such a blessing.  We have been given so much.  We had a wonderful lesson at church today about gratitude.  Someone told of a challenge they were given as a teenager to pop a lifesaver in their mouth just before they started to pray.  And then offer a prayer of gratitude--thanking God for all their blessings until their lifesaver was gone.


That little nudge was all I needed to come up with these gratitude "matchbook" favors.  I'm calling it "The Lifesaver Challenge".  Maybe you could use it as a little hand out for a lesson at church or family home evening or whatever.  These little matchbooks are very easy to make.  Just print out a sheet of them here.  Then cut along the black lines and fold along the light grey lines.  Staple a lifesaver candy under the tab at the bottom.  Then slide the top under the flap.  Wow.  How easy was that? 


I'm going to participate in the lifesaver challenge today.  These three punks will be at the TOP of my list.  Want to do it with me?  Leave a comment about some of the things you thanked God for.  I can't wait to hear how He has blessed you!

*****

I'm linking up with:
Skip To My Lou 
The Party Bunch

Monday, June 24, 2013

Pocket Notes


Have you ever just wished you had a little card on hand for those spur of the moment occasions when you want to leave a little note for someone?  I have found myself in this situation a lot lately.  You just have a few seconds.  You don't need to send flowers.  You don't need to give a batch of your favorite treat.  You just need or want to write a few quick words on something more than the back of a WalMart receipt.  Know what I mean?

Well, I think I've found the solution.  I like to call them "pocket notes".  They fit perfectly in your pocket or more likely your purse.  The are the size of a business card.  These are perfect for sliding under someone's windshield wiper, or slipping into their backpack or purse.  You can slide them inside a door frame or tuck them into a coat pocket.  These would be the perfect accompaniment to acts of random kindness. 

I've made it super easy for you.  Just print them out here.  You can use a sheet of printable business cards (Avery 8371) or just print on a sheet of card stock and cut them out with a paper cutter or scissors.

It's just that simple.  Now go and express yourself!

Friday, June 21, 2013

[New Neighbors] The S'more the Merrier!


Wow, I think it's high time that I came out of retirement, don't you?  We have had week after week of really awesome family stuff that has unfortunately taken me away from this here blog.  But, things are simmering down now, and I'm ready to bring you some fun new ideas.

The economy must be picking up a bit, because after years of stagnation, the homes in our neighborhood are starting to sell.  And lots and lots of people are moving in and out.  It's always sad to say good-bye to long time friends and neighbors.  But the prospect of making new friends is something to look forward to.

I have been wanting to take a little treat around to all of the new folks to officially welcome them into the neighborhood.  This is what I came up with!  There's nothing quite like s'mores in the summertime!


I grabbed some supplies from my local grocery store.  I love to use Keebler chocolate grahams.   Less mess and less fuss.  Peanut Butter grahams and Grasshopper grahams are also delicious. You will also want to buy a bag of marshmallows.  Wrap them up with some burlap and twine and attach this free printable.  You have two options for printing.  I sent this file to Costco and had it printed on photo paper.  Or you can print this page right from your own printer onto card stock and trim as necessary.  I also opted to cut around the edges with a pair of scalloped scissors.  And there you have it...Presto!  A fun neighbor gift for just a couple of bucks.

Now all you have to do is walk next door and say hello!

Friday, March 29, 2013

[Easter] Hunt Surprise


So, I've been thinking.  Lots of families around here have long standing Easter traditions.  They gather with friends and family to celebrate the season.  But maybe you know of one or two that just aren't up to the task this year.  Or maybe just someone that needs a little extra TLC.  Why not provide a little Easter fun for someone else?  It's not that hard and it could just become a family tradition of your own.


Gather some supplies for a good old fashioned egg hunt.  I used plastic eggs.  You will need twenty-four of them if you are going to use the printable that I am providing.  Fill them with jelly beans and other goodies.  They don't have to be sweets.  You could use small toys or money or whatever tickles your fancy.  You could number them if you want to or seal them with washi tape.


Now put them in a festive container.  This cute Easter bag comes to mind.  Or you could use a fun bucket or a spare basket.  Or some bunny britches! You could even add a cute stuffed bunny for good measure if you'd like.  You can never have too many bunnies!


Now comes the fun part.  You have to be all ninja-like.  Gather the kids and explain the procedure.  You are going to sneak up on the family you would like to surprise.  Quietly hide the eggs in their yard.  You might want to go when you know they aren't home or when their blinds/curtains are closed.  I would stick to the front yard to avoid dogs and such.  When you are done hiding all of the eggs...leave your empty Easter bag (or bucket or basket) on their porch.  Be sure to attach a fun tag to explain the fine points of the Easter Hunt Surprise!  Click here for an orange version or here for a pink version.

Then ring the door bell and run like the wind!

Door bell ditching Easter style!  Gotta love it!

Happy Hunting!

Linking up with:

Thursday, March 21, 2013

[Easter] Roll A Bunny Dice Game

 
You knew it was coming, right?  I'm sure you are familiar with the drill by now.  If not you could refer to this
or this or this.  All you need is a die, a pencil, and this lovely free printable.  Enjoy!

I'm linking up with:

Wednesday, February 13, 2013

[Valentine] You Drive Me Crazy


One Valentine.  Multiple applications.


Have a special little boy in your life?  I've got you covered.


Have a lot of little boys in your classroom?  I've got you covered.


Have a grown-up driver in your life?  I've totally got you covered.
Just slip a few car wash vouchers in a bag and you're good to go.  Or a new key chain.  Or anything car related.  Go crazy!

Click on over here for the printable!

Friday, February 1, 2013

Just a Note

 
I've been needing to send some notes to friends and family.  Thought you'd like to join in on the fun!  Here's a free printable.  Happy weekend everyone!

Saturday, January 26, 2013

[Valentine] Like Cookies and Cream


Valentine's Day is right around the corner!  It's one of my most favorite holidays.  And it's high time that we started getting our craft on.  This is a very simple no nonsense valentine that would be perfect for the classroom.  Easy to make.  Easy to reproduce.  Kid friendly.  Affordable.  Like I said--it's perfect!

Let's start by gathering our supplies.

You will need:
a package or two of Oreo cookies
Small plastic treat bags
Treat bag toppers (see below)
A stapler and staples

1.  Print and assemble your bag toppers.  This should be fairly self-explanatory.  Cut them out.  Fold them.  Have your child address them.**

2.  Put a couple of cookies in the treat bag.  I chose Oreo cookies.  (Double stuffed-duh.  You could go with any sandwich type cookie obviously)

3.  Staple the topper to the top of the bag.


Wha-la!  You are done.

I told you that would be easy.  Now go enjoy a cup of hot cocoa.  Pat yourself on the back.  Because your valentines are all taken care of.

**There is an alternative way to make these toppers.  I know that some of you are averse to all that spendy computer ink.  Don't worry, I've got your back.  The second option that you have is to buy some cute  cardstock at your local craft store.  Cut it into rectangles.  Mine measured about 3.5 inches by 4.5 inches.  Fold those in half.  Your topper should now measure about 1.75 inches by 4.5 inches.  Print out the "white" part of the tag here.  Cut them out and glue them onto your cardstock toppers.  You will have to hand write the greeting on the back.  Sorry.  There are sacrifices that come with saving a few bucks.

I'm linking up with:

Wednesday, January 23, 2013

[Valentine] Love Bug Game


Do you need a little game for a class party?  Or just something fun to do with the kids for family night?  Here is a simple Valentine dice game.  Print out the game cards.  Grab some dice and a pencil.  And channel you inner Picasso.  Ready...set...go!

Wednesday, January 16, 2013

Think to Thank


I've still got a lot of thanking to do.  I created this colorful card the other day and thought maybe you'd like to print a few too.  Happy Wednesday everyone!

Friday, January 11, 2013

Peas...and thank you!

 
I have found myself lately on the receiving end of some incredible acts of kindness.  I've been racking my brain trying to think of a clever way to show how much I appreciate the thoughtfulness. Guess what I came up with?  PEAS.  Well, of course.


Don't you just love peas?  They are one of my favorite veggies.  There are those in the world that are averse to peas.  No worries.  These are not real peas.  They are really green sixlets in disguise.  I'm pretty sure that everyone in the whole wide world loves sixlets.  So these are the perfect thank you accompaniment.

I found a large bag of green sixlets at Hobby Lobby in the wedding department.  You could probably find them at other party and wedding supply stores.  There are enough sixlets in the bag to make four or five thank you gifts, like the one I made above. Use a coupon.  Coupons are the best!  I put my peas in a clear plastic pillow box.  But a small bag or box would work just fine.  Tie it with a ribbon.  Ribbons are not optional.  Then just print out a tag  and you're gold!

Peas--they're the new chocolate!

Linking up with:

Related Posts Plugin for WordPress, Blogger...