Showing posts with label teacher appreciation. Show all posts

Monday, April 22, 2013

[teacher appreciation] Door Decoration


We have a tradition in our elementary school of decorating the teachers' classroom doors for teacher appreciation week.  I was asked to decorate my daughter's Kindergarten door for her teacher.  I thought about it for a long time.  Her teacher is amazing!  She loves to read and has instilled this love in her students.  I wanted to do something that involved children's literature.  I thought it might be fun to use an illustration from a children's book to show our teacher how much we appreciate her.

We love Mo Willems at our house.  If you aren't familiar with his works, run to your nearest library and check out a book or two or three or ten!  They are delightful!  My daughter is especially fond of the Elephant & Piggie Books.  The last time we went to the library we really did check out about a dozen of them.  Our all time favorite is There Is a Bird On Your Head .  But I found a fun illustration in his book I Am Invited To A Party that I wanted to use for our teacher's door decoration.

First thing you need to do is to acquire the book or the illustration that you want to use.  I scanned the page into my computer.  Then I used our projector to enlarge the image.

Now you need to trace the image onto a large piece of paper or posterboard.  I just lightly traced the image with a pencil.

Once you have captured the basic image, you can trace it with a black marker.  Have you tried the new Sharpies with a brush tip??  I am in love!  The funnest marker I have ever used.  Not kidding.  Outline the image in black and then color as desired.  I used mostly markers to bring my image to life.  You could also use crayons, pencils, or chalk.  I actually did use chalk to color most of Elephant's body.  It was just too much surface area to color with the marker.
 

Now all you have to do is cut out your image with a pair of scissors.

I had pre-measured the teacher's door which proved to be very handy.  My daughter's teacher always leaves her door open.  So, I had to work around the push bar.  Which was kind of a pain.  The other side of the door probably would have been easier.  I grabbed some bulletin board paper from the teachers' workroom while I was at the school earlier in the week.  You know what I mean, right?  The big rolls of colored paper?  I pulled out and cut a little more than I needed.  When I got home I measured out the roll of paper and cut it to the exact size.

If you want to write a fun phrase about your teacher, you will need to cut out some letters.  Or you could just draw or paint them right onto your paper.  I chose to cut some out.  And I did it old school baby!  I used a large stencil set and hand cut each letter.


I wanted to assemble everything on-site.  So I hauled all of my supplies to the school.  I taped the colored roll paper to the door.  Then I attached my images and my letters.


There you have it!  You knew I would add some bunting, right?  I think it turned out pretty fun.

*****

As I was cutting out the letters, my six year old asked me what I was doing.  I told her what I was going to write on the paper..."Mrs. Crockett makes learning fun!"  Her response?  "She really really does!"

Thanks to all the great teachers out there!  We appreciate you!

Friday, April 12, 2013

[Teacher Appreciation] Alphabet Gifts


I thought this was such a fun idea for a preschool or kindergarten teacher.  I received a letter from my daughter's room mother.  She sent a white lunch sack home with each student with a letter of the alphabet on it.  Our assignment was to put some small gifts for the teacher in the bag.  The gifts needed to be items that start with that letter of the alphabet.  They could be homemade, store bought, or whatever.  And they needed to be able to fit inside of the bag.  We've been out of town, so I only had one afternoon to put mine together.  I probably could have been a little more creative if I had known earlier.  Oh well.

We were actually one of the lucky ones.  We were given two bags to fill.  We were assigned the letters N and Y.  "N"  was fairly easy.  We decided to get some nail care products (nail polish, nail files, etc), a notepad, and some Hershey Nuggets.  Some other ideas we were considering...a necklace, Nutter Butters, Newtons, and Nerds.  The letter "Y" was a little harder.  We went with YooHoo drink packets, yogurt covered pretzels, York peppermint patties, and a gift card for frozen yogurt.  Some other ideas we thought of were Yahtzee, a yo-yo, and anything yellow.

My daughter loves her kindergarten teacher--and so do I!  She does such a fantastic job.  I'm sure that you feel the same way about the teachers in your life.   Take a minute to do something nice to thank them for all they do.

I've got a few other "appreciation" tricks up my sleeve...so be sure to stick around!


Tuesday, March 26, 2013

[Easter] Spring Bouquet


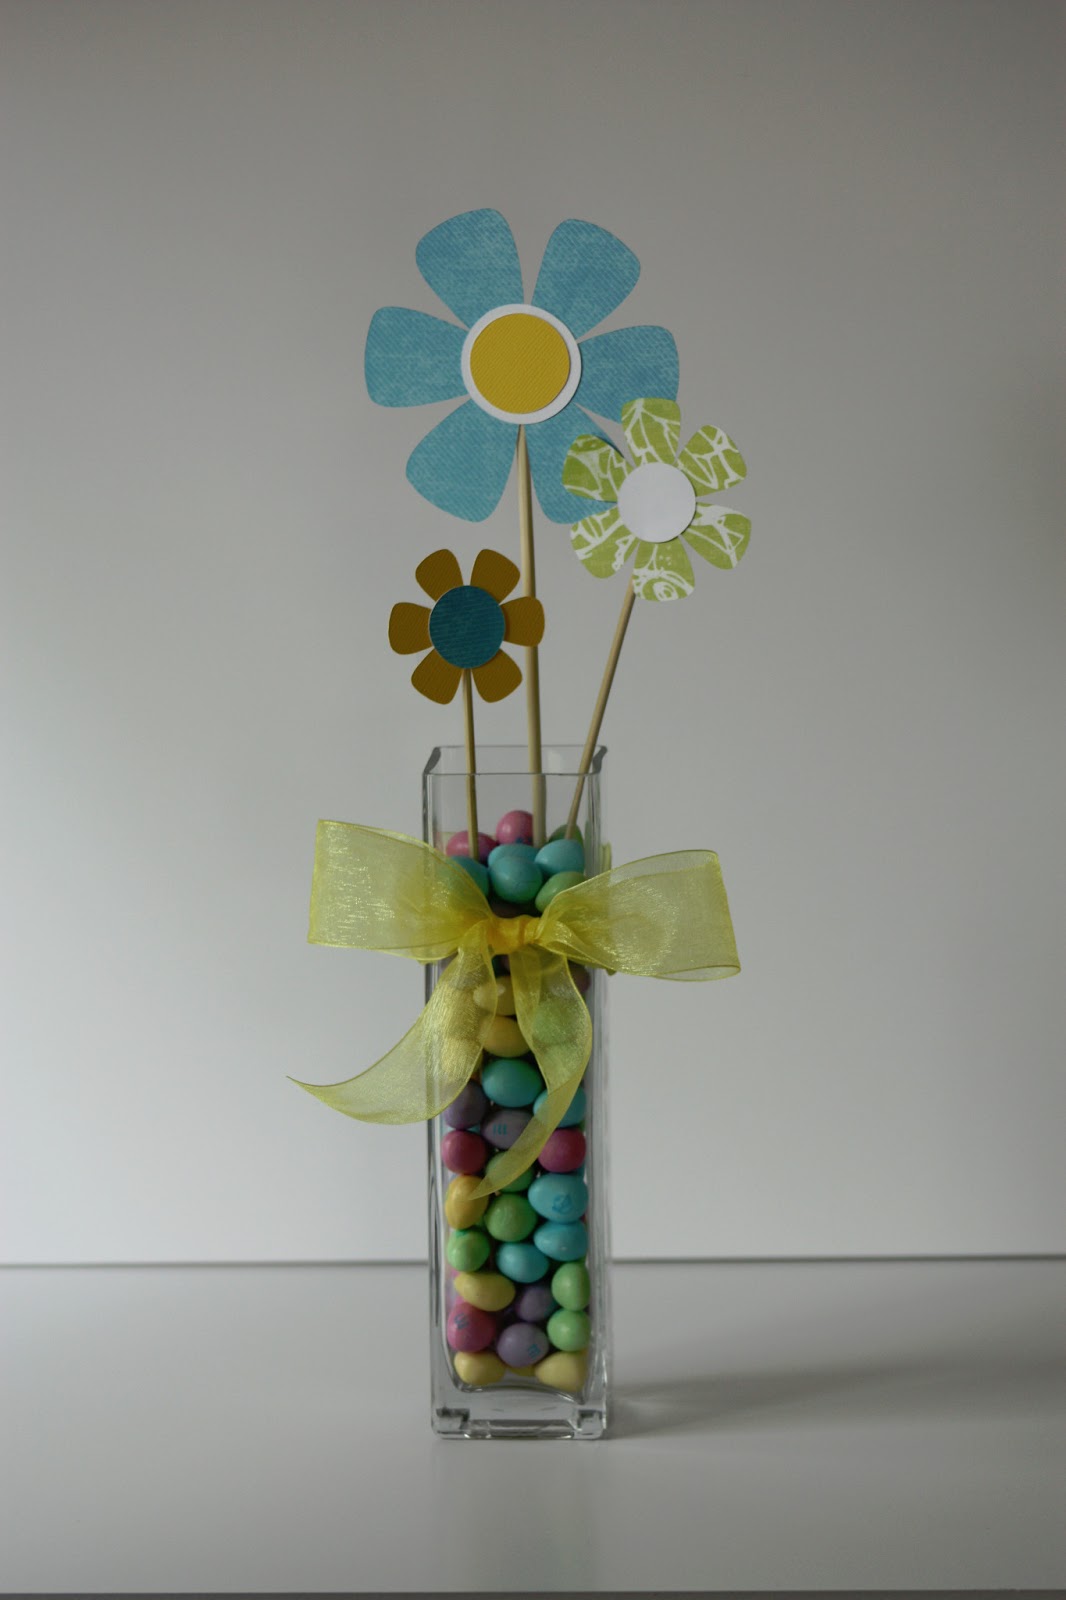
I just had to share this with you.  Is this not the cutest thing you have ever seen?  My friend Kelley gave this to me last week and I absolutely love it.  Love. 


I'm sure you could figure this out on your own just from the picture.  But, I'll run through it anyway.  Why not?  She basically took a rectangular bud vase and filled it with peanut m&m's.  I'm sure any small pastel candy would work.  Pick a favorite.  Then she attached three paper flowers--that I am sure she crafted all on her own.  Because that's the kind of awesome that is Kelley.  And paper flowers are kind of her signature.  She does amazing things with paper flowers.  Anyway,  attach the paper flowers to some long wooden skewers.  Stick the flowers into the vase and arrange them all pretty-like.  Then tie an organza bow around the vase!

And there you have it!  These would make super cute centerpieces for your Easter table.  Or how about a teacher appreciation gift?  Or just because.  Give one to a friend.  It will make them happy.

Wednesday, January 16, 2013

Think to Thank


I've still got a lot of thanking to do.  I created this colorful card the other day and thought maybe you'd like to print a few too.  Happy Wednesday everyone!

Monday, January 14, 2013

[Valentine] Share the Love Candy Wreath


This is procrastination done right.  That's what this is.  I totally intended to make a candy wreath for Christmas.  I had a bucket of candy waiting in the pantry for me to have a few spare minutes.  But, I got over-run by all of the Christmas madness.  The good news?  Most of my candy was red and/or white.  It totally works for Valentine's day.  Three cheers for procrastination!!

I love this wreath.  It's heart shaped.  It's red.  It's delicious.  It's totally easy to make and is guaranteed to bring a smile to everyone you share it with.

Do you need a valentine for Great Grandma who is in the care center?  This is the perfect wreath to hang on her door.  Visitors can enjoy a little piece of candy while they chat.  Just pluck a piece right off.

Maybe you need a valentine gift for your favorite Kindergarten teacher.  Again, this is the perfect solution.  She can hang it on her classroom door and when she feels the time is right she can share a piece of candy with the children or her co-workers.

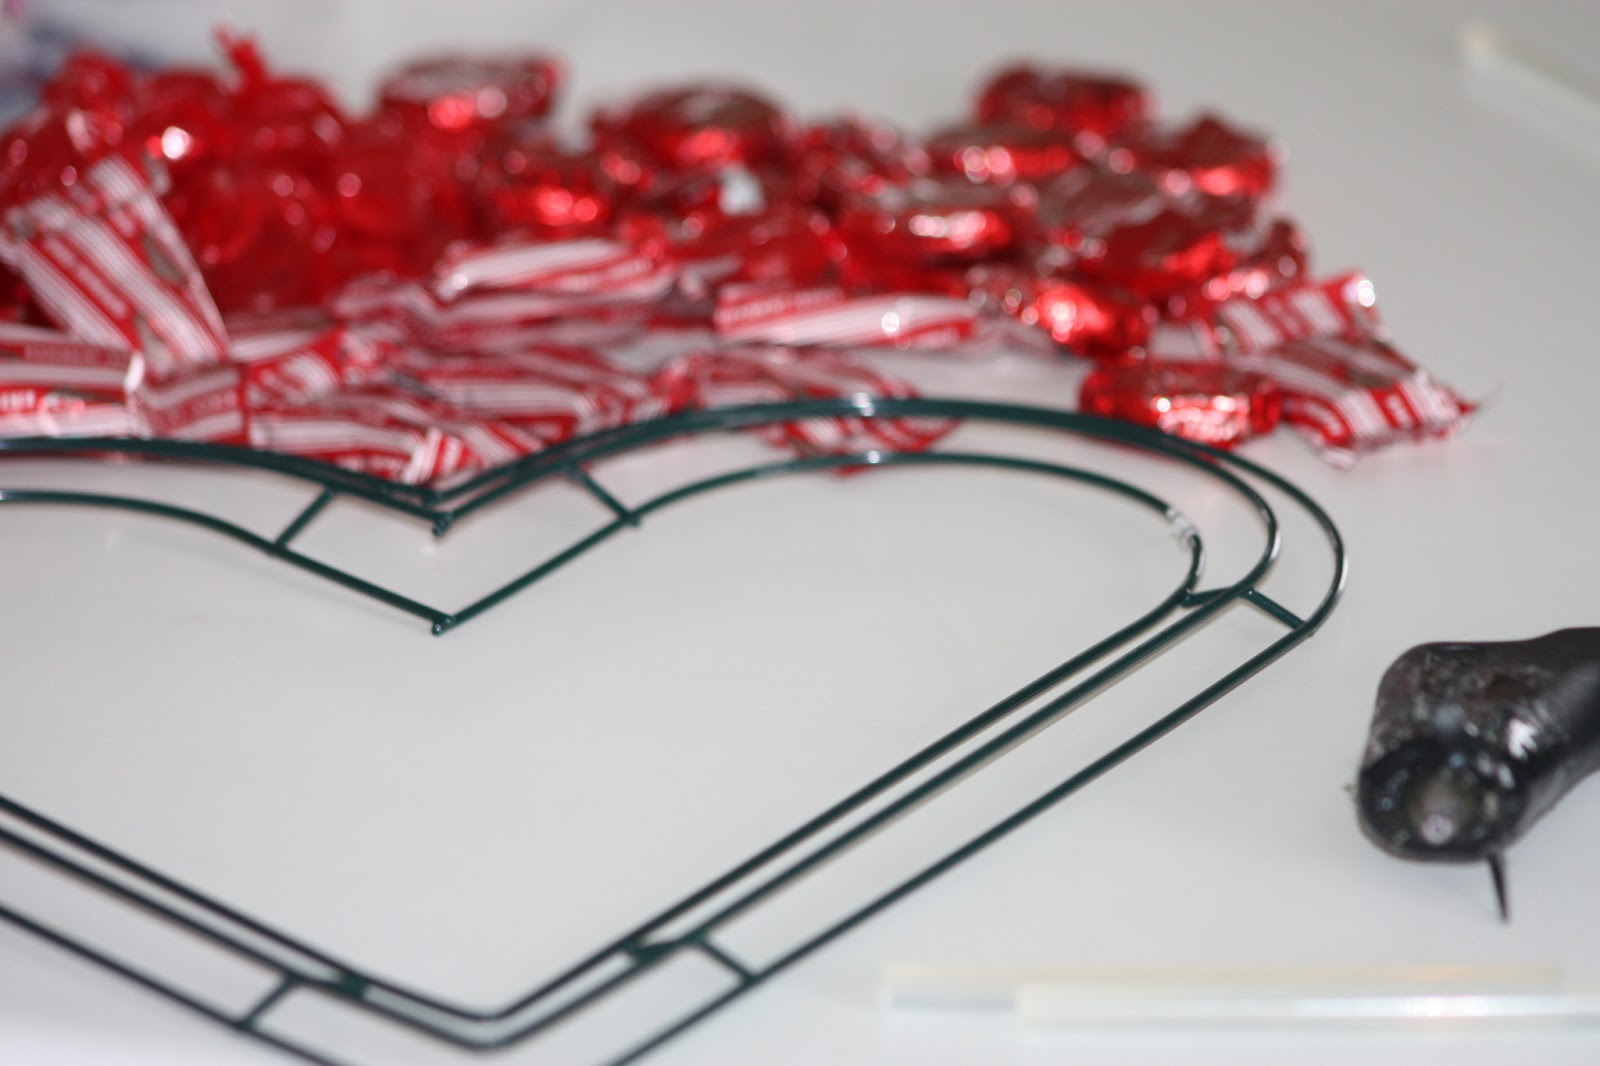
So, let's get busy.  You will need a heart shaped wreath form.  Styrofoam will work.  I happened to have a metal form.  It worked fine too.  You will also need some candy.  And a glue gun.  That's it.


Set out your candy and decide how you would like to arrange it.  Then carefully glue each piece onto the form.  Just keep gluing and layering.


In just a few minutes you will have a beautiful lush candy wreath!

Wrap it up with a bow and hang it in a place of distinction.

There you go.  Now go share the love!

I'm linking up with:

Friday, January 11, 2013

Peas...and thank you!

 
I have found myself lately on the receiving end of some incredible acts of kindness.  I've been racking my brain trying to think of a clever way to show how much I appreciate the thoughtfulness. Guess what I came up with?  PEAS.  Well, of course.


Don't you just love peas?  They are one of my favorite veggies.  There are those in the world that are averse to peas.  No worries.  These are not real peas.  They are really green sixlets in disguise.  I'm pretty sure that everyone in the whole wide world loves sixlets.  So these are the perfect thank you accompaniment.

I found a large bag of green sixlets at Hobby Lobby in the wedding department.  You could probably find them at other party and wedding supply stores.  There are enough sixlets in the bag to make four or five thank you gifts, like the one I made above. Use a coupon.  Coupons are the best!  I put my peas in a clear plastic pillow box.  But a small bag or box would work just fine.  Tie it with a ribbon.  Ribbons are not optional.  Then just print out a tag  and you're gold!

Peas--they're the new chocolate!

Linking up with:

Friday, April 27, 2012

Notes of Appreciation


Personal notes.  A whole pack of them.  Written by you and your kids.  Or a classroom of kids.  Just fill in the blanks or write a personal note right on top of the graphic or on the back.  Whatever.


What better way to say thanks to a special teacher?  The cuteness lies in the packaging.  Have you ever made your own notepad?  You are going to love this.  This is a skill that every crafter needs to have in their bag of tricks.  The options are endless.

For our intents and purposes, you will need the following:

padding compound
binder clips
piece of heavy card stock
small paint brush
cover pages and thank you notes-click here

Step One:  Print out the notes.  Just click on the link above and print away.  There should be three pages worth.  I printed mine on card stock.

Step Two:  Cut the notes out with a paper cutter.


Step Three:  Stack your notes together.  Make sure they are all facing the right direction.  Put the cover page on top on the back cover--well, on the back.  Make sure it faces out.

Step Four:  You are going to want to sandwich your notepad with a heavier card stock to prevent drips down the front or the back.  I used the back of an old steno pad.  I just cut it about the same size as my note cards.  It doesn't matter if it looks pretty.  You are going to discard these two pieces before we are done.


Step Five:  Tap your note cards (and ugly card stock) on the tabletop so the tops and sides are all aligned.  Hold them in place with binder clips.

Step Six:  You want quite a bit of pressure on your paper, so the bonding compound doesn't drip down in between.  I decided to use some thin pieces of wood to even out the pressure.  You will also want to clamp it down tight with some heavy binder clips.  My honey insisted on using the mega clamps from the wood shop.  If you've got em--use em.  If not, I'm sure binder clips will work just fine.  If you are worried about it, practice with some scratch notepads.


Step Seven:  Open your padding compound.  You can buy it here.  We inherited this vintage jar from my husbands office.  It's gotta be twenty years old.  I was a little nervous that it would be rock solid when I opened the jar.  But, after a few quick stirs, it was perfect.  I think this jar will last us about a hundred years.  You only need a tiny bit.

Step Eight:  Take a small paint brush (nothing fancy--I used my daughters watercolor brush from her crayola box).  Brush the compound across the top of your notepad.  Let it dry for thirty minutes.


Step Nine:  Remove the clamps and remove the ugly cardboard from the front and back.


Step Ten:  Have your kids fill in their memories and write little notes.  Admire everyone's work!


And now for a little surprise ending...Bank Notes!


If you want to take this little gift from great to WOW, add a few bank notes to the back of your notepad.  I chose to use one dollar bills.  You want them as crisp and clean as possible.  Don't be afraid to iron them if you need to.  It doesn't have to be much.  Five dollars?  Ten?  Twenty?  I made the note cards to be the exact same size as a dollar bill.  So, before you embark on step four, throw a few dollar bills into your stack.  You could intersperse them or put them all at the end for a little surprise.  I don't know of any teacher that couldn't use a little extra cash in their rainy day fund.  They could put it towards their classroom supplies, or happy hour at Sonic, or go to their favorite sandwich place for lunch.

Appreciation.  That's what we're talking about!

Need another teacher appreciation gift idea?  Click here!

I'm linking up with:
.

Wednesday, April 25, 2012

[teacher appreciation] Nuggets of Wisdom


Teacher Appreciation Week is coming right up.  I thought I would share a few ideas that I've had over the next few days.  For the first time in many many years, I don't have any children in the elementary school.  But this idea is very adaptable.  You could send it with your little one to preschool, or with your teenagers to give to a favorite teacher.  Everyone likes to be appreciated!  This is also easy to do with your children or as an entire classroom.  I was the room mother for my daughter's sixth grade class last year.  The PTA asked me to take over the classroom for 45 minutes to give the teacher an extra long lunch.  We did something similar to this to keep the children busy and show our appreciation as an entire class.  So, it's up to you!  Adapt away.

Nuggets of Wisdom:

You will need just a few supplies:


 Hershey's Nuggets (these are the most useful candy!)
scrapbook paper-I chose a school themed design
tape
pencils or pens
plastic pillow box or other suitable container
paper band and tag

Cut your paper into strips that will wrap around each candy bar.  Mine measured an inch in width and three inches in length.


Have your child (or all of the students) write something on the back of each paper strip that they learned this year from their teacher.   Some wonderful bit of wisdom that the teacher shared with them.  It could be something as simple as learning to write their name.  Or maybe something more complex like the Pythagorean Theorem or Newton's Laws of Physics.  Maybe they had a great literary experience or learned the lyrics to a particularly awesome song.  Whatever.


Next you just tape the paper strips around the candy bars and package it up all cute. I chose to put my candy bars in this darling plastic pillow box that I found at my local copy store.  If you are doing this on a larger scale you will need a larger cellophane bag or box.


To finish it off, I made a paper band to wrap around the box.  I labeled it "nuggets of wisdom".  Then I made a thank you tag and included a quote from David Viscott.
"The purpose of life is to discover your gift.  The meaning of life is to give your gift away."
I just taped the band together around the back and punched a hole in the tag.  Then I attached it with some baker's twine.


It would be a lovely gesture to slip a gift card into the pillow box before you give it to your favorite teacher!  Thank goodness they are willing to share their gifts with our children!

I'm linking up with:

Related Posts Plugin for WordPress, Blogger...