Showing posts with label sewing. Show all posts

Thursday, July 19, 2012

Peg Doll Pals


Are these not the cutest things you've seen in a long long time?  I haven't done any peg dolls since these and these.  We are way past due people!

 I've been wanting to try my hand at this kind of a clothespin doll.  We used to use this kind when I was a kid to make reindeer pins for Christmas, remember those?  These pins are flat an both sides and void of metal springs.  They make for some pretty fun little people...with their squatty bodies and really long legs. Not to mention the whole no arms thing. 


We spent yesterday afternoon painting these guys.  Actually most of them are girls.  I should have snapped a photo of the backs of them.  There are lots of pony tails and braids going on in the back.  My little one wanted in on the action.  She painted "Alex"  the one on the right.  I think she did a fantastic job.  He was a boy at first.  And then she changed her mind and decided it should be a girl.  Hence the name Alex.  It can go either way.

Today we decided that they needed a "home".  Some way to keep them organized and handy.  I put my oldest daughter to work making this peg doll carrier.  We dug out some fabric scraps and I set her loose in my sewing room.  All it takes is two strips of fabric about eighteen inches long and some thread.  She sewed the strips together and then sewed little pockets for each of the dolls to slip in to.  To make it extra fabulous, she labeled each pocket with the doll's name. 


Add some ribbon to the end.


And tie them all up nice with a bow!


So, what do dice games and peg dolls have in common?  Tune in tomorrow and I promise it will all make sense.

Linking up with:

Monday, April 23, 2012

Clothespin Bag


If you know me personally, you know that I love hanging clothes on the line.  I love the crispness of line-dried clothes and I love the fresh smell that the breeze gives to my clothes.  A couple of years ago, I did an experiment and found that drying my clothes outside saved me between ten and fifteen dollars a month on my electricity bill.  I especially love that!  Do you like to line-dry your laundry?  At first thought, it would seem that hanging the clothes on the line makes for more work.  To that I say, just try it and see what you think.  Laundry is my arch nemesis.  I hate everything about it.  Especially folding.  But when I started hanging my clothes out on the line, my whole attitude about laundry changed.  Weird, I know.  I think it has to do with being out in the sunshine instead of locked in the laundry room.  I wash and hang four loads of laundry in about an hour and a half.  You can wash load after load without having to wait for the dryer.  Then I just let the clothes hang until they are dry and I am good and ready.  They all come down at once and are folded right away.  And I've figured out how to clip them so I don't have to iron anything! 


So, in honor of Earth Day I offer you this clothespin bag--to make your laundry day a little easier. All you need is a bit of fabric, some bias binding tape (you can make your own or buy it at any fabric store), some thread and a sewing machine.  Oh yeah...and a pants hanger.

You will want your bag to be just a bit wider than the pants hanger.  You eventually want your hanger to clip inside.  My hanger measured twelve inches wide.  I cut my fabric 13 inches wide.  This allowed for a 3/8 inch  seam and about a 1/4 inch of play.  I cut my fabric sixteen inches long.  You will need two pieces, one for the front and one for the back.  My hanger was a bit rounded, so I rounded that top of my fabric pieces just a bit.  Some hangers are flat, just do what you gotta do.  Next, you are going to want to cut a "U-shaped" piece out of your front piece.  This will be the opening of the bag.  It's easiest to fold your piece in half vertically and cut half of the "U" so it comes out symmetrical.  I left about 8 inches intact between the bottom of my "U" and the bottom of the bag.  And I left 3 inches on each side.  Discard the piece that you cut out.

Match the right sides of your fabric pieces together.  Now sew up all of the sides of your rectangle.  Flip your bag right side out.  Next sew your binding around your opening.  I liked a thinner look, so I cut my packaged binding in half lengthwise.  If you haven't ever worked with binding tape, this tutorial might be helpful.


That's all there is to it!  Open your pants hanger and slip one side of it into the opening.  Close your hanger.  The idea is to sandwich the back of your bag between the hanger.


Fill your bag with clothespins and you are ready for a full day of laundry!  I like to just slide the bag along the line as I hang.  Super handy.


Happy Earth Day!

I'm linking up with:

Wednesday, January 25, 2012

[baby edition] burp cloths


Guess what??  It's hard to believe, but I came into a little extra cash.  That never happens.  Ever.  But for some reason, the stars have aligned.  I figured I'd better spend it and fast...before it just goes up in smoke.  How about a new sewing machine?  Yes, I think so.

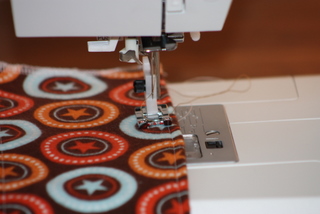
I've had my old sewing machine for almost eighteen years.  It has not been working well.  It was time for a new one.  After much deliberation, I bought a Husqvarna (which is a fancy way of saying Viking) machine.

I am not going to lie to you--my new machine is SO MUCH FUN!!
That might explain the late blog posts.  I've been playing.


In other news.  My second grand-nephew was born yesterday.  Finally!  He took his sweet time coming into the world.  But I think he will prove to be worth the wait.  In honor of this new little guy I decided to make some burp cloths.  I found this idea on the internet a while back and I wanted to give it a try.  When I was a mother of newborn babies, I preferred cloth diapers over every other burp cloth out there.  They are just so absorbant and handy.  So this was a perfect marriage of cute and practical.


You will need:

pre-folded cloth diapers (I bought mine at Target.  It came in a pack of 10)
cute flannel fabric (you can get two burp cloths out of a fat quarter)
matching thread
scissors
sewing machine
straight pins

I followed PetiteLemon's basic tutorial, but changed it up a bit to make it my own.


Be sure to pre-wash your diapers and your fabric.  I cut my flannel fabric strips five inches in width and nineteen inches long.  I serged the long sides of each strip.  You certainly wouldn't have to, because the next step is to press those raw edges into the center.  I folded the edges of the long sides over about half an inch and pressed them into place.  Then I used my new handy dandy sewing machine to stitch the fabric strips onto the cloth diaper.  I used straight pins to hold the fabric in place while I sewed.  This proved to be a great opportunity to play with all of the different stitches that my new machine offers. 


The original instructions say to fold and stitch the short ends under.  But, as I looked at those silly cloth diapers and realized that the edges are just serged anyway, I decided on a short cut.  I just serged the ends of those diapers over again and in the process I cut and serged the fabric strips as well.  It made for less bulk and it was fast.  And I don't think it diminishes the cuteness at all. 

So, there you have it---burp cloths for the new babies in your life.
Related Posts Plugin for WordPress, Blogger...