Showing posts with label lds missionary mail. Show all posts
Tuesday, May 20, 2014
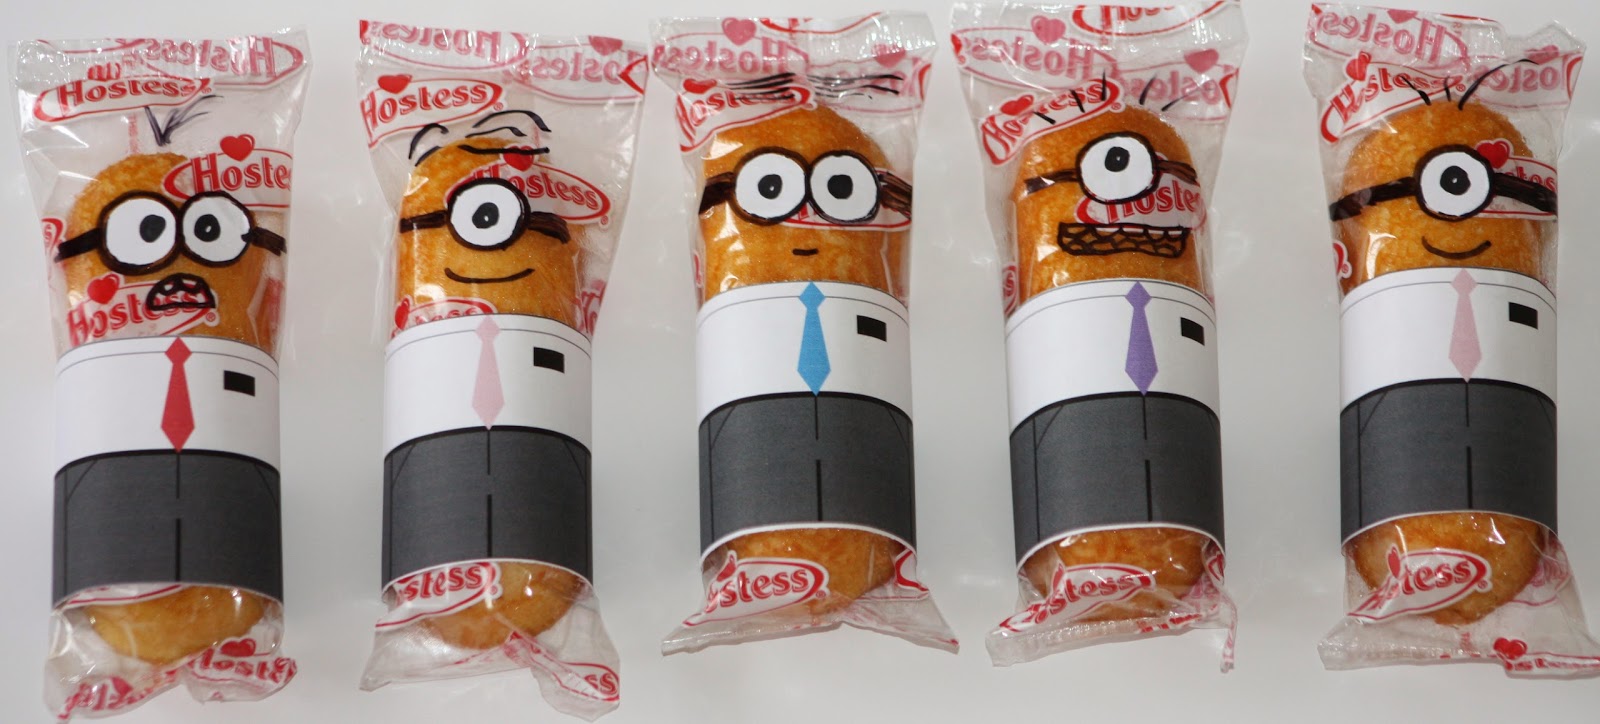
Introducing...Sister Minionaries!!
We couldn't have "Elder" minionaries without their sister counterparts, now could we? The injustice of it all. Sister Missionaries are wonderful and amazing. I was actually one of them many many moons ago. I apologize for neglecting my fellow sisters in the work. But the wrongs have now been righted and it is time to get busy making some minionaries for all of your favorite sisters serving around the world. I will admit that these are a little harder to make (mostly because you can't just draw spiky hair and be done). And they take a little more colored ink (because ladies need color!). But the process is still the same. Thanks to my wonderful readers, I was able to find the Great Value version of a twinkie. And hallelujah there are no words printed on the cellophane wrappers. I can't vouch for the taste however. I have yet to eat one. I found them at my local WalMart. But they were not in the Hostess aisle. I found them in the bakery department. Go figure.
Here's the drill just in case you haven't heard...
1. Buy some "twinkies" or cloud cakes or the Great Value equivalent.
2. Open the box.
3. Print out this handy Sister Minionary Printable. Cut along the lines.
4. Tape the minion "clothes" around each Twinkie. I like to use sticky dots
5. Punch an "eyeball" or two out of a white address label or something similar. I used a circular craft punch. Remove the backing and stick it to the Twinkie.
6. Use a black sharpie to outline the eyeball and make the goggles.
7. Use your black sharpie to add a mouth and hair, etc.
8. Mail these goodies off to the ones you love and miss!
**If you missed this male version of minionaries, click here.
Monday, March 17, 2014
[St Patrick's Day] Lucky No. 7
Is there a number luckier than seven?
How about when you add it to eleven? I'm not talking eighteen. I'm talking 7-eleven! Nothing is luckier than that. Especially when it involves Slurpees!
And a gift card.
My boy is in California. He is a missionary for The Church of Jesus Christ of Latter-day Saints. He is riding his bike in the California heat. All day long. This just might be the perfect way for him to stay cool this summer. I'm thinking every high school and college student I know could put this to good use. Cut two pieces of white card stock to measure 5 3/4 inches square. Measure in 1 1/4 inches from one of the sides and fold. Repeat with the other piece. This little flap will eventually make the pocket for the gift card. Click here for the "Lucky no. 7" printable. Cut out the card front and glue it to one of the card stock pieces. Line up the card stock so the flaps meet in the middle. Glue carefully around the sides and the back of the flap. Leave the front open. That's where the gift card slides in! I used some green patterned paper to embellish the pocket and the back of the card. I wanted to leave the inside of my card white so I could write a little letter. But whatever tickles your fancy. Go crazy if you want. Have fun.
Write a sentiment or two. Send your love. Then slip the gift card into the pocket. Slide the card into an envelope and send that fun-mail on it's way!
Happy St Patrick's Day!
Tuesday, February 11, 2014
To Our Favorite Minionary!
I just couldn't resist. Minionaries! These make for a great care package. We are sending ours for Valentine's Day. But anytime is a good time. Bring a smile to your missionary's face in just six easy steps.
1. Buy a package of Twinkies. Or Cloud Cakes. If you can find one without any printing on the cellophane packaging you win a prize! Be sure to leave me a comment and let me know how you did it!
(**One of my readers found some!! Buy the WalMart generic "twinkies". They don't have any printing on the packaging :)
2. Purchase and print out this handy printable on regular old white printer paper. And relish in the fact that there is very little usage of colored ink!
3. Cut out the missionary "clothes" and tape to the Twinkie. I used glue dots.
4. Punch some "eyeballs" from a white sticker or address label and adhere to the Twinkie.
5. Using a black sharpie..embellish to your heart's content. I warn you that this is quite addicting and sooo much fun!
6. Package them up and mail them off!
I promise that you will be able to hear the squeals of delight from half-way around the globe.
If you are looking for something fun for your Sister Missionary...you can find Sister Minionaries here!
*****
linking up with:
Monday, October 28, 2013
Mummy Conversations
"What did one mummy say to the other mummy?"
This must be the year of the mummies here at Pretty Petunia. I was sending a Halloween package to my favorite missionary and all of this mummy goodness just kind of rolled out of my brain.
So let's talk about Mummy Pretzels. I LOVE chocolate covered pretzels. But not just any chocolate covered pretzels...they must first be dipped in caramel. Caramel makes everything better. Most people like to use the long pretzel rods. But not me. I much prefer the Rold Gold Wheat and Honey Twists. They are delicious. And they provide a much better chocolate caramel to pretzel ratio! Let's be honest. The pretzel is merely the vehicle for all that other goodness. Don't worry--there will still be plenty of pretzel at the bottom for a little "handle".
So go buy a bag of wheat and honey twists. I'll wait.
Now you will need some caramel. Obviously. I've said it before and I'll say it again. I prefer the homemade caramel route. But I do not discriminate. Whatever is easiest for you. Make some. Buy some. You will find no judgment here. When your caramel is all warm and melty, dip the pretzel twist. I like to pour my caramel into a glass cup measure with a handle. Just hold the pretzel rod by one end and dip the other. Easy. Let it firm up on a Silpat mat (or a greased cookie sheet).
After your caramel has cooled onto your pretzel, you are going to dip it into milk chocolate. I like to use the Guittard milk chocolate discs. Melt them in a glass cup in the microwave at 30-40 percent power for 30-40 second intervals. Stir frequently until the chocolate is melted and smooth. Dip your caramel pretzels into the chocolate and tap off the excess. Place them on the Silpat mat again or on a piece of parchment paper. Let them solidify. You may want to pop them into the freezer for a minute or two.
Now melt some white chocolate discs in a plastic bag or in a squeeze bottle. Use the white chocolate to stripe your pretzels. Just snip the corner off of the plastic bag. It will work fine! We are going for a bandaged look here...so stripe away!
After the white chocolate has solidified, you will want to add some eyes. Use the same technique that we followed here.
Package three or four to a bag. Otherwise, how will they chat amongst themselves?
Top it all off with this bag topper!
And give them to all your favorite goblins and ghosts...of corpse!
Subscribe to:
Posts (Atom)