Showing posts with label recipes. Show all posts

Tuesday, February 12, 2013

Egg Rolls

Our Chinese New Year party was how shall we say...not quite what we had planned.  The influenza invaded our house over the weekend.  So, we had to postpone our grandiose plans for Sunday evening.  By last night we were doing a little better but still not great.  The problem is that most of the groceries that I had purchased for this party were perishable and needed to be used sooner as opposed to later.  We ended up scaling down our menu considerably.  We scaled down our guest list even more.  Pretty much just the family attended with a few exceptions.  We had a great time nonetheless.  And we definitely made egg rolls.


Egg rolls are the quintessential element in my Chinese dining experience.  I love them.  I could go to a restaurant and just order egg rolls and be completely content.  So, no Chinese New Year party is complete without egg rolls.  This recipe is delicious.  I won't lie to you though...it is a time commitment.  Totally worth the effort and not difficult at all.

Let's get to it, shall we? 

You will need to buy some fresh vegetables from your favorite produce place.  You will need celery, a medium sized onion, mushrooms (8 oz package), green onions, bean sprouts (1 pound), and napa cabbage.


 You will also want to pick up some ground pork sausage, egg roll wrappers, and some water chestnuts.  The first thing we need to do is to prepare our vegetables.  Separate your cabbage leaves and rinse them well.  Pat dry with paper towels.  Slice into thin slivers and then chop them into one inch lengths.  You will need 1/2 pound of sliced cabbage.
 
Wash two celery stalks and slice thinly on the diagonal.  Wash and slice two green onions.  While you are at it, chop up the yellow onion.  I only used about half of it.  Put the celery and onions together in a small bowl and set it aside.

Chop up the chestnuts.  Rinse the bean sprouts and wash and slice the mushrooms.  Place them in a bowl and set aside.

Crumble and cook the pork sausage in your wok.  When it is completely cooked, set it aside in a bowl and wipe out your wok.


There's just one more thing you need to do before we start to bring all of this goodness together.  You need to make the gravy.  Measure out 4 tablespoons of water, 1/2 teaspoon of soy sauce, 2 teaspoons of oyster sauce, and 1 tablespoon of corn starch in a small bowl and whisk to dissolve.  Set aside.

Now for the fun part.  Heat your wok over medium-high to high heat.  Add a couple tablespoons of oil for stir-frying.  When the oil is ready add the celery and onions and stir-fry.  Add pinch of salt and sugar if desired.  Remove from the wok and place in a large bowl.


Clean the wok and stir-fry the mushrooms, bean sprouts, and water chestnuts.  Add salt/sugar if desired.  Remove from wok.


Stir fry the napa cabbage.  Cover the wok and cook for about 1 minute.  Add all of the ingredients back into the wok and gently mix.  Push the vegetables up against the sides of the wok.  Add the gravy in the well that you have created.  Cook until thickened.  Mix well.  Set the filling aside and allow to cool before wrapping.

 Before you assemble your egg rolls, drain the vegetable/pork mixture well.  Otherwise you will end up with very soggy egg rolls.  I like to put my mixture into a colander over a bowl.


At this point everyone was hungry and things were getting crazy in the kitchen.  So I neglected to take photos of assembling the egg rolls.  I always follow the instructions on the egg roll wrapper package.  Orient your wrapper so the point of the square is facing you.  Place a heaping tablespoon of mixture in the center of the egg roll.   Fold the bottom corner up over the mixture.  Fold each side corner towards the center.  Using your finger, put a little bit of "glue" (1 tablespoon water mixed with 2 teaspoons of corn starch) on the top corner (this will help to seal it all up).  Then roll it closed and press to seal.

Deep fry your egg rolls until golden brown.  Drain on paper towels.  I like to line my serving platter with the extra cabbage slivers.  Serve warm with sweet and sour sauce.


 Happy New Year!


Wednesday, February 6, 2013

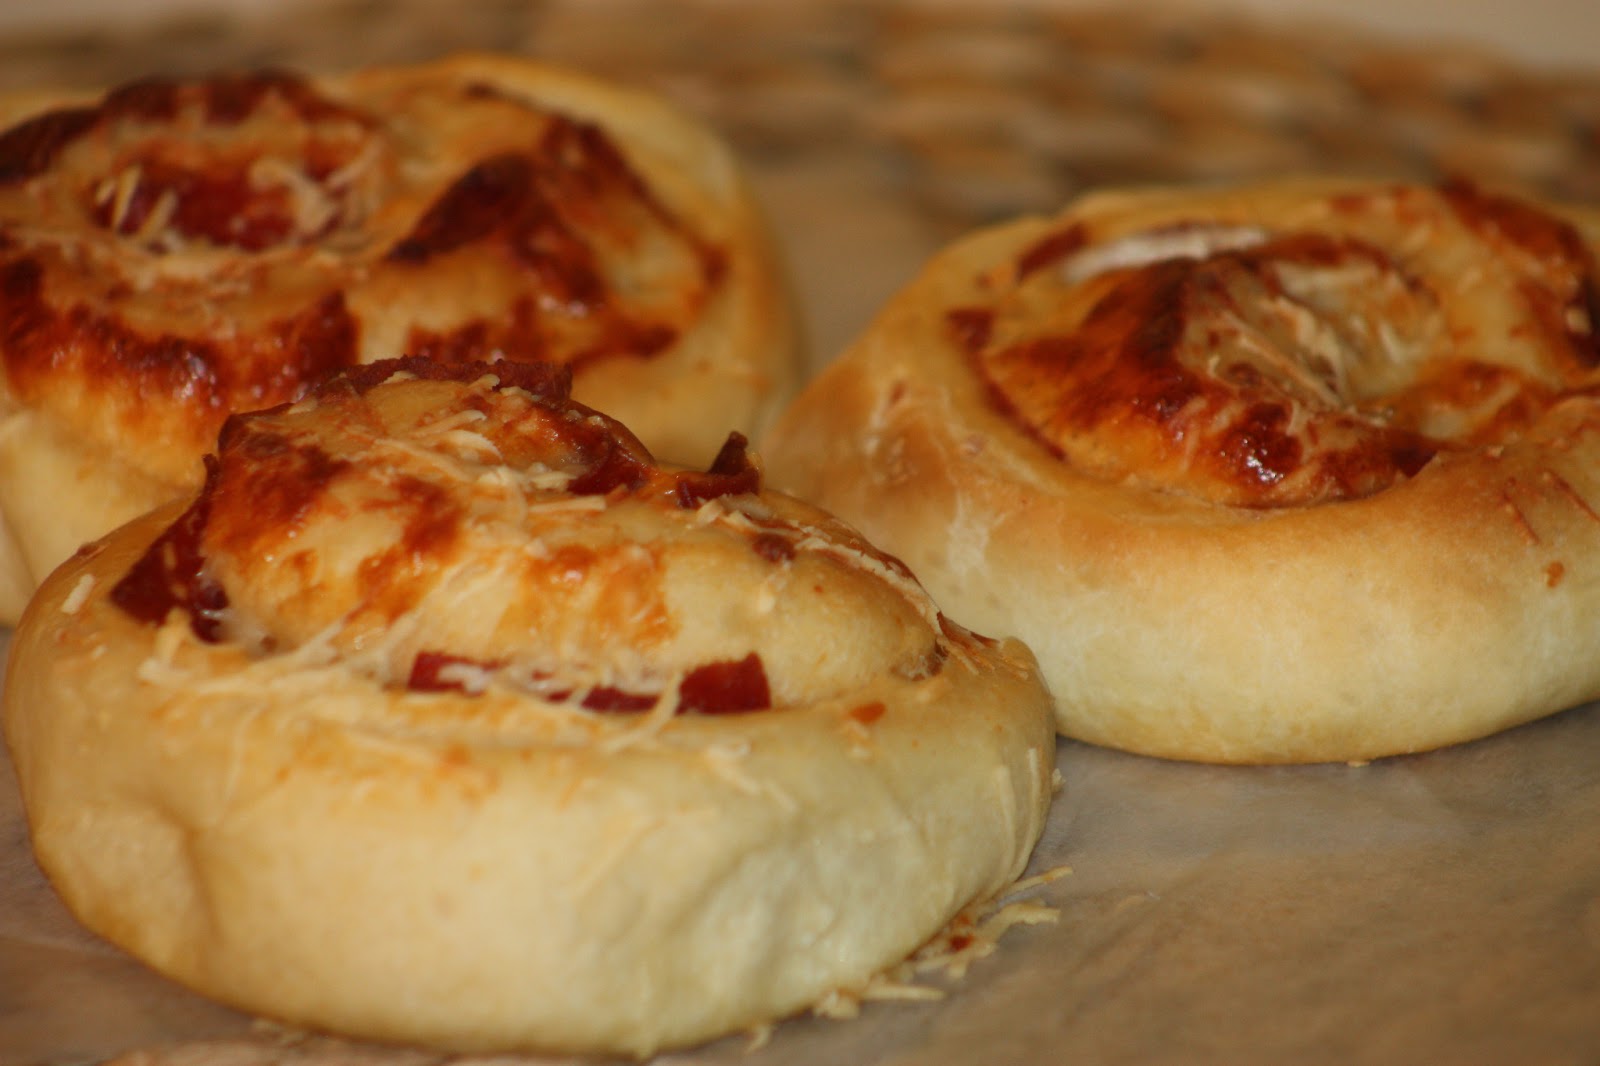
Pizza Pinwheels


Any way you slice it...these are delicious!  And fast and easy.

I know that pizza pinwheels are all the rage.  You know the ones.  You've seen them on Pinterest.  But these are not those.  These are so so so much more.

Step One:  Make the bread dough.  I LOVE this recipe.  You can make bread--let it rise--and bake it in under 60 minutes!  What??!!  I know.  It's revolutionary.  Try it.  Or just use whatever bread recipe you like the most.

Step Two:  Roll the dough into a rectangular shape--like you would for cinnamon rolls.  My recipe makes enough for two jelly rolls or about 24 pinwheels.

Step Three:  Cover the dough in pepperoni.  And I do mean cover.  This is no time to be frugal.  Pepperoni=flavor baby!  Please excuse the frosty look of my pepperoni--I had just taken it out of the freezer and it hadn't thawed all the way.


Step Four:  Cover the pepperoni in grated mozzarella cheese.  Once again--use a heavy hand.  Cheese=delicious!


Step Five:  Roll your dough jelly roll style.  Seal the seam well.


Step Six:  Slice your rolled logs into pinwheels.  I like to use a bench knife.


Step Seven:  Place your pinwheels on a baking sheet lined with parchment.  Don't do what I did.  I accidentally used my Silpat (which I love--but not for rolls!)  My pinwheels had a hard time browning on the bottom.  Parchment works much better!

Step Eight.  Brush your pinwheels with melted butter and sprinkle with some grated asiago cheese.


Step Nine:  Let your pinwheels raise the appropriate amount of time for your recipe.  Mine raised about 25 minutes.

Step Ten:  Bake at 350 degrees for 25 minutes, or until golden brown.


YUM YUM YUM

These are really wonderful hot out of the oven.  You can dip them in marinara sauce or ranch dressing.  They make a great dinner combined with a green salad.  My kids like to take them to school in their sack lunches. They just eat them cold.  But they are also awesome warmed up for a few seconds in the microwave.

Tuesday, November 13, 2012

[The Gratitude Project] Daily Bread


I am so thankful for a bounteous table.  We have always been blessed to have enough nutritious food to feed our family.  And there's always some to share.


Today I made this crock-pot oatmeal for breakfast.  This is a yummy recipe. I added applesauce to mine instead of chunky apples.  And my family is not big into nuts, so I left those out.   Anyway, the recipe made waaayy more than we were able to eat.  So I decided to make some oatmeal bread out of the left-overs.  I doubled the recipe below and it yielded four large loaves of bread.  Plenty to enjoy and a couple of loaves to share.  Perfect.  For a softer crust, brush your warm loaves with melted butter.  Or brush with warmed honey and sprinkle with a few oat flakes.


This bread would be delicious with raspberry butter!  Or toast it up for breakfast and spread with your favorite jam.

Monday, November 5, 2012

[The Gratitude Project] Neighbors

We live in the most amazing neighborhood.  The perfect place to raise a family.

Today I am thankful for wonderful neighbors!


Tonight we are going to visit some of those fabulous families with a plate of goodies.  You can do it too.  It's easy.

Tell your neighbors you love them "a whole honey bunch" with a plate of fresh baked cookies!


There's a bit of a story behind this cookie recipe.  If you haven't figured it out by now, I love to save a buck.  One day while I was grocery shopping I decided that I could get a big ol' bag of generic breakfast cereal for much less money than a box of the name brand kind.  I've bought the bagged cereal before and had relative success.  But that was the kids' cereal.  I hadn't been brave enough to try the generic version of my favorite cereal.   What's my favorite cereal?   Honey Bunches of Oats.  Perfection in my mind.  It's corn flakes and clusters or oat-ey goodness.  How hard can it be to replicate that?  I don't know what I was thinking, because---they are not the same thing!  At.  All.   I couldn't bring myself to eat more than one bowl of the stuff.  And I couldn't trick the kids into eating it either.  Boo.

So, now I have a ginormous bag of cereal that is going to go to waste unless I get creative.

And that my friends is how the "Honey Bunch Cookie" was born!

The bagged cereal might not be that great covered in milk in my cereal bowl.  But it's a super star in these cookies.  They are dee-licious!.  They are soft and very chewy warm out of the oven with the perfect amount of crunch.  If you want them crispy you'll need to cook them a bit longer.  I'm not going to lie to you...the dough is to die for.  I almost didn't bake any of it into cookies.  Just grab a spoon and dig right in.

Isn't it funny how life goes?  This morning I had a bag of nasty cereal staring out of the cupboard at me.  Now I'm not so sad that I have a gigantic bag of sub-standard cereal.  In fact, I'm quite happy about it.  I'll be able to make cookies for weeks!


Friday, August 31, 2012

Strawberry Jam Paranoia


My husband has jam paranoia of the strawberry kind.  Homemade.  Strawberry.  Freezer jam.

He is absolutely certain that we will run out of jam before the strawberries come back in season in the spring.   Maybe you aren't familiar with this disorder.  If you are experiencing any of the following symptoms, you should see a doctor or the produce manager at your local grocery store immediately:
*Every time you go to the freezer to get a jar of jam, you have a little panic attack and exclaim "Oh no--we are running out of jam!"  Even when there are twenty plus jars remaining in said freezer.

*Every time your wife comes home from the grocery store, you ask if she bought strawberries to make freezer jam.

*You sneak multiple cartons of strawberries into the grocery cart whenever you go to the store with your wife.

*You mentally tally how many containers of jam are being used each and every week.  It's basically the only math you feel confident doing.

*You resent your children for using your precious strawberry jam on their sandwiches.  Jam on waffles and pancakes puts you right over the edge!

*You hate starting a new school year, because that means more family PBJ sandwich consumption.

*You try to coerce dinner guests into using the raspberry jam on their hot bread and rolls.  You leave the strawberry jam hidden in the dark corners of the refrigerator for safety.


To relieve my husband's jam anxiety, I made strawberry jam this week.  Three batches.  Eighteen cute little containers.  Add that to the twenty plus containers we already have in the freezer and I think we will be OK until strawberries come back into the markets in February/March.

Have you made freezer jam before?  It doesn't have to be strawberry jam.  You can use raspberries or blackberries or whatever (although the recipe may vary slightly.  Typically there are recipe suggestions inserted into the pectin box).  You really need to make some jam.  Like now!  I won't lie to you...it's one of the easiest things you will ever do.

You need strawberries, sugar, lemon juice and pectin.  I like to use liquid pectin.  You can usually find it in the grocery store aisle next to the canning jars and lids.

  • Smash up your berries.  Do not chop...the smashing is really important.  You want to release all of those lovely strawberry juices.  I usually use my potato masher and it works like a charm.   Smash up enough berries to make two cups.  
  • Pour your berry mash into a big bowl.  
  • Add four cups of sugar.  I know it sounds like a lot, but just trust me.  Stir the berry sugar mixture until the sugar is incorporated.  Then you need to let it sit for about ten minutes. 
  • Now, open your liquid pectin package and squeeze it into a small bowl.  Add two tablespoons of lemon juice to the pectin and stir.
  • Add the pectin mixture to your big bowl of sugary berry mash and stir.  Stir man stir!  You have to stir for about three minutes.  The sugar will dissolve and the mixture will thicken.
  • That's it!  Scoop the delicious jam into freezer safe containers.  I like to use these Ziploc containers.  They hold one cup of jam and they stack nicely in my freezer door.
  • Now you need to set all of your cute little jam containers on the counter and let them sit for twenty-four hours.  This allows the sugar to dissolve completely and the jam to set-up nicely.  When your time is up, stack them in your freezer.  Remove a container at a time and store it in the refrigerator to be used as needed.  

I told you it was easy.  No cooking.  No boiling.  No thermometers or crazy pressure cookers.  Just a bowl and a spoon. 

My husband's symptoms have temporarily subsided.  But now I am not feeling so good.  I think I have freezer space paranoia. 

Saturday, June 23, 2012

100 Degrees in the Shade

Summer has come with a vengeance.  It is *H*O*T* outside.  Our solution?  Watch a movie in Grandma's freezing cold basement and make homemade slurpees.  Have you done this before?  Pure brilliance.


I hesitate giving you the recipe...it's just so simple.  OK.  Here it is.  Are you ready?

You need four cans of your favorite soda pop.  We used root beer.  (This will make just enough for five people.  Cause we got five people in our family!  Adjust as necessary)

That's pretty much it.

Dump your soda pop into your ice cream canister.  Put your dasher in and tighten the lid.  Secure the motor to the canister.  Surround that baby with ice and rock salt.  Plug it in.  Turn it on.

Watch a movie for a while.  Check back occasionally.  Making slurpees is much faster than making ice cream.  It doesn't take long at all.  (I want to say 20-30 minutes)  Especially if your soda pop is already cold.  I think I may have churned mine for a bit too long.  There wasn't any liquid left at all.  But, no worries.  Scoop it into a fancy glass and wait for a minute or two.  It will be just melty enough to enjoy with a spoon or a straw.


Now go confront the heat.  You'll totally win.
I've got your back.

Monday, June 18, 2012

[The Ice Cream Scoop] A Double Feature

KitKat Caramel Crunch Ice Cream


I have two flavors for you today.  The first one, we dubbed "KitKat Caramel Crunch".  Follow the recipe for vanilla ice cream found at the bottom of this post.  As your ice cream begins to firm up, add some chopped KitKat bars (about three large candy bars) and two roughly chopped Skor or Heath bars.  Finish processing your ice cream.  When it has completed churning, scoop it into a freezer safe container.  At this point you will want to layer your ice cream with caramel.  So, scoop a layer of ice cream into the container.  Top with a thin layer of caramel syrup (homemade or caramel ice cream topping).  Continue layering until your container is full.  Place your container of ice cream in the freezer until firm.  When you scoop out the ice cream there will be a gorgeous ribbon of caramel distributed throughout.  This flavor is my favorite to date!

Mint Chocolate Chip


My husband's favorite ice cream flavor is mint chocolate chip.  So, in honor of Father's Day I made up a batch just for him.  (Although we are all secretly hoping that he will share!)

Again, follow the recipe for vanilla ice cream found at the bottom of this post.  Add several drops of green food coloring if you want and 1/4 teaspoon of peppermint oil to the ice cream mix before turning on the ice cream maker.  Pack your container with ice and rock salt and let it churn for a while.  Add 1 cup of mini semi-sweet chocolate chips when the ice cream begins to firm up.  When the ice cream has reached perfection, scoop it into a freezer safe container and let it firm up in the freezer for a couple of hours.  You know how I told you KitKat Caramel Crunch was my favorite?  I lied.  Mint Chocolate Chip is my new love.

You will want to whip up a chocolate cake or a batch of delicious brownies while you wait.  It's meant to be.  Your ice cream will be lonely if you don't.

And no one wants to deal with a lonely bowl of ice cream.

Thursday, June 14, 2012

Lazy Man Lofthouse Cookies


 I've been wanting to make some soft sugar cookies for a while now.  I scoured through all of my internet sources.  Most of the recipes I found, originate from the same source and they all claim to be just like the Lofthouse Soft Sugar Cookies that you see in the stores, usually decorated with seasonal sprinkles.  All of them required you to make the dough and then refrigerate it overnight.  When you were ready to bake, you rolled a very sticky dough as best you could to a half inch thickness and cut it with a circle cookie cutter.

Well, I'm not likely to let a dough sit in the fridge overnight.  If I want cookies, I usually want them right now!  And as far as rolling the sticky dough--I wasn't really into that either.  So, enter the lazy man version.

Make your dough following the recipe below.  Don't bother putting the dough into the refrigerator.  Just forge on!  Scoop it with a large two tablespoon cookie scoop onto a cookie sheet lined with parchment or a silpat.  Flour your fingers or the bottom of a cup and gently press the cookie balls to about a half inch thickness.


I actually did not look very closely at the oven temperature from the above recipe.  So, I baked my first sheet at 350 degrees.  After seven minutes, I looked and realized that they were not finished baking.  Then I noticed my mistake.  I went ahead and baked them for 4-5 more minutes at 350 degrees.  After that, I corrected the temperature and baked the remaining cookies according to the recipe.  Guess what?  I liked my "mistake" cookies best.  They held their puffy shape much better.  The others tended to droop as they cooled.


So, after your cookies have baked at 350 degrees for 10-12 minutes (you want them just barely golden on the edges) remove them from the oven and place them  on a cooling rack.  When they have completely cooled, frost them with your favorite buttercream recipe.  And don't neglect the sprinkles!


Now, if you are the type that need perfectly round cookies, you will probably want to roll out the dough and cut it with a cookie cutter.  But, if you want a cookie in hand within 30 minutes, this is the method for you.  What they lack in perfection they make up for in speed!  These would be brilliant for a fourth of July picnic.

Friday, June 1, 2012

[The Ice Cream Scoop] Strawberry


I have been on the biggest ice cream kick lately.  I think I've made four batches in two weeks.  Yeah.  It's a problem.  Actually it's no problem at all!  It's absolutely wonderful!  My favorite flavor so far has been this homemade fresh strawberry Philadelphia style ice cream.  "Philadelphia" style just means that it is not a custard base (as in no eggs).  Just your basic cream and sugar.  After you mix up your vanilla base using the recipe below, you will want to add your strawberries.  I tried this a couple of ways, and finally landed on the procedure that I like the best.

Take a container of strawberries and wash and hull them.  Place some in a blender and give it a whirl.  You want enough to make a cup and a half of strawberry puree.  Mix your puree directly with your vanilla base and put it in your ice cream maker.  Proceed following the directions on your maker.  I have an electric ice cream maker with a metal container and a wooden bucket.  It uses a plastic dasher to churn the ice cream.  You know, the kind that needs ice and rock salt to do it's magic.  I'm sure it would work well with whatever style maker you own.  You will want to process your ice cream until it starts to firm up and becomes semi-frozen.

While you are waiting for your ice cream to process, prepare the rest of your strawberries.  Give them a rough chop on a cutting board.

Then place them in a bowl and mash them up good.  I usually use my potato masher, but a fork works just as well.  Again, you want about a cup and a half of mashed berries.  Add 1/2 cup of sugar.  Stir it up.  Let it sit until your ice cream is ready.

When your ice cream is starting to firm up you will want to add your mashed strawberries.  I drained off the juice and just added the strawberry mash.  Dump it right into your canister and let the dasher distribute the chunks evenly for you.  When your ice cream has reached perfection, you have two choices.  First, you can grab a bowl and a spoon and dig right in.  The ice cream will still be relatively soft but incredibly delicious.  Or you can scoop your ice cream into a freezer safe container and let it harden in the freezer.    This will give you beautiful rounded scoops of ice cream that you may serve in a bowl or a cone.  Delicious!

Now, if you want to make make your ice cream extra fancy pants you could do the following:

Grab three or four graham crackers from the pantry.  Melt some white chocolate chips in a microwave safe bowl.  I think I used about a half of a cup.  I like to melt them for 30 second intervals at 40% power, stirring well after each interval, until all of the chocolate is melted.  Dollop your chocolate onto your cracker and smooth it all out.  Put your crackers in the freezer for a minute or two to firm up your chocolate.  Now remove your crackers from the freezer and break them into small chunks.


Add your chocolate glazed crackers to the ice cream at the same time as your mashed strawberries.  Have your dasher stir it all in.   The crackers taste just like a graham cracker crust, with a chocolate bonus.  The chocolate prevents them from getting too soggy.  (I saw this technique on the Tasty Kitchen blog and it is miraculous!)

And there you have it---strawberry pie ice cream!!

Thursday, May 10, 2012

[prom week] appetizers

As you know, I hosted seven couples for dinner for prom last week.  I saw it as a great opportunity to try some of the hundreds of recipes I've been "pinning" over on Pinterest.  The hands down favorite appetizer recipe?  These honey glazed chicken and bacon bites from Kayotic Kitchen.  Delicious!


I will tell you this.  I made them and served them without even trying them ahead of time.  I do that a lot.  It's the optimist in me.  Chicken-bacon-honey...how can you go wrong?  I knew they would be good.  But I wasn't expecting fantastic.  Anyway.  After the kids raved so much about them, I decided we had better make them for the family to try.  And we did.  And they were yummy.  But, my oven was tied up at the time, so I decided to grill them.  My son informed me that the grilled version was not even half as  good as the baked version.  So, follow the recipe and cook them in the oven.  Over and out.

Friday, April 13, 2012

Granola or Muesli?


Granola refers to a whole grain product that is sweetened and baked until crisp.  Muesli is traditionally not baked or sweetened.

Granola.  Definitely.

Today has been cold and rainy.  The perfect kind of day for baking up something delicious.  I found a surplus of oats and nuts in my pantry, and decided it was definitely time to make some granola.  I have been wanting to try this recipe for years.  I was not disappointed.  It came together very quickly.  And the smell of it crisping in the oven is divine!  This recipe was only slightly altered from the original written by Melissa of The Traveler's Lunchbox.  She claims that the secret to this great granola is the oat flour...and I must agree.  It makes the most wonderful crispy clumps.  So, grab the following ingredients from your pantry and let's get started!

quick cooking oats
assorted nuts and seeds
butter
brown sugar
cinnamon
nutmeg
vanilla
sea salt
dried fruit 

Measure out 2 3/4 cups of quick cooking oats into a blender or food processor.  Pulse until the oats become a fine powder.  Dump into a large bowl.  It should look something like this:


Measure out 3 more cups of quick cooking oats and dump them into the bowl as is.


Here is a side-by-side comparison of the oats and the flour.


Now add your nuts and seeds.  You want a total of three cups, but you can use an assortment.


I had a large variety of nuts and seeds in my cupboard, so I just used what I had.  Anything goes here.  You will want to break up the larger nuts into coarse pieces.  I ended up using pine nuts, sunflower seeds, almonds, pecans, and walnuts.   Dump whatever your little heart desires into the big bowl.  Add 1 teaspoon of cinnamon and 1/2 teaspoon of nutmeg.


 Stir it all together well.

Now, in a small saucepan melt 1/2 cup of butter over low heat.  Add 1 cup firmly packed brown sugar and 1/3 cup water.  Heat until the butter is melted and the mixture is just bubbly.  Remove from heat and stir in 2 teaspoons of vanilla and 1/2 teaspoon of sea salt.  Carefully pour the mixture over the contents in the bowl.  Stir until everything is evenly moist.
 

Let it sit for about ten minutes while you do the dishes and clean-up a bit.

Pour the granola onto a cookie sheet, spread it out and separate it into clumps.


Bake at 300 degrees for 25 minutes until the top is golden brown.  Remove from the oven and gently stir it around.  Return to the oven for fifteen minutes.  Remove and stir.  Continue this process for about an hour and a half, until all of it is golden and crisp.


Cool completely and add any dried fruit that you are craving.  Store in an airtight container.

Eat by the handfuls.   Milk is always a good thing---poured right over the top.  In a bowl silly, not in your hand!  Or you could be all fancy pants and serve it with Greek yogurt and fresh fruit. 


Delicious!  And the perfect solution to brightening up a dark and dreary day.
Related Posts Plugin for WordPress, Blogger...