Showing posts with label Christmas. Show all posts

Friday, December 13, 2013

Tag--you're it!


I've been making confections like nobody's business for the past week.  Eight batches of fudge.  Six batches of caramel.  Peppermint Bark.  And Christmas Pretzels.  Lots and lots of pretzels.  Hundreds.  Now it's time to package all of these goodies up.  Candy boxes.  Cellophane bags.  Red and green ribbons.  Check.  Check.  Double Check.  OH yeah...and tags.  Ummm.


No tags.  Well, that just won't do.  So I tried my hand at the ever popular chalkboard tags.  And this is what I came up with.  My beef is that these take so much black ink to print out.  So, I decided to have them printed at Costco.  I fit two tags on an 4x6 photo.  The cost is 6 1/2 cents per tag.  I don't know if that's cheaper in the long run than an ink cartridge.  But I like to think it is.  I hate buying printer ink.  And it never runs out at a convenient time.  Am I right?


Anyway, here is the file if you would like to make some chalkboard tags of your own.  Make sure you check the matte or flat option when you are ordering your prints.  Chalkboard tags are NOT meant to be glossy.  Just a little helpful tip.

Merry Christmas!

Friday, November 22, 2013

Bundle-Up Buttercup!

Today I am thankful for warmth!

It's freezing outside.  I am so grateful for a warm home to live in.  For hot food right out of the oven.  And for warm blankets to snuggle up in.

I came up with this little gem...to encourage warm hearts and warm hands.


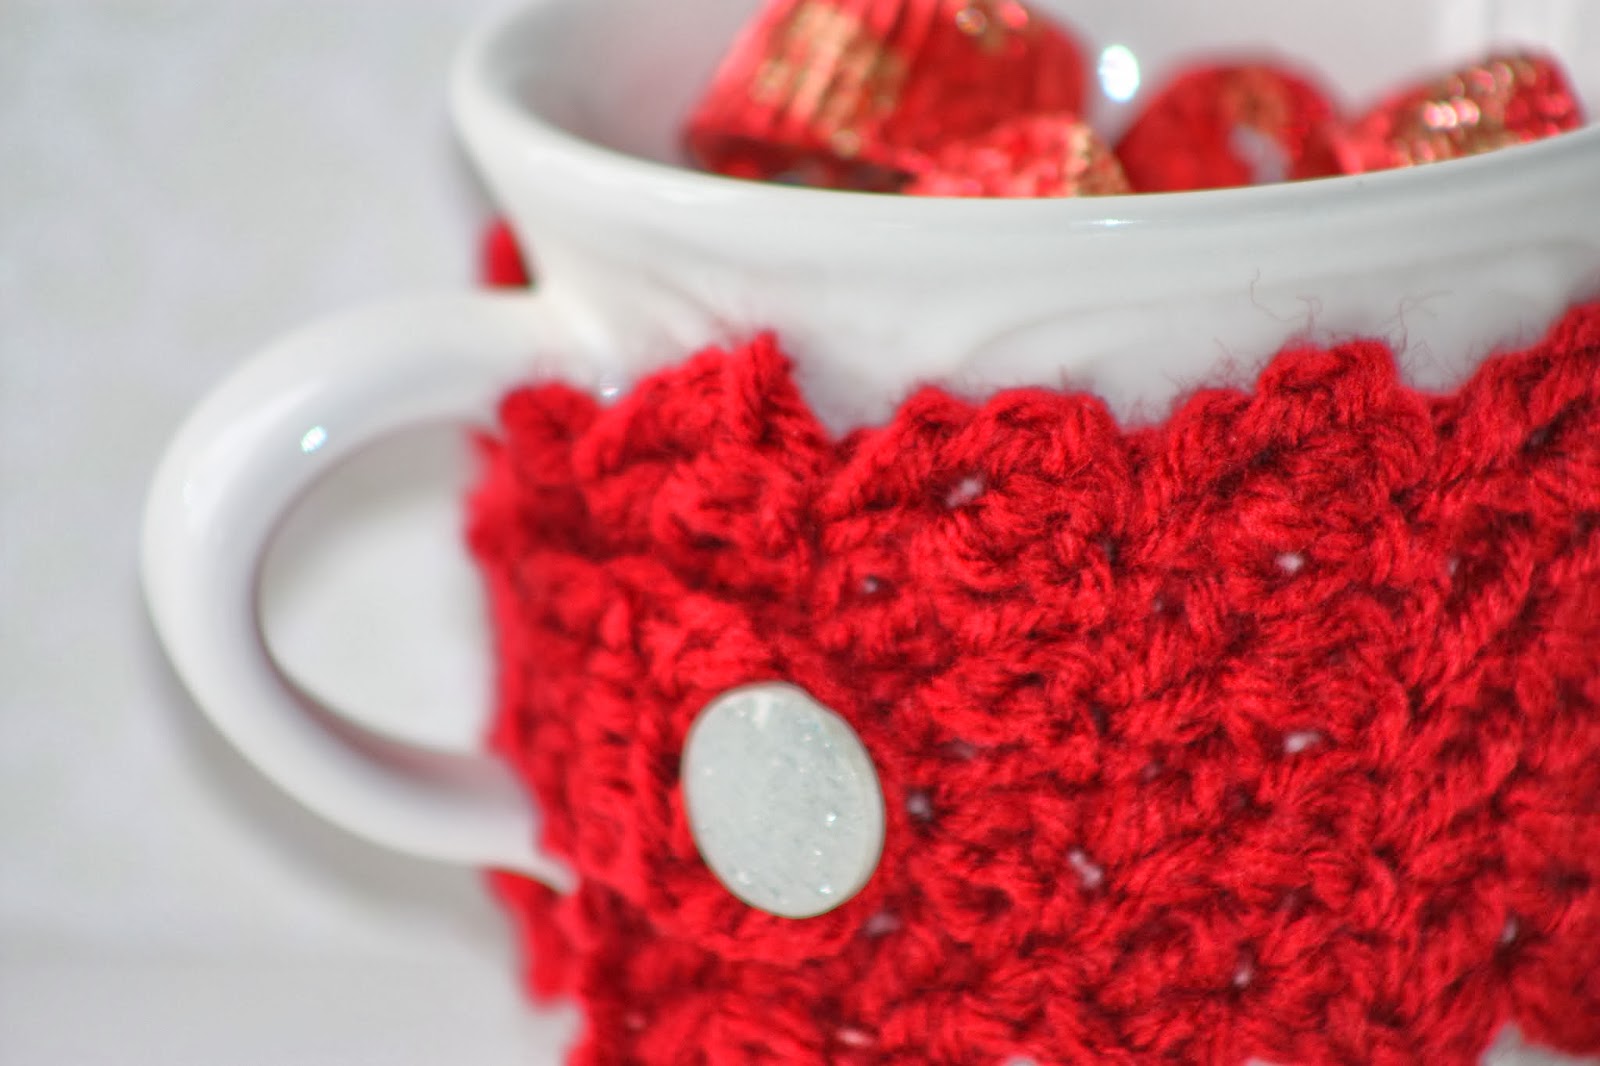
I picked up a mug for pennies at the good will.  For fun, I added a mug cozy.  I'm not super skilled or proficient at crocheting, but in no time at all, I had finished this cutie.  I modified this pattern  just a little.  I liked the look of the scalloped edges, so I didn't edge the cozy with a single crochet stitch.  Give it a try...if I can do it, you can too!  And it was so fun, that I made quite a few.  Just sew on a random button from your stash and wrap it snugly around your mug.


Fill your mug with some (peanut) buttercups!  Add this cute little tag and you're all set for warming up somebody's day.


*****
I'm linking up with:

Thursday, December 20, 2012

Santa Hat Bag Toppers

 
My daughter was so excited to make Santa Sucker Favors for all of her friends.  We decided to keep with the whole Santa theme for the packaging.  These are super simple to make and give.  Grab some red and white construction paper or card stock, some cotton balls, and a stapler.


First we made red triangles for the hat.  Easy.
Second we made white strips for the trim.  Make the strip double the width of your hat.  You want it to wrap around the back of the bag.  We went ahead and printed a Christmas greeting on the trim.  You certainly wouldn't have to.
Third, we folded down the tip of the hat and glued on a cotton ball.


To assemble, insert your Santa beard and a sucker into a cellophane bag.  Fold down the top of the bag a time or two.  Place the hat over the fold, wrapping the trim around the back.  Staple.  And you're done!


HOHOHO...Merry Christmas!

Friday, December 14, 2012

Santa Sucker Favors

 
This has got to be one of the cutest things I've seen in a long time!

And all of the credit goes to my amazing sister-in-law who happens to share my name.  Three cheers for Julie!!!  I'm hoping to convince her to share her awesomeness with us on a regular basis!

I love this craft/favor for many reasons.  It's simple.  It requires very little ink to print and only a pair of scissors to execute.  Little hands could make this happen.  It totally and completely makes me smile!


1.  Print out the free printable here.  You will want to print it on a piece of white cardstock.
2.  Cut out the Santa moustache/beard combo.
3.  Punch or poke a hole just below the moustache.
4.  Add a sucker. (dumdum, tootsie, or something more gourmet)
5.  Grab a camera...because you are going to want to snap some pictures of your cute little Santas!

This would be the perfect craft/favor for a classroom party.  Or to bust the boredom when the kids get out of school for Christmas vacation.  My kids want to give them to all of their friends for Christmas!  And why not??

I'm linking up with:


Saturday, December 8, 2012

Christmas Peg Dolls

Yesterday was a really good day.  Yesterday I got to pull out my paint and my brushes and get to work.  I had a Christmas request from a sweet little niece for some peg dolls like these.  I had so much fun making a new set of little friends for her to play with.


I was sitting at the kitchen counter, surrounded by Christmas decorations and Christmas treats and listening to Christmas music.  I just couldn't help myself.  I simply had to do it.

Let me introduce you to a couple of folks...


Santa can't make all of those toys by himself.  He simply had to have some helpers.


Oh man.  I love this time of year!

I'm linking up with:

Thursday, December 6, 2012

Christmas Treat Boxes

Back by popular demand....treat boxes!  Christmas style!


These are perfect for giving to friends and teachers.  Anyone really.  Follow these easy steps to make your own:

1.  Download and print the file.


2.  Follow the general assembly instructions from this post.  You will need some double sided sticky tape.  I liked to orient my Santa so the point of the triangle is at the top of his hat.  As for Rudolph, you will want the point of the triangle at his chin.  The snowmen can be oriented either way.


3.  If you wanted to get all fancy-pants you can embellish your containers a bit.  You could put a small white pompom on Santa's hat or a red pompom for Rudolph's nose.  Put a bow around Rudolph's neck.  You get the idea.  Have some fun!


3.  Fill your little container of cuteness with some Christmas candy.  I chose to use m&m candies of all varieties.  But the sky's the limit here people!  Well, as long as your candies are smallish.

4.  Seal your containers and give them to all of your friends and loved ones this Christmas!


Enjoy!  And have a very merry Christmas.

Monday, December 3, 2012

[Christmas Treats] Of Christmas Past

Here are some holiday treat ideas that I posted last year.  You know, just in case you need an excuse to make something yummy today!


Thursday, November 29, 2012

Christmas Candy Calendar 2012


Grab your glue guns and a bag of candy!!  It's that time of year again. 


Time to make a candy calendar!  Remember this one from last year?  I made an updated version for 2012.  I've pretty much done all of the hard work for you.  It's basically a four step process.


Step One:  Click here to print your calendar onto a piece of heavy card stock.

Step Two:  Use your glue gun to carefully glue a piece of candy (small wrapped candy works best) to each square of the calendar.

This is a great step for the kids to help with.  I put the glue on the back of the candy and let her press it onto the paper.
 Step Three:  Cut a strip of heavy cardboard (I used a piece of a box) to reinforce your calendar if your candy is particularly heavy.  I cut my strip eleven inches long and three inches wide.  Punch two holes on each side of the top of your calendar.  You will also need to punch matching holes in your cardboard.  The card board strip obviously goes on the back of the calendar where it won't be seen.

Step Four:  Thread some ribbon through the holes and tie it in a bow at the top.  Hang your calendar in a place of distinction, and enjoy!


We went with a red and white candy theme.  You can buy one bag of your favorite candy and use the same kind for each day.  Or buy a variety of candy to mix things up a bit. 

 "So simple...so easy...so perfectly perfect!" (Name that children's book!)

I had a lot of candy left-over.  It would be really fun to make a bunch of these and gift them to your friends.  Or hide your candy in the back of the pantry and save it for a really fun project that I will be posting soon.  Which is of course, what I did.  Can't wait to show you what I have up my sleeve!

Monday, November 26, 2012

Christmas Countdowns

I LOVE Christmas advent calendars and countdowns.  They add so much excitement and anticipation to the holidays.  

Here are a couple of ideas that I posted last year for counting down to the big day:

Christmas Service Countdown


A Christmas Bucket List


Watch for some more coming soon!

Monday, December 26, 2011

Christmas Thanks

I hope that you all had a wonderful Christmas!  We were so blessed to spend the day with family worshiping the Savior, sharing gifts, and enjoying one another's company.  We were given so many beautiful gifts by many friends, family members and neighbors.


I wanted to encourage my children to express their thanks for the love that they were shown.  So, I whipped up this simple "check the box" thank you card.  This file will print four post cards.  Just print them out, trim them, fill in the blanks, check the appropriate boxes and sign your name.  You could add a little personal note or draw a picture on the back for that extra special touch!


Somewhat Simple

Saturday, December 24, 2011

[Christmas treat] Heath Bar Cheese Ball


We have a Christmas Eve tradition of sorts.  You see, our Grandpa is Santa.  Not just any Santa.  THE Santa.  So, he's a little busy on Christmas Eve.  Which interferes with Christmas Eve dinners and such.  Our Christmas Eve dinner has evolved over the years.  It's pretty casual.  We usually invite Grandma to come and hang out with us.  We have ham and rolls.  We have chips and veggies and dip.  We have our special Christmas punch.  And we have crackers and cheese.  This year, I thought I'd add a new "cheese" dish to the line-up.  It isn't exactly dinner fare.  It's more like dessert.

Let me introduce you to...


Heath Bar Cheese Ball. 

Yummo!  Really it's just a version of cream cheese frosting all rolled up in a ball and sprinkled with delicious heath bar bits and mini chocolate chips.  You will want to serve this with sweet cookies and crackers.  I rounded up some cookies,  honey wheat pretzels,  and vanilla wafers. I wanted to make some waffle crisps--but I have officially run out of time.  So we made do. This also makes a great Christmas gift since the recipe makes enough for two.  Are you going somewhere for Christmas Eve dinner?  Just wrap up your festive cheese ball in some plastic wrap, bag some cookies and crackers, and place it in a cute box or container.  Add a bow and a gift tag.  Instant hostess gift.


May you have a fantastic Christmas Eve with your loved ones, enjoying all of the wonderful things
this season brings!

*****
If you missed this for Christmas. don't fret!  It's also a great New Year's Eve treat.


Thursday, December 22, 2011

Memory Tree Ornaments


Well now that Christmas is literally upon us, I thought I'd finally show you some of the ornaments I've been working on this year.  I have been wanting to do this for quite some time.  I love the Christmas trees decorated with framed pictures.  Have you priced out those cute little frames?  YIKES!  So, I took matters into my own hands.

The first step was to rifle through all of our old Christmas photos.  Luckily this isn't hard to do now that most of our pictures are digital.  It isn't easy to narrow down the selection to just a few favorites though.  I chose some really old photos from my childhood (that's me up there with my little brother) and I chose some from each of the eighteen years we have been together as a family.  I ended up with one hundred photos that I wanted to feature on the tree.  Why one hundred?  Well, the real reason was that I had a coupon for a hundred free 4x6 prints.  I don't think I will end up using them all on the tree.  But now I have them printed for future projects.  I decided I wanted them to have a vintage feel.  So, I printed all of them in sepia.  To have a couple of different size options, I used my photoshop to put two pictures side by side.  Then I just cut them with a paper cutter when I got them back from the printer.  The final size of these smaller pictures was 3x4.  (So really I have more than a hundred pictures-sweet!)

Now to "frame" them. 

We had some bead board left over from this project.  The pieces were too small to use in the house.  But they were perfect for cutting down and making "frames".  They aren't really frames so much as just mats.  My husband and daughter (she has now been power saw approved!)  spent a few days cutting the boards.  We made them just barely bigger than the pictures.  I wanted to keep the size and weight of the boards down as much as possible.  But I like the white matted look.  So, I left a little edge.

After the boards were cut, I grabbed my pictures and my ModPodge and got to work.  I covered my work surface (in this case my kitchen counter) with newspaper.


I put a thin coat of glue on the bare board, using a foam brush.  Then I positioned my photo and followed up with another thin coat of glue.


There is a moment or two of panic when you glop the glue all over the photo.  But, don't worry...it will dry clear and the photo will survive.  I promise!  I let my photos dry overnight.

To finish them up, my husband drilled a hole in the center top of each board.  You will want to drill from the back.  (We did add some hangers to the back of a few to avoid drilling through someone's head)


I looped some ribbon through and tied a bow.

Ta Da--lots and lots of wonderful family photos to hang on the tree.

*****
Want a cost breakdown?

frame boards--leftover beadboard.  FREE
ModPodge-leftover from many other projects.  Free to me.  But if you had to buy new, it would only cost a couple of bucks
printed photos-FREE with coupon
ribbon-70% off at JoAnn's this week.  Each spool came to under a dollar.
Total cost-$5.00

memories-priceless!


Even as we worked on this project, the kids were commenting on the photos and recalling wonderful Christmas memories.  It was so fun to listen to them reminisce.

Tuesday, December 20, 2011

Christmas Chex Mix


I do most of the cooking around these parts.  My husband cooks when called upon.  He is best known for his scrambled eggs, macaroni and cheese, and man can he make a mean grilled cheese.  The world's best.  Someday I will ask him to reveal his secret.  It's revolutionary.  But, his real claim to fame is his Chex Mix.  This stuff is unbelievable!  The original recipe (as far as we are concerned) hails from his Aunt Cheryl.  But he has tweaked it and it makes all the difference.  For the record, this is a sweet not a savory chex mix.  If you only make it at Christmas time, you are really missing the point.  The only thing that makes this "Christmas" Chex, is the fact that you use "Christmas" M&Ms.  Want to make Easter Chex?  Awesome.  Buy some of those pastel M&Ms with bunnies on them.  Want Fourth of July Chex?  Red white and blue M&Ms.  You get the picture.  It's so good that you will want to make it once a week.

Grab a big bowl, a big spoon, and a medium sized saucepan and let's get to work!

It's pretty easy.  Just follow the recipe below.  Pour your dry cereal into a large bowl.  We like to use all rice chex.  But if you want to live on the wild side, you could substitute corn or wheat for part of the rice chex.  But,  don't even think about skipping out on the frosted flakes.  Or substituting them with corn flakes.  Your average old corn flakes will not cut it.  It must be frosted flakes--in the words of the immortal Tony "They're Great!"


Now, put your butter in the saucepan and melt it slowly.  The secret to the chex success is you absolutely MUST use real butter.   Be careful.  Butter burns very very easily.  Add your sugar and your corn syrup.


Turn your heat up to medium and let that syrup come to a boil.  Once it comes to a full boil, turn on your timer for three minutes.


When the buzzer rings, pour your hot syrup over the dry cereal.  Be careful--this stuff is hot!  Pour as much as you can.  I never scrape the pan.  You don't want those nasty crystals that have built up on the sides.  Now put your pan in the sink and stir your chex mix well.  You want every last chex to be coated in yummy syrup.  Once it is well coated, add your coconut and your nuts.  Feel free to add whatever nuts you like.  We have found that we like almonds best.  Add your m&ms very last.  If you add them when the cereal is too warm, they will melt.  If you wait too long they won't stick.  There's a bit of a learning curve.  But it tastes good no matter what.


Now it's ready to eat!  Or package up cute for the neighbors.  I've been saving these little take-out containers for months.  They worked perfectly.


Tie them up with a bow and add a tag and you are good to go.  Cellophane bags also look beautiful when filled with this delicious treat.  I bet Santa would even enjoy some with his plate of cookies on Saturday night.


Here's the recipe--enjoy!


Related Posts Plugin for WordPress, Blogger...