Friday, February 14, 2014

Valentine Soldier


If you've spent much time poking around this blog, then you know that I LOVE Valentine's Day!  It's my favorite.  Just click on the "Valentine" label in the right sidebar and you'll start to get an idea.  I couldn't let this week pass by without sharing a few of my latest Valentine creations with you. 

You can easily make a whole army of these traditional English soldiers in no time flat.  You will need some full sized Lifesaver rolls.  Mine measured 3.5 inches long.  You will also need a large black pompom.  Print out the soldier's uniform here.  Cut it out and wrap it around the lifesaver roll.  You will want to secure it with glue or tape.  Then glue the pompom on top for his hat.

And just like that...you have a super cute valentine to give to all of your friends.

I attached mine to this here little card.  If you want it to be really glossy and crisp, you could print it out as a photo like I did.  Or you could print it out on cardstock.  There are just so many options!  I  mounted mine on red cardstock.  Punched a couple of holes and tied my little soldier onto the card with some baker's twine.

Happy Valentine's Day!

Thursday, February 13, 2014

[Valentine] Peas be Mine


The PEAS are back!! Hip Hip Hooray!  If you missed my first pea post, you'll want to click here for sure.  I think these little green sixlets are just about the cutest things ever.  And don't they look just like peas??


This is what my seven year old daughter is handing out to her classmates this year.  There is a bit of irony going on here.  My daughter hates peas.  But when she discovered they were chocolate.  She was totally on board.  And really, nothing says first grade more than a knock knock joke!  It's all about the jokes here people!  I am loving the fact that it's not too much candy.  Just a little taste and that's enough.  Know what I mean?


I had some cute little plastic pillow boxes that were screaming to be used for this project.  You could just as easily put the peas in a tiny little bag.  Just attach the peas to the card with some sticky tape or a ribbon or BOTH.  And send these off to school.  Done.

Want to print some for yourself?  Click here.

*****
 I bought my green sixlets at Hobby Lobby with a coupon and it only came to like three bucks.  AND  we only used about half the bag.  Happy happy.

Tuesday, February 11, 2014

To Our Favorite Minionary!

 
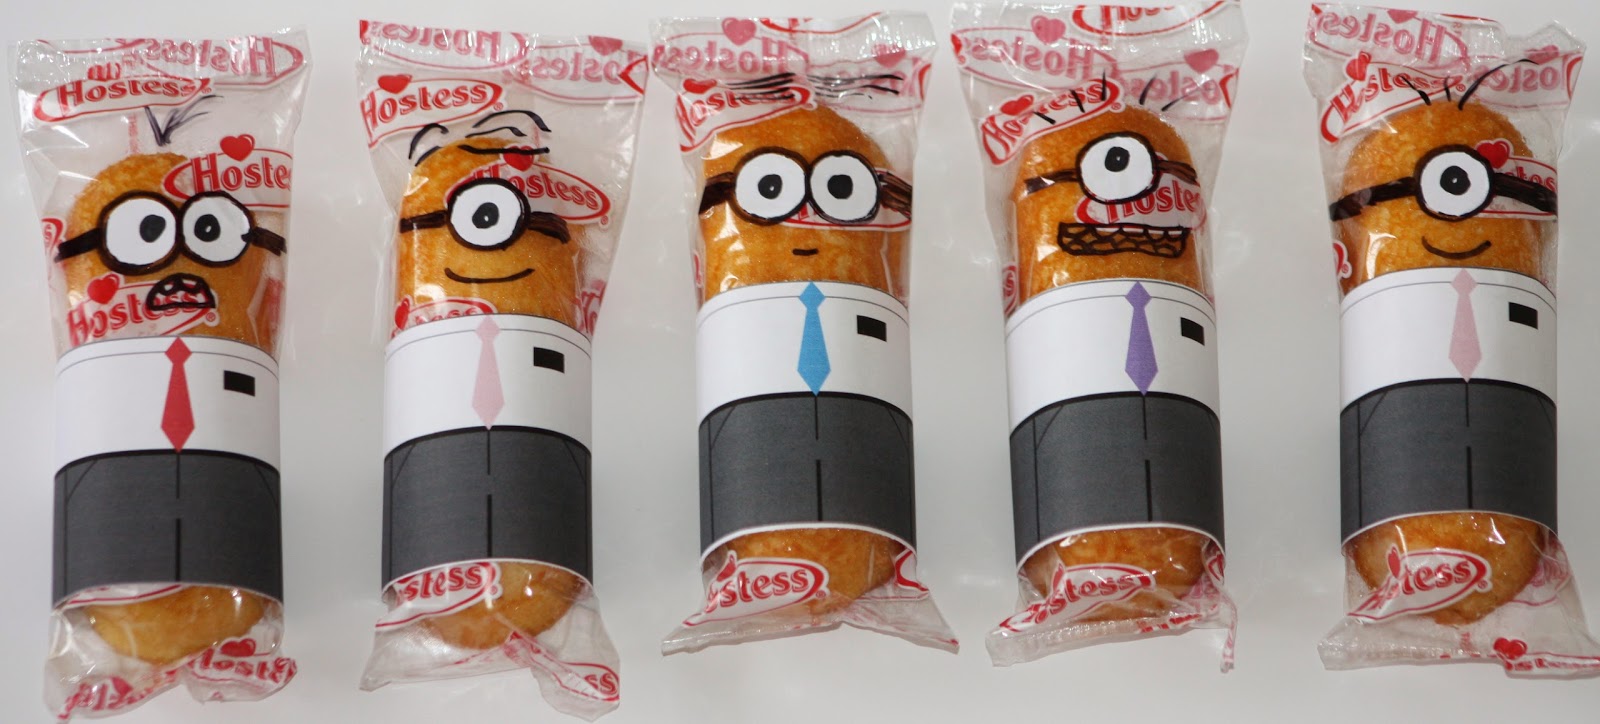
I just couldn't resist.  Minionaries!  These make for a great care package.   We are sending ours for Valentine's Day.  But anytime is a good time.  Bring a smile to your missionary's face in just six easy steps.

1.  Buy a package of Twinkies.  Or Cloud Cakes.  If you can find one without any printing on the cellophane packaging you win a prize!  Be sure to leave me a comment and let me know how you did it!
(**One of my readers found some!!  Buy the WalMart generic "twinkies".  They don't have any printing on the packaging :)

2.  Purchase and print out this handy printable on regular old white printer paper.  And relish in the fact that there is very little usage of colored ink!

3.  Cut out the missionary "clothes" and tape to the Twinkie.  I used glue dots.

4.  Punch some "eyeballs" from a white sticker or address label and adhere to the Twinkie.

5.  Using a black sharpie..embellish to your heart's content.  I warn you that this is quite addicting and sooo much fun!

6.  Package them up and mail them off!

I promise that you will be able to hear the squeals of delight from half-way around the globe.


If you are looking for something fun for your Sister Missionary...you can find Sister Minionaries here!


*****
linking up with:

Thursday, January 16, 2014

[Valentine] A Classic Combination


Isn't about time we did a little doorbell ditchin?  Valentine style?  I thought so too.  I found these aluminum pans with cardboard lids at WalMart.  They weren't much more than a dollar for three pans.  They measure about eight inches by six inches.  These are the perfect vehicle for ditchin' some homemade treats.


I went ahead and designed a fun Valentine lid to put on top of the pans.  The cool thing is...you have so many treat options.  Just think of something that combines classic flavors.

Cookies are at the top of my list.  Chocolate chip.  Sugar cookies with buttercream  frosting and sprinkles.  Homemade Oreos.  Snickerdoodles.  Peanut butter dipped in chocolate.  Mmmm.

Or if cookies aren't your thing, you could go with Sweetheart Popcorn.  Or Valentine Chex Mix.  Or Pink Party Mix.  All solid choices.

Bake up those delicious treats and package them into your pan.  Print out the box lid onto heavy card stock.  Crimp down the foil edges and you are ready for business.

I suppose if you weren't in a ninja doorbell ditchin' kind of mood...you could just hand deliver them with a smile.  That would be fun too.

For an alternate box lid...click here.  Just a friendly warning.  These may be ink intensive.  You might want to print them at your local copy shop.

Friday, December 13, 2013

Tag--you're it!


I've been making confections like nobody's business for the past week.  Eight batches of fudge.  Six batches of caramel.  Peppermint Bark.  And Christmas Pretzels.  Lots and lots of pretzels.  Hundreds.  Now it's time to package all of these goodies up.  Candy boxes.  Cellophane bags.  Red and green ribbons.  Check.  Check.  Double Check.  OH yeah...and tags.  Ummm.


No tags.  Well, that just won't do.  So I tried my hand at the ever popular chalkboard tags.  And this is what I came up with.  My beef is that these take so much black ink to print out.  So, I decided to have them printed at Costco.  I fit two tags on an 4x6 photo.  The cost is 6 1/2 cents per tag.  I don't know if that's cheaper in the long run than an ink cartridge.  But I like to think it is.  I hate buying printer ink.  And it never runs out at a convenient time.  Am I right?


Anyway, here is the file if you would like to make some chalkboard tags of your own.  Make sure you check the matte or flat option when you are ordering your prints.  Chalkboard tags are NOT meant to be glossy.  Just a little helpful tip.

Merry Christmas!

Wednesday, November 27, 2013

Happy Thanksgiving from our house to yours!


There is so much to be grateful for.  We are feeling very blessed this year.

Friday, November 22, 2013

Bundle-Up Buttercup!

Today I am thankful for warmth!

It's freezing outside.  I am so grateful for a warm home to live in.  For hot food right out of the oven.  And for warm blankets to snuggle up in.

I came up with this little gem...to encourage warm hearts and warm hands.


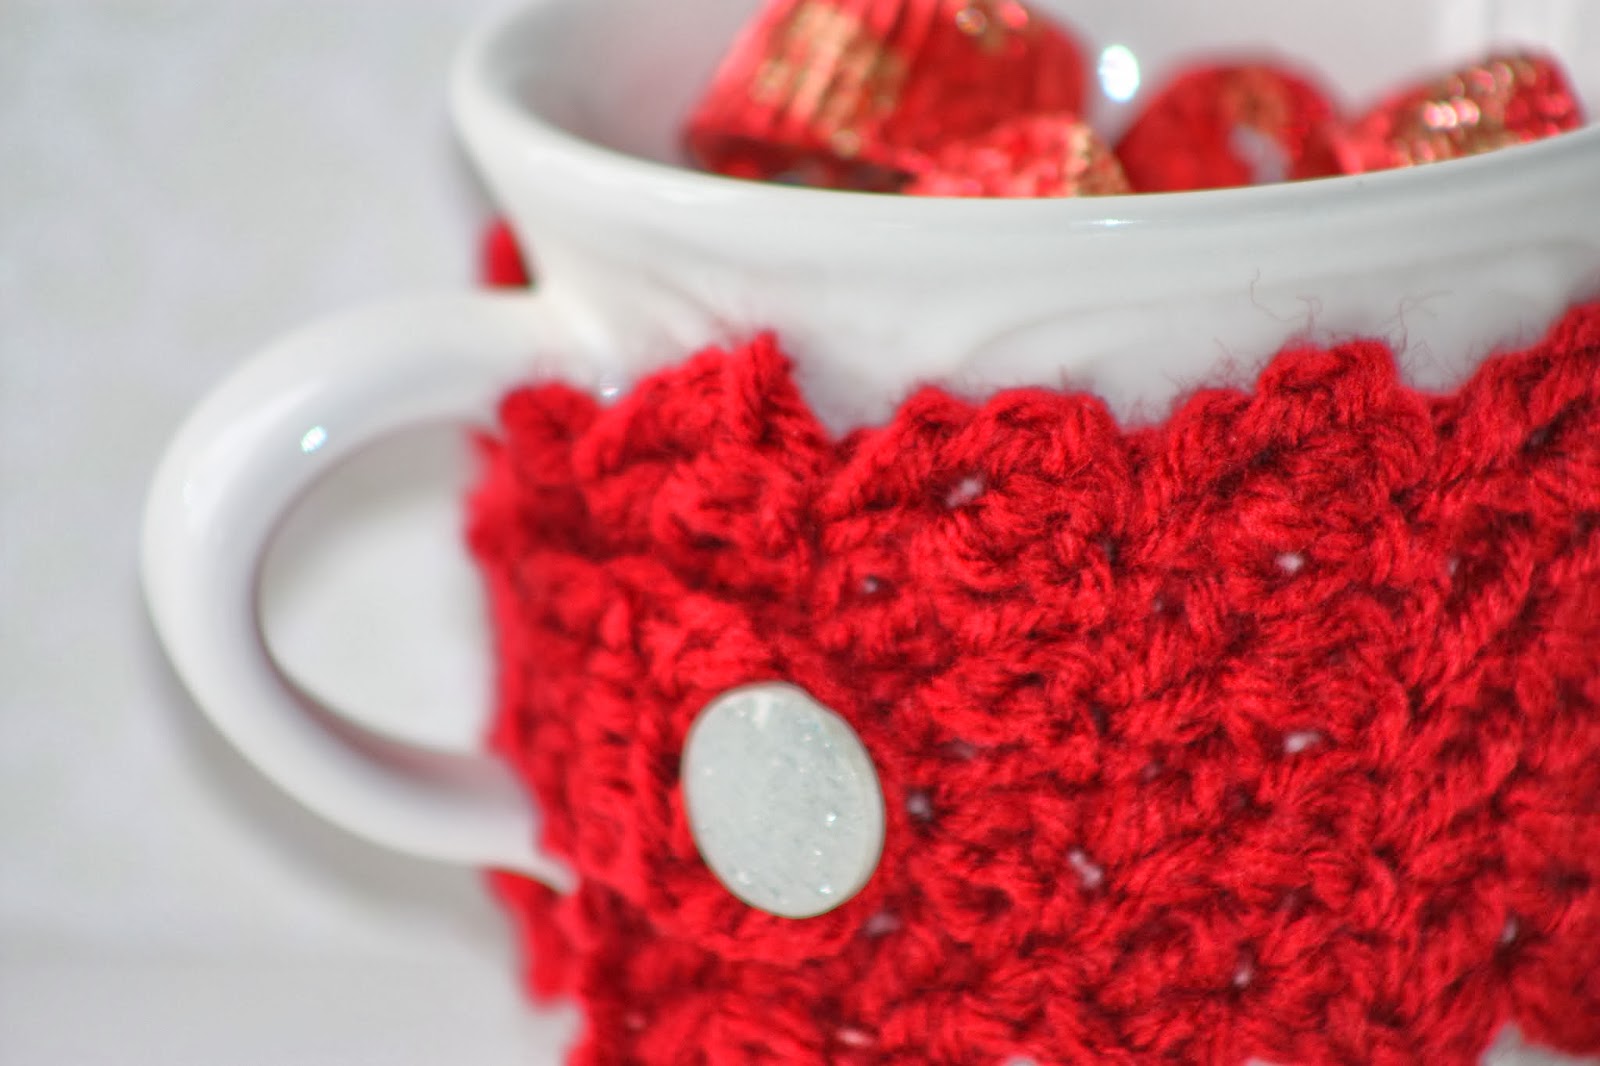
I picked up a mug for pennies at the good will.  For fun, I added a mug cozy.  I'm not super skilled or proficient at crocheting, but in no time at all, I had finished this cutie.  I modified this pattern  just a little.  I liked the look of the scalloped edges, so I didn't edge the cozy with a single crochet stitch.  Give it a try...if I can do it, you can too!  And it was so fun, that I made quite a few.  Just sew on a random button from your stash and wrap it snugly around your mug.


Fill your mug with some (peanut) buttercups!  Add this cute little tag and you're all set for warming up somebody's day.


*****
I'm linking up with:

Related Posts Plugin for WordPress, Blogger...